Author: Mark Liskey

  • My (Simple) Secret To Better Pain Relief Massage Therapy

    My (Simple) Secret To Better Pain Relief Massage Therapy

    What’s my simple secret to better pain relief massage therapy?

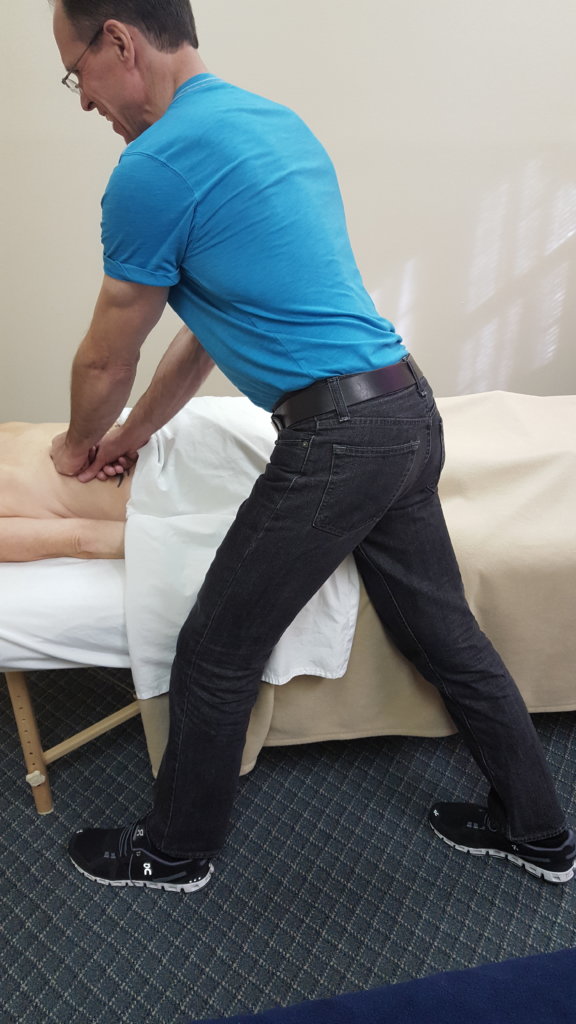
    Find the client’s pain areas before she gets on the table.

    I told you that it was simple. But my simple tip packs a big therapeutic punch.

    First, I’m going to explain how I find the client’s pain areas pre-massage.

    How to Find Pain Areas Pre-Massage

    During the intake, I talk to my client about her pain areas.

    Then I ask her if I can palpate those areas right then and there before she gets on the table.

    It’s at this time that I find the exact locations of the pain areas.

    Then I make a mental note and write pain location information in my therapy notes before I start the massage.

    Now I’m ready to kick the crap out of some pain…well, you know what I mean…

    Onto the why.

    Why Palpate Pain Areas Pre-Massage

    Understanding where to go before a client gets on the table is therapeutically huge.

    For one, when you find the pain spots you’re showing your client that you’ve listened to her.

    Secondly, you’re also acknowledging her pain.

    That’s a whole lot of care and concern coming her way.

    Care and concern reduces a client’s treatment-related stress.

    1. Reduce Treatment-Related Stress

    Speaking of stress, remember the last time you went to the doctor?

    Did you feel at ease?

    Yeah, right…

    In fact, you probably were a little stressed out.

    One reason why you may have felt stressed out is because in the US medical system, pain is primarily viewed as a function of tissue damage (biomedical view), and the psychological and sociological components of pain are ignored, resulting in the patient feeling alienated and stressed.

    I explain the biomedical view in greater detail in 4 Lesson On Chronic Pain–Notes From a Mountain Guide.

    Don’t biomedical-ize your clients before they get on the table.

    The MRI and X-ray are the appropriate tools to help figure out pain issues.

    Our hands are the appropriate tools to reduce treatment-related stress.

    And when you use your hands (ears and words) to reduce stress before the massage, you’re client is more likely to believe that you’re the person to get the job done.

    2. Gain the Client’s Confidence

    When I first started doing pain relief massage I never looked for pain spots pre-massage.

    Instead I let my bumbling fingers poke and prod until my client gave me a clue like: Ouch!

    In retrospect, I am confident that my clients had little to no confidence in my ability to find their pain, let alone relieve their pain, which brings us to the how-much-pressure question.

    Palpating a pain spot before the client gets on the table is also the perfect time to experiment with how much pressure you want to apply to the pain spot.

    3. Find the Therapeutic Pressure

    If you accidentally press too hard pre-massage and get a grimace from the client, that’s okay.

    At least now you’ll know the pressure parameters to work within when you start the massage.

    Pre-massage palpation can also help you rule out areas that are inflamed and shouldn’t be massaged.

    One more thing.

    At the end of a heavy day your memory may get foggy (like mine does). But if it does, pre-massage palpation will you help you…

    4. Remember Where All the Pain Areas Are

    Going through a pre-massage palpation protocol makes the pain spots stick in my memory.

    And I don’t find myself in the embarrassing situation of missing a pain area I should have worked.

    Oh, sometimes knowing where a pain spot is pre-massage doesn’t guarantee that you’ll find it when the client gets on the table.

    Where’d the Pain Spots Go?

    Here’s how I find a “lost” pain spot: I create contrast.

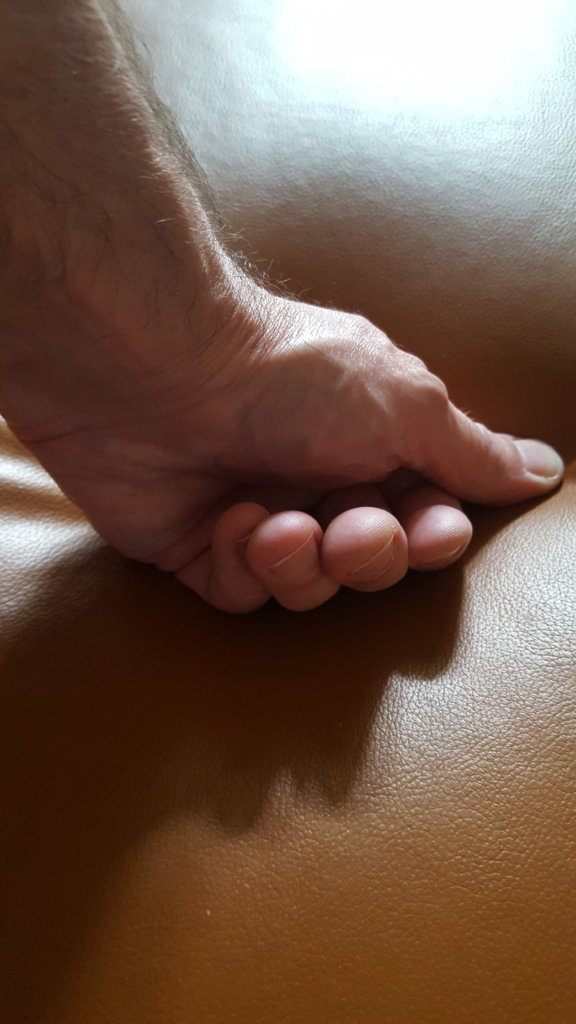
    First, put your fingers or thumbs around the area where you think the pain spot is.

    Press down and move back and forth over that area.

    If you don’t feel anything, press deeper and make your back-and-forth stroke longer and faster.

    If you’re still having trouble, close your eyes so that your focus is in your fingers.

    Stress Be Gone!

    I’m a pre-massage palpation junkie because my stress is reduced when I find the pain areas before the client gets on the table.

    When I do the client relaxes and I gain competency points.

    I also find the starting point for the appropriate therapeutic pressure and I burn the pain areas into my memory.

    Here are my quick steps for finding pain spots pre-massage.

    Pain Relief Massage Therapy: Steps for Finding Pain Spots

    During the intake…

    (1) ask the client if you can palpate his pain spots,

    (2) then locate pain spots on the client,

    (3) test out pressure, and

    (4) recall and write down where the pain areas are.

    Like I said, it’s a simple thing.

    But the therapeutic bang is big.

    Does your pain relief massage therapy practice have a website?

    My website history reads like a Stephen King horror novel.

    And my massage practice suffered because of it.

    Don’t be me then.

    Here’s how to fix website woes: How to Build a Website Fast and Cheap.

    Need more help?

    Get my latest everything weekly.

    Just sign up below. (It’s free:-)


  • Massage Website 101: How to Write an About Page

    Massage Website 101: How to Write an About Page

    How do you write an About page for your massage website?

    Find your unique massage story to tell the reader by asking yourself very specific questions.

    It’s not hard to do once you get your brain thinking in the right direction. A solid About page is essential to creating a simple but effective 3-tab website that includes a Homepage and a Services Page, as well as an About page.

    Let’s get started. Here are easy to use website builders.

    Once you have your website builder, then you have to add the content for the About, Services and Home pages.

    Okay, the Home and Services pages seem fairly straightforward, but the About page…that’s about you…crap… how awkward is that?

    Very.

    But I have strategy to help you out.

    Ready?

    Stop thinking that you have to pump yourself up on your massage About page.

    Instead think about how you can engage your customer.

    Massage About Page

    There’s a reason I say “massage About page” instead of “About page”.

    Start writing an About page without tethering it to massage and the next thing you know it’s a Facebook post about how much you love poetry and stamp collecting.

    Friends are interested that you like poetry and stamp collecting.

    Customers?

    Not so much.

    In order to engage a customer on an About page, you need to create your massage story.

    Wait, Mark, can’t I simply list my massage credentials and experience.

    You could.

    But if that’s all you do it doesn’t help the customer with her getting to know you.

    And quite frankly, it’s boring.

    A massage story engages the customer.

    Engagement makes the cell ring and can help boost your website in the Google rankings.

    Your massage story should reveal how you view and practice massage.

    [bctt tweet=”Think of an About story as event in your life highlighted to drive home a message.” username=”Mark LiskeyMarkLiskey”]

    Our Story

    For example, here’s the first paragraph from the About page of PressurePerfect™ Massage (the business my wife, Lisa, and I own):

    “My name is Mark Liskey, and I’m the co-owner of PressurePerfect™ Massage. My wife, Lisa Westfall, and I opened PressurePerfect™ Massage in August of 2014 because somewhere along the way the massage industry has forgotten who they serve—the customer.” (You can view the full About page here.)

    It’s a simple story.

    Big massage spas have changed the industry, and we don’t like the direction the industry has gone because customer service has been sacrificed. We opened our business in 2014 in response to this.

    How to Find Your Massage Story

    You can find your story by uncovering your “Aha!” moment.

    Your “Aha!” moment is that point in time where something moved you to act.

    For our business, it happened when Lisa and I experienced firsthand what it was like to work in a franchise massage-spa environment.

    To be honest, we were shocked.

    The client’s massage was cut from 60 minutes to 50 minutes.

    There were ten minutes to get one client off the table and the next one on the table.

    And clients were stacked back-to-back, so getting behind with the first client meant that you were really behind with the 4th or 5th client.

    This was NOT how we wanted to treat clients or massage therapists.

    If your “Aha!” moment is not apparent, sometimes it helps to ask yourself some questions.

    Here are some questions that I find helpful. I also provided hypothetical responses to show you how the answers to these questions can lead to a story.

    1. Why did you get your first massage?

    I needed to relax.

    1. Why’d you need to relax?

    I lost my job and a week before that my dad died. I was at my wits’ end and a friend gave me a gift certificate to see her massage therapist.

    1. What were you feeling during and/or after the massage?

    It was a Zen moment. I felt like it was the first time I had relaxed in years.

    1. What type of massage do you like doing?

    Relaxation because it relaxes me as I do it and I want clients to feel the same peace that I did when I had my first massage.

    Connecting the Dots

    Now it’s just a matter of putting these parts to together. A narrative might be:

    In May of 2013, I was at my wits’ end. My dad had recently died from a long illness and I had just lost my job. I had read books on de-stressing and started to do yoga at home, but no matter what I did, I just couldn’t turn the worry off.

    Then one day my friend Asha gave me a gift certificate to see her massage therapist. Honestly, I didn’t want to go. In fact, the thought of going created more anxiety. But I went.

    Admittedly, the first 5 minutes of the massage were rough, but then when Jaylah, the massage therapist, pressed at the base of my skull, I felt all the tension leave my body. From that moment on, I was putty.

    After carrying what felt like the weight of the world on my back for months, I suddenly felt unburdened. Yes, life’s stressors came back, but massage taught me that I could disconnect, power down and come out feeling recharged.

    My goal in massage is to give each client what Jaylah gave me: total relaxation when I needed it the most.

    Stay in the Moment

    If you find yourself struggling when writing your story, here’s an easy-to-implement tip: Go back and connect with the emotion around your “Aha!” moment.

    That emotion should drive the story.

    It will be compelling to the person reading your story.

    And when you feel this emotion as you write, it will give you the motivation to continue on.

    Your massage About Page

    Writing about yourself on your About page can seem weird, but it doesn’t have to be weird. Think of it as simply highlighting something in your massage life that could resonate with your customer.

    Your “Aha!” moment doesn’t have to be earth-shattering to be effective. In fact, most aren’t. It just needs to be genuine.

    To find your “Aha!” moment ask yourself questions about massage, like:

    1. Why did I get my first massage?
    2. What was I feeling when I got my first my massage?
    3. What type of massage do I like doing?

    Need more website help?

    I got it all right here:

    In this article I provide the links to 3 massage websites I have built using 3 different website builders.

    And I compare the 3 website builders in these categories: 1. Price, 2. Ease to Use, and 3. Appearance.

    Between the three, you should be able to find the one that works for you.

    Oh, and here’s my How to Build Website Guide for Non-Techies.

    Want My Latest Weekly Info?

    Sign up below. It’s free:-)

  • How to Massage with Your Fists

    How to Massage with Your Fists

    Let me guess what your go-to tool is for deep pressure?

    Forearms.

    Am I right?

    Mine was.

    But then my neck started to bother me, my elbow felt funky, and my already unstable left shoulder said I don’t think so.

    So, I went searching for another way to deliver deep pressure.

    Guess what I found?

    You got it–fists.

    Well, not exactly balled-up, punch-you-in-the-face fists.

    More like relaxed, I’m-going-to-fall-asleep fists.

    Why a relaxed fist?

    Because I want to take all unnecessary tension out of my hands AND my fists don’t need to be tight to deliver deep pressure, aka, transfer my body weight onto the client.

    We’re doing massage here, Mark, not fist push-ups.

    Funny you should mention fist push-ups.

    When you do a fist push-up a lot of your body weight is distributed through your arms onto the floor, right?

    Your fists (and feet) are the contact points between you and the floor.

    And that’s exactly how I want to do deep pressure massage with my fists (minus the feet part…lol).

    I want to lean my body weight onto the client so that my body weight is doing the work and my fists are simply the points of contact.

    It’s really not hard to do.

    These 3 steps will make it even easier. 

    Massage with your Fists in Three Steps

    1. Make a lose fists, not a tight fist.

    Okay, so we already talked about a loose fist, but it’s worth mentioning again because my objective is to save all body parts, not just one or two.

    Tightening your hands for no reason is extra muscle stress that you don’t need.

    If you’re a chronic hand tightener when doing massage, read this: Massage Body Mechanics 201: Relax Your Hands.

    2. Lean to generate pressure.

    You’ll probably need to lower your table to get enough leaning distance between your fists and the body part you’re working on so that you can effectively transfer your body weight.

    Don’t overthink this step.

    You already lean when using your forearms, right?

    Leaning with your fists is pretty much the same thing.

    Just like leaning with your forearm you can lean with your chest parallel to the table.

    Or you can lean with your chest perpendicular to the table.

    It’s not hard to do.

    It just takes getting in some reps to get comfortable with leaning.

    Here’s a video that will get you up and running with leaning to generate pressure: Deep Tissue Basics of Massage—The Lean.

    So, now you have enough information to massage with your fists when doing deep, static pressure.

    The only other thing left to do is to glide with your fists. 

    You can lean and glide with your fists in small areas effectively by remaining stationery.

    But if you want to do a long glide (like up the back) then you’ll need to…

    3. Move your feet.

    Moving your feet allows you to keep your shoulder, elbow and wrist in alignment as you glide and transfer your body weight onto the client.

    In this video I show you how I move my feet when massaging with my fists and knuckles:

    [embedyt] https://www.youtube.com/watch?v=omwk-NyVjZU[/embedyt]

    Massage with Your Fists Checklist

    Fists are a great forearm alternative for deep pressure.

    To get competent at massaging with your fists you’ll need to…

    1. Use relaxed fists.
    2. Lean to generate pressure. (Low table.)
    3. Move your feet.

    Boom.

    Now you can have happy everything:-)

    Need more deep pressure help?

    My Delivering Deep Pressure Without Hurting Yourself class is here.

    It’s an online home-study class (3 CEUs) with lots of videos and guidance.

    It’s based on the discoveries and strategies that I used to save my body and massage career.

  • How to Save Money Building a Weebly Website

    I want to build the cheapest website possible.

    Hmm…are you sure about that?

    Or do you actually want to build the cheapest website possible using a reliable and easy-to-use website builder.

    If so, take a look at Weebly.

    Weebly is all three: easy to use, inexpensive and reliable.

    So, end of story?

    Not quite.

    Because when we look at Weebly pricing, you have more options than just buying straight from Weebly.

    You can buy through a web host.

    A web host provides storage space and the technologies for a website or web pages to be viewed on the Internet.

    And some web hosts, like Bluehost, have the Weebly website builder.

    I’m a fan of Bluehost because they have great customer service and they offer an inexpensive way to use Weebly.

    How inexpensive?

    You can do a three year term for $35.40/year.

    Dang dawg, that’s cheap, right?      

    But to make an informed decision about purchasing Weebly or Bluehost we need to seriously do an apples-to-apples comparison.

    Don’t worry, I’m not going to make this a big, hairy deal.

    I’m going to distill it to the essentials so you can get crackin’.

    One last thing before we get started, some of the links in this article are affiliate links.

    So, if you buy through a link I get one-time commission.

    But you don’t get charged extra if you do.

    And if you do, thanks for supporting my work!

    By the way, if you need help with Weebly, Bluehost or anything I recommend, email me at mark@makethemostofmassage.com 🙂

    Okay, onto Weebly and Bluehost for your inexpensive website.

    Weebly versus “Weebly on Bluehost”

    With Weebly you pay annually.

    With Bluehost you first buy a package which could be a one, two or three year plan. Then after the package terms are over you pay annually.

    If you want (1) the Weebly website builder, (2) email (with your domain name), and (3) free domain name for 1st year, here’s what the comparison looks like:

    1st Year
    Price
    Weebly (1 yr) Bluehost (1 yr) Bluehost (2 yr) Bluehost (3yr)
    Website
    Builder
    $60 $59.40 $47.40 $35.40
    Domain
    Email
    $60 0 0 0
    Domain name 0 0 0 0
      $120 $59.40 $47.40 $35.40

    Where’s that Bluehost link to click, right?

    But there is more to consider, Bluehost, like Weebly, wants its money upfront.

    So, if you signed up for the Bluehost 2 year deal, you’d pay $94.80 upfront for the 2 years.

    The Bluehost 3 year deal would cost you $106.20 upfront.

    Even so, 3 years of Bluehost ($106.20) is still cheaper than 1 year of Weebly ($120).

    Continuing on with Bluehost, after your 1, 2 or 3 year package deal is over, you will pay the regular price of $7.99/month ($95.88/year).

    Let’s make this a little cleaner.

      Year 1 Year 2 Year 3 Year 4
    Weebly $120 $120 $120 $120
    Bluehost 1 yr $59.40 $95.88 $95.88 $95.88
    Bluehost 2 yr $47.40 $47.40 $95.88 $95.88
    Bluehost 3 yr $35.40 $35.40 $35.40 $95.88

    (With both Weebly and Bluehost, you can get a domain name with them for free the first year. After that you pay for domain name renewal, which is usually between $15 and $20 a year.)

    It seems like a pretty easy decision right now, but Bluehost may not be for everyone because there are more steps to using the Weebly website builder.

    For one, instead of going straight to the Weebly website builder when you sign in on Bluehost, you go to your control panel where you can then select the Weebly website builder to use.

    If at any time you get confused and need some help, just call Bluehost customer service. They run 24/7.

    Another thing to consider is that Weebly does provide email support for the website builder under the basic plan that I’m using in this comparison, but Bluehost doesn’t.

    That said, the Weebly website builder is super-easy to you use.

    You can find the answer to probably any question you have about Weebly by doing a Google search or you can ask me.

    If you’re cringing at the thought of adding steps by using Bluehost, but going with Weebly at $120 a year is too much, you can always not purchase the Weebly email option ($60 a year) and only pay $60 total for the year.

    If you’re keen on having a professional presentation from the get-go (domain email address) for the least amount of money, then there are 4 things you need to do with Bluehost:

    1. Go with the Basic Plan to start.

    You can always upgrade later. 

    2. The cheapest Basic Plan will be the one that has the longest terms.

    In other words, the 3-year-plan ($2.95/month) will be month-to-month cheaper than the 1-year-plan ($4.95/month).

    My advice would be that if you’re all in with the blog idea, save money and go for 3 years.

    If it’s an experiment, sign up for 1 year. 

    3. All hosting companies will try to up-sell you on other stuff you don’t need, like domain privacy.

    See those boxes that they automatically check for you in the package extras section? Un-check them and save yourself some more money.

    So, your total should just be the price of your account plan.

    1 year Basic Plan = $59.40 ($59.40/year for 1 year).

    2 years Basic Plan = $94.80 ($47.40/year for 2 years).

    3 years Basic Plan = $106.20 ($35.40/year for 3 years).

    When buying a package you can’t pay month-to-month. You pay everything upfront to get the deal.

    4. Get Bluehost to Un-install WordPress

    When you purchase Bluehost they automatically install WordPress (another way to build a website.)

    You need to un-install that if you want to use Weebly on Bluehost.

    No, I didn’t screw you! Lol.

    Just call Bluehost (888-401-4678) and have them un-install it.

    No biggie.

    It will take them less than a minute.

    Lean on that customer support.

    In this video, I build a Weebly website on Bluehost.

    https://www.youtube.com/watch?v=vkfVeyxS-b8

    My Recommendations in a Nutshell

    Weebly Builder

    NOT techie: Go right to Weebly.

    To save the most $ using a Weebly website builder and have a domain email: Go with Bluehost.

    Multiple Websites

    If you plan on having more than one website use a web host service, like Bluehost.

    With Bluehost you’ll have to upgrade to the next level, but then you can build a whole lot of Weebly and WordPress websites for way cheap.

    Best Designs for a Website

    If appearance ranks #1 in your criteria for choosing a website builder, go with Wix.

    You can read more about that here.

    Content for a Website

    Don’t no what to write on your website?

    Check out: How to Build a Website Guide.

    And if you have a question about building a website.

    Let me know:-)