Author: Mark Liskey

  • How to Write a Massage Homepage

    How to Write a Massage Homepage

    Here’s a topic that’ll put your friends to sleep: massage homepage.

    And quite frankly it seems minor in the big picture of building a massage practice, doesn’t it?

    But when you dig down deeper you start to realize that your massage homepage is your 1st impression page.

    If the viewer likes what she sees, she’s going to continue to read about your services.

    Make a bad impression and bye-bye potential customer.

    Your Massage Homepage is Important

    I learned about the importance of a homepage from my new clients.

    When a new client comes into our office it’s not uncommon for him to say:

    “I like that your massages are 60 minutes long…” or “I saw your tennis ball video…” or “I never heard of anyone not accepting tips…”

    And that’s when I made the connection that having an effective homepage impacts potential customers calling us.

    Okay, Mark, how much is it going to cost to have someone write (or rewrite) my homepage for me?

    Nothing.

    Because you’re going to do it yourself.

    Massage Homepage Writing Strategy

    And I have a simple strategy to help you out.

    So simple it has only one rule:

    1. Don’t bore the viewer (potential customer).

    Let the franchise massage spas do that.

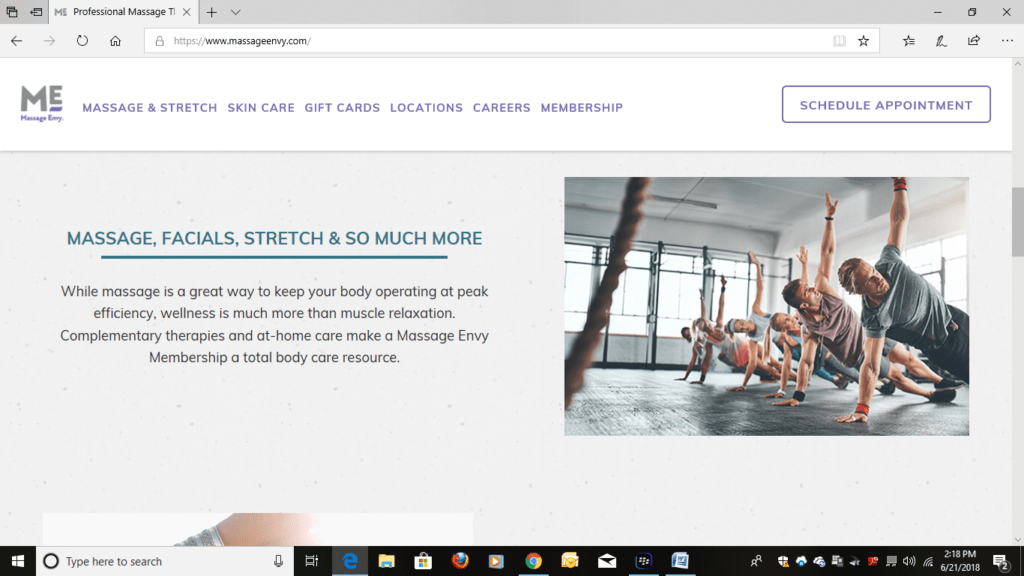
    Here’s Massage Envy in action:
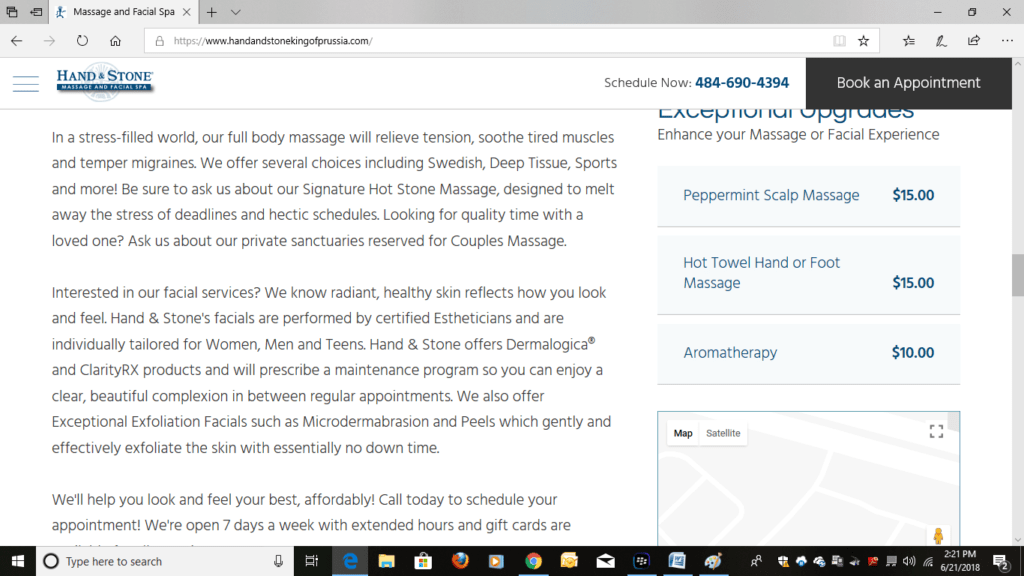
    And Hand & Stone…

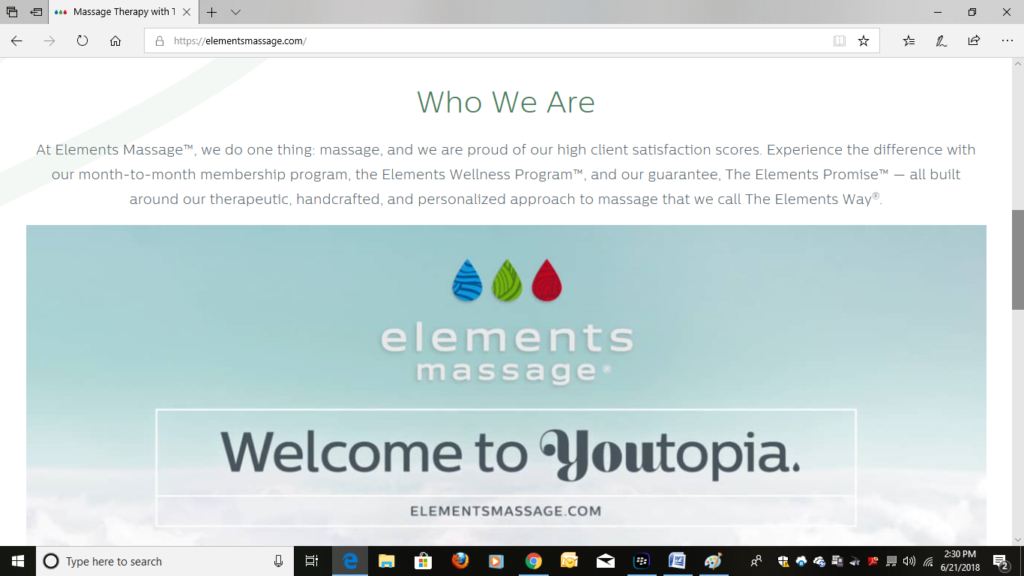
    Hey, Elements isn’t a slacker with boring copy either.

    Here’s the thing, they’re not dumb.

    They know their market, and they make tons of money.

    They choose boring copy because being boring works in their situation.

    They are drawing customers from the spa market. Franchise massage spas are the cheap option for these customers. So franchise massage spas want to blend in and look like the other guy (higher-end spas) while offering a cheaper deal. Hence, boring copy.

    But boring doesn’t work for us independents.

    We’re not only competing with massage spas, but we’re competing with chiropractors, wellness centers and each other, too.

    We need to stand out.

    The copy on our homepages has to pop, has to resonate, has to grab the viewer’s eyeballs.

    Make Your Copy Pop

    On our PressurePerfect homepage I let potential customers know that if massage spas are acid we’re the base.

    We do 60 minute massages.

    We provide ample time between clients so that no one is rushed.

    We don’t have memberships.

    And we don’t accept tips.

    That’s what we do on our homepage, but what should you do on your own homepage?

    1. Ask yourself: What about my business is eyeball catching?

    It doesn’t have to be radical.

    In fact, radical can turn a lot of people off.

    It just has to be truthful, something you are and/or stand behind.

    Here are some examples:

    1. Above-and-beyond customer care.
    2. Specialty massage.
    3. Expert with specific populations, like seniors, PTSD clients or cancer survivors.
    4. Niche market, like tri-athletes, golfers, actors, dancers, office workers, EMTs, nurses, etc.
    5. A special introductory rate.
    6. A really nice and relaxing massage room.
    7. Aromatherapy/essential oils.
    8. Guided meditation with massage.
    9. Massage and stretching.
    10. Your own brand of massage.

    So what if none of this is your deal or you just started doing massage, how else can you not be boring and engage the potential customer?

    2. Provide non-boring, helpful information.

    We have a self-massage video for neck and shoulders on our homepage.

    When a customer comes in and says, “I tried the massage tool that you showed on your video…” all I can thing about is how awkward I look on camera.

    But I know that the video was effective because the customer remembered it.

    [embedyt] https://www.youtube.com/watch?v=F9iLpapL4BY[/embedyt]

    3. Use pictures to take the yawn out of a homepage.

    I use a combination of free stock pics and ones that I have taken.

    I’d prefer to do all homegrown pics, but some pics are beyond my pic-taking abilities.

    Also, if you’re comfortable writing…

    4. Write a short article on something important to the customer.

    You can’t go wrong with massage as it relates to neck or back pain.

    That article can be on the homepage itself or you could create another tab on your website, paste the article on that page and simply have a link to the article on your homepage.

    Not too hard, right?

    So have at it.

    Make your homepage not boring.

    How do you know if your copy is boring?

    Are you bored writing it or when you read it?

    If so, rewrite.

    Make that viewer want to come see you.

    Give her reasons.

    Earn her business.

    Tell her what makes you different from the competition.

    Give her information (article) that can have immediate impact on her health.

    Show her (video) how to do something that can relieve pain.

    Provide her with the information that demonstrates you are the one to get the job done.

    By the way, you are:-)

    Hey, I never get bored talking about homepages and websites.

    For more help with your website check out my How to Build a Website Guide and my How to Decide Which Website Builder to Go With article.

  • Save Your Thumbs: The Mighty T-Bar

    Save Your Thumbs: The Mighty T-Bar

    I’d bet $100 that you’ve experienced this at least once in your massage career: thumb pain.

    And my guess is that the next thing you do is to search YouTube videos for thumb massages and stretches.

    But instead of just managing thumb pain, why not stop injuring thumbs altogether?

    And burn out my fingers instead, Mark?

    No.

    Use a T-bar instead of thumbs and fingers.

    But there’s a caveat here. A T-bar can actually hurt your hand if you don’t understand some basic things about holding it.

    The T-bar Structure

    The T-bar can be broken down into three elements: the handle, the shank and the tip.

    The shank is in the middle of the handle. The tip of the shank can be flat or have rounded edges. Here the tip is covered by a plastic end-cap. Other options include a rubber end cap or no end cap at all, just bare wood.

    As you can see, it’s a very simple tool. But a simple tool can be a highly effective tool. And that’s what I discovered when I first got my hands on a T-bar.

    St. John’s Neuromuscular Therapy

    I was introduced to the T-bar in 1998 when studying Paul St. John’s neuromuscular therapy (NMT). A tenet of NMT was to work the origin and insertions of muscles. To do this, you needed to be able to apply very precise and often deep pressure. Thumbs, of course, were a natural fit for this job.

    However, thumbs would take a pounding if you tried to use them for deep work in dense muscle areas like in the spinal lamina groove. Enter the trusty T-bar.

    When I first tried using a T-bar during a neuromuscular class, I was instantly hooked. Though it felt clunky in my hands, I was able to generate precise pressure like never before without thumb pain.

    After I was certified in NMT, I opened a practice. But a few years into the business, something unexpected happened: My hands hurt.

    I Didn’t Want to Quit Massage

    At first I thought I’m simply coming up to one of the reasons why MTs change careers—pain and injury.

    But at the same time, I was having non-massage, pain issues, too. A lot of my non-massage pain was due to bad techniques when working out. I decided to make some changes in the gym and those issues got better.

    So, I then took another look at my hand pain. It seemed to occur after I was using the T-bar. This made me wonder if I could eliminate my hand pain by adjusting something that I was doing  when using the T-bar.

    The short answer was yes. And it all started with my intention.

    How My Thumb Pain Went Bye-Byes

    At the time, my intention when using the T-bar during a massage was to work a tender/tight spot with precision.

    But there was a vital part missing to this intention. The missing part was “without causing me (the massage therapist) pain.”

    That may sound obvious, but think of all the times you did a particular massage technique to release a muscle, knowing that it was causing or was going to cause you pain?

    It’s just what we do.

    So, keeping this idea of “not being in pain when working” in mind, I zoomed in on how I was holding the T-bar. It soon became apparent that I was over-gripping the T-bar, and that was probably the cause of my hand pain.

    Adjustment 1: Relax Your Hand

    This is how we were taught to grip a T-bar in NMT class.

    Take note of my fingers gripping the stem and tip to control the T-bar.

    This hold allowed you to have fine-tuned control of the T-bar when working a tight/tender spot, but it also encouraged you to grip the T-bar tightly, even when applying light pressure.

    Hmm, I wondered, what would happen if I just loosened my grip some?

    Actually, nothing happened. The T-bar didn’t slip out of my hand, and I was still able to control the tip with a lighter grip.

    This begged the question: How loose can I hold the T-bar without it actually falling out of my hand? I started experimenting and found that my hands were very happy when I simply steadied the T-bar with the minimal amount of pressure required to keep the T-bar from dropping  or slipping from my hand.

    This is a loose-hand hold: 

    My fingers are relaxed and I’m using just enough of a grip so that T-bar doesn’t slip out of my hand.

    At the end of a month or so, I got pretty good with light and medium pressure, but when I ratcheted up to deep, I had to tighten the grip to keep the tool steady.

    I wish I could say that I figured out the pain-free method of holding a T-bar for deep pressure within a month or so, but I can’t.

    In fact, I went in a different direction altogether. I started experimenting with other massage tools for deep and precise pressure. And it wasn’t until 15 years later that I figured out how to use the T-bar for deep pressure without hurting my hands.

    At that time, shoulder and neck conditions forced me to radically change my massage body mechanics. One of the big changes that I made was to set my table lower than I normally had it. And when I did, the T-bar missing puzzle piece fell into place.

    Adjustment #2: Pin the T-bar

    With a lower table, my work was below me. This meant that I could take full advantage of leaning my body weight into the client to generate pressure.

    When I leaned in with a T-bar to do deep pressure, I could pin the T-bar between my hand and the client’s body. There was no need to grip hard to hold the T-bar in place. In fact, I really didn’t have to grip at all. This is an open-hand hold.

    To execute this hold the table has to be low enough so that you can lean in to generate pressure and pin the T-bar. Here’s what it looks like when the camera steps back.

    The pin technique made it easy to hold the T-bar, but there were times when a one-handed pin wasn’t possible and/or my pinning hand needed a break. This leads us to the third adjustment.

    Adjustment #3: Use A Guide Hand Next to the T-bar

    Using a guide hand next to a T-bar is my preferred way to hold a T-bar.

    For one, I’m contacting the client with more surface area than I would with the T-bar alone. This gives the massage more of a relaxation feel.

    Two, it’s really easy to stabilize the T-bar with a guide hand, maintain sensitivity and regulate pressure.

    Three, I can shift the emphasis of pressure from tool to guide hand (hand not holding the T-bar) without having to pull my hands off the client.

    In this picture my guide hand is a relaxed fist. 

    The relaxed-fist, guide hand that’s next to the T-bar serves as a stabilizer. For broader pressure, I would direct more of my body weight into my fist. For precise pressure, I’d lean more into the T-bar. This hold is great for calves and forearms.

    This next example is a double-handed hold.

    Note that both hands are contacting the handle. Having two hands on the handle allows me to lean in with my body weight. I use this hold when I need to deliver more pressure to influence deep muscles.

    The double-handed hold is good for when you’re working thick areas, like back, hamstrings and quads.

    Also, can you see that my hands are relaxed? That’s really important because you’ll instinctively want to tighten your grip to steady the T-bar as you lean in to deliver deeper pressure.

    But that’ll be completely unnecessary. Look at all the points of contact my fingers and knuckles make with my client’s back. That T-bar is not going anywhere!

    This last hold is a wrap-around technique that works well feet.

    The great thing about the wrap-around hold is that it’s easy to control your pressure. You simply lean in. 

    The guide-hand and two-handed holds worked great for me, but I had a tendency to get really comfortable with one or two holds and I then I’d feel the overuse pain again. This tendency led to me to adjustment #4.

    Adjustment 4: Vary Your Holds

    There are countless ways to hold a T-bar. Here’s how I recommend you experiment. First, pin the T-bar between your hand and the client’s body. Then place your other hand next to the T-bar and allow that hand do whatever it wants to in order to support the T-bar.

    Just remember to keep your hands relaxed and you’ll be amazed at how many different holds you’ll come up with.

    Easier than You Think

    There’s a potential irony in massage that we all desperately try to avoid. It goes like this: We put ourselves in pain to get someone else out of pain.

    Thumb pain is not a byproduct of doing massage.

    Kick thumb pain to the curb by using a T-bar when doing deep and precise work. But first you have to learn how to hold the T-bar without gripping it.

    Here are the keys for holding a T-bar:

    1. Hold the T-bar with a relaxed hand.
    2. Pin the T-bar between your hand and the muscle by leaning in. You may have to lower your table. You can lean when you’re sitting, too.
    3. Use a guide hand, thumb, finger next to the T-bar for stability, sensitivity and as a pressure gauge.
    4. Use two-handed holds to spread the workload.
    5. Vary your holds so that you don’t overuse a body part.

    Once you get these basic things down, you’ll never have to worry about developing chronic thumb pain again.

    Looking to get a T-bar?

    For a plastic one, check out CareerExtenders.

    For a wooden T-bar, visit NeuromuscularSolutions.

    Want a custom T-bar?

    Call/text my friend Matt Johnson: 610-945-6491.

    He makes all my wooden massage tools. Prices range between $15 and $25 per T-bar.

    Want to Get Good with Massage Tools?

    Do it with one online, home-study class and some practice.

    This is the  online, home-study class that I’ve designed to get you comfortable with using a massage tool in any massage you do: How to Use Massage Tools (Fearlessly and Effectively).

    This class takes massage tools to the next level so that you can brand yourself as an expert with focused pressure: Advanced Massage Tools.


  • Why Aren’t You Using Your Fists?

    Why Aren’t You Using Your Fists?

    Need a deep pressure substitute for a forearm?

    Try fists.

    I did, Mark, but fists didn’t work for me.

    Yeah, at first that was my experience, too.

    Then I did this: Set my table height for fists not forearms. (In other words, I lowered my table.)

    When I set my table for fists instead of forearms I was able to transfer my body weight into the client for deep pressure—and it was smooth sailing.

    Well, almost smooth sailing. I still needed to get good at transitions between forearms and fists.

    This was accomplished by taking a wider stance for forearms and a narrower stance for fists.

    So, to use fists as a deep pressure substitute for forearms, I just needed to 1. set my table height for fists (lower) and 2. get competent at transitioning between forearms and fists by using a wide stance for forearms and a narrow stance for fists.

    Sounds like a lot of work, Mark, maybe I’ll just stick with forearms.

    Hey, you might be able to get away with using only forearms for the rest of your massage career, BUT if…

    1. Your shoulder(s) hurts.
    2. You have cubital tunnel syndrome.
    3. Your forearm is too big to get the job done.
    4. The person getting the massage doesn’t like the feeling of a forearm.
    5. You don’t feel comfortable using a forearm.

    …you’re going to want a deep pressure substitute for forearms.

    Think fists.

    Deep Pressure Substitute Mini-Tutorial

    Enough talk about fists as a deep pressure substitute for forearms. Let’s make this happen.

    In this video, I first show why I think most MTs struggle with fists.

    (You guessed it: The massage table is set too high.)

    After I go over table height I show how to transition back and forth between forearms and fists using wide and narrow stances.

    P.S. Moving between wide and narrow stances is easy when you shuffle your feet.

    Want to massage pain-free using your fists and other cool techniques?

    Take this pain quiz.

    You will get an instant video that will help you with your issue.

    Pain Quiz
  • How to Get A Client Out of Pain: A Key Question

    How to Get A Client Out of Pain: A Key Question

    There’s a massage skill that has nothing to do with your hands, but is really important when treating a client in pain. The skill is to ask the right massage intake question.

    Of all the questions (excluding medical history and contraindications), there’s one question that could vastly improve your chances of helping someone in pain.

    No more suspense.

    It is: What has worked to relieve your pain before?

    Oxycontin and vodka.

    Okay, I’m not talking about drugs and booze.

    I’m talking about what kinds of musculoskeletal treatments (physical therapy, chiropractic, massage therapy, yoga therapy, Pilates, etc) have helped with the pain in the past.

    Once you have that information, drill down and find out what specifically about the treatments worked.

    Then, if possible, incorporate the things that worked into your massage.

    Here’s an example of how you might ask this important massage intake question.

    Asha came in with neck and shoulder pain. She was a medevac nurse and speculated that having to carry heavy equipment and wear night vision goggles was the cause of cervical condition.

    To relieve the pain she had tried lots of treatments. The cortisone route didn’t really help. Chiropractic had helped some. Bill helped the most.

    Who was Bill?

    He was a physical therapist who did hands on work with her.

    Hmm…I asked her what he did.

    She explained that he did some massage and stretching.

    Then I asked her if he did manual traction on her neck as part of the stretching? And, if so, did that help?

    The answers were yes and yes.

    Next I asked if Bill ever tested her neck flexion, extension and rotation.

    He had. Flexion and extension–no pain. Some pain in rotation.

    Lastly, I asked about Bill’s massage pressure.

    Firm pressure relieved the pain.

    So, at that point I knew my treatment starting point would include specific work in the cervical erectors with firm pressure. I would also stretch her neck and do manual traction.

    At the end of the session, Asha was a happy camper.

    A companion massage-intake question to what makes a pain condition better is: What makes a pain condition worse or simply doesn’t help?

    Maria came in with sciatica. The pain was in her right buttock and down her leg, but not below her  knee.

    She had been dealing with the condition for a month and half, but it had improved. And she rated herself as being 60% better.

    Here’s how my questioning went with her.

    Have you had massage before?

    Yes, I get shiatsu from time to time. I really like it. I feel so much better afterwards.

    (Maria had won a GC to see me. That’s why she wasn’t going to her Shiatsu person.)

    Oh, did you ever get shiatsu when you had sciatica?

    Yes. It was very helpful.

    Now I had an idea of how I was going to treat Maria’s back problem—using a lot of static pressure.

    Next the companion question: What makes it worse?

    Maria told me that sitting makes her sciatica worse.

    Okay, how about lying face down?

    I’m good, she said.

    I worked on Maria supine, fairly confident that I wasn’t going to aggravate her back condition.

    I used static pressure on tight/tender areas in her spinal erectors. That was very relaxing and pain relieving for her.

    When I got to her glutes, I knew I was going to back off on my pressure because sitting bothered here which could mean that the nerves in her gluteal area were fired up.

    And they were.

    I used oblique angles of approach when working the glutes and piriformis so that I wouldn’t be pressing down onto angry nerves, and used a pain scale technique to make sure that the pain was lessening as we worked.

    Maria had significant pain reduction when we were done.

    Here’s the key massage intake question and companion question recap:

    “What has helped?” led me to using static pressure.

    “What made it worse?” led me to using a pain scale, oblique angles of approach and lighter pressure in the gluteal area.

    Why I’m So Adamant About This Massage Intake Question

    Asking the right questions was hammered home with me after sitting in on many intakes with a PT friend.

    I noticed that he was always coming back to identifying what is making a condition worse and what is making it better or, at the very least, not making it worse.

    Once he had an idea of the parameters he should initially work within he then had an idea of how he could address the pain without making it worse. Once he got the pain down, he could start to test the parameters.

    It takes time to ask the right questions.

    I give and an extra 30 minutes for new clients. (You can download our intake here: [download id=”618″]).

    During that time, I ask the important massage intake question: What treatments/techniques have lessened the pain in the past.

    Then I incorporate the techniques that had worked (and I’m competent with) into my massage.

    And I avoid the techniques that had been a bust or had made things worse.

    Need more help? 

    Join my email group.

    I send you my latest everything weekly.

    It’s free.

    Sign up below:-)