What is the right massage table height for you?
It is the table height that allows you to effectively deliver force without hurting your body.
You’ll need to experiment to figure out what table height setting works best for you. In a few minutes I’ll give you my recommendations. But first, I have a question for you: What’s your table height set at now?
Twenty-five years ago I was taught to set my table height this way: my distal knuckles should touch the top of the table when my arms were at my sides. Look on the Internet and you’ll find a range of table height advice, like: the height of your table should be your height divided by two.
Though well intended, a standardized table height setting should not be your gold standard for setting your table height.
Why?
Different sizes.
Different body part requests.
Different pressure request.
Different massage styles.
Different chronic conditions and injuries.
1. Different Sizes
When I say different sizes I’m not just talking about massage clients–I’m talking about massage therapists, too. Let’s start with massage therapists.
MTs Come in Different Limb Lengths
Two people at the same height don’t necessarily share the same limb length. Jennifer and Shanice are 64 inches tall. When they stand against the same massage table, Jennifer’s fingertips are 1 inch farther away from the table than Shanice’s.
Imagine Jennifer and Shanice are leaning to apply pressure. Depending on the massage style of Jennifer and Shanice, a 1 inch differential in arm length could make a difference in how high or low each sets her table.
Clients Come in Different Thicknesses
Clients come in all sizes. Ricardo, who weighs 305 lbs, is “thicker” than Jamar who weighs 150. That means if Ricardo and Jamar were lying on a table side-by-side, the top of Ricardo’s body would be an inch or two higher off the table than Jamar’s. If you set your table height at the Jamar level for each massage, you’d be giving up an inch or two of leaning leverage when working on someone big, like Ricardo.
2. Different Body Part Requests
When a client is lying on the table, body parts stick up at varying heights. For instance, glutes will stick up off the table higher than calves. If you’re focusing on glutes and your table height is too high, you won’t be able to generate enough pressure from leaning.
3. Different Pressure Requests
Light pressure is less important in terms of dialing in on table height. A high table can help keep the flexion out of your back and a low table is workable if you know how to use the massage table for support. However, a request for medium or deep pressure should make your ears prick up.
In general, when talking about leaning to generate pressure, medium and deep pressure require you to apply more force. You safely do that by leveraging more of your body weight onto the client and/or driving from your legs. Whether you are more of a using-your-body- weight leaner or a driving-from-your-legs leaner depends on your massage style.
4. Different Massage Styles
Which body part would you pick to work on hamstrings using medium to deep pressure? Are you an elbow/forearm or a fist/knuckles or a palms/fingers massage therapist?
Knowing which body parts you’ll use the most during a massage is a key for setting your table height at the beginning of the massage.
If you’re a forearm/elbow MT you’ll need less leaning leverage than you would if you’re a fist/knuckle MT. So your table will probably be higher.
What about your techniques? Are you more of an ischemic compression/trigger point therapist or gliding/relaxing therapist?
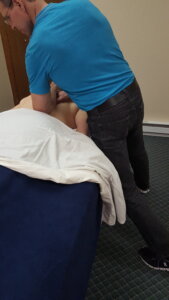
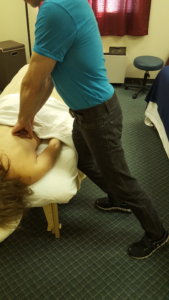
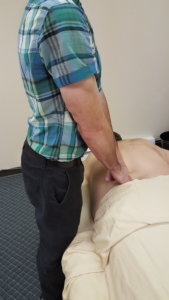
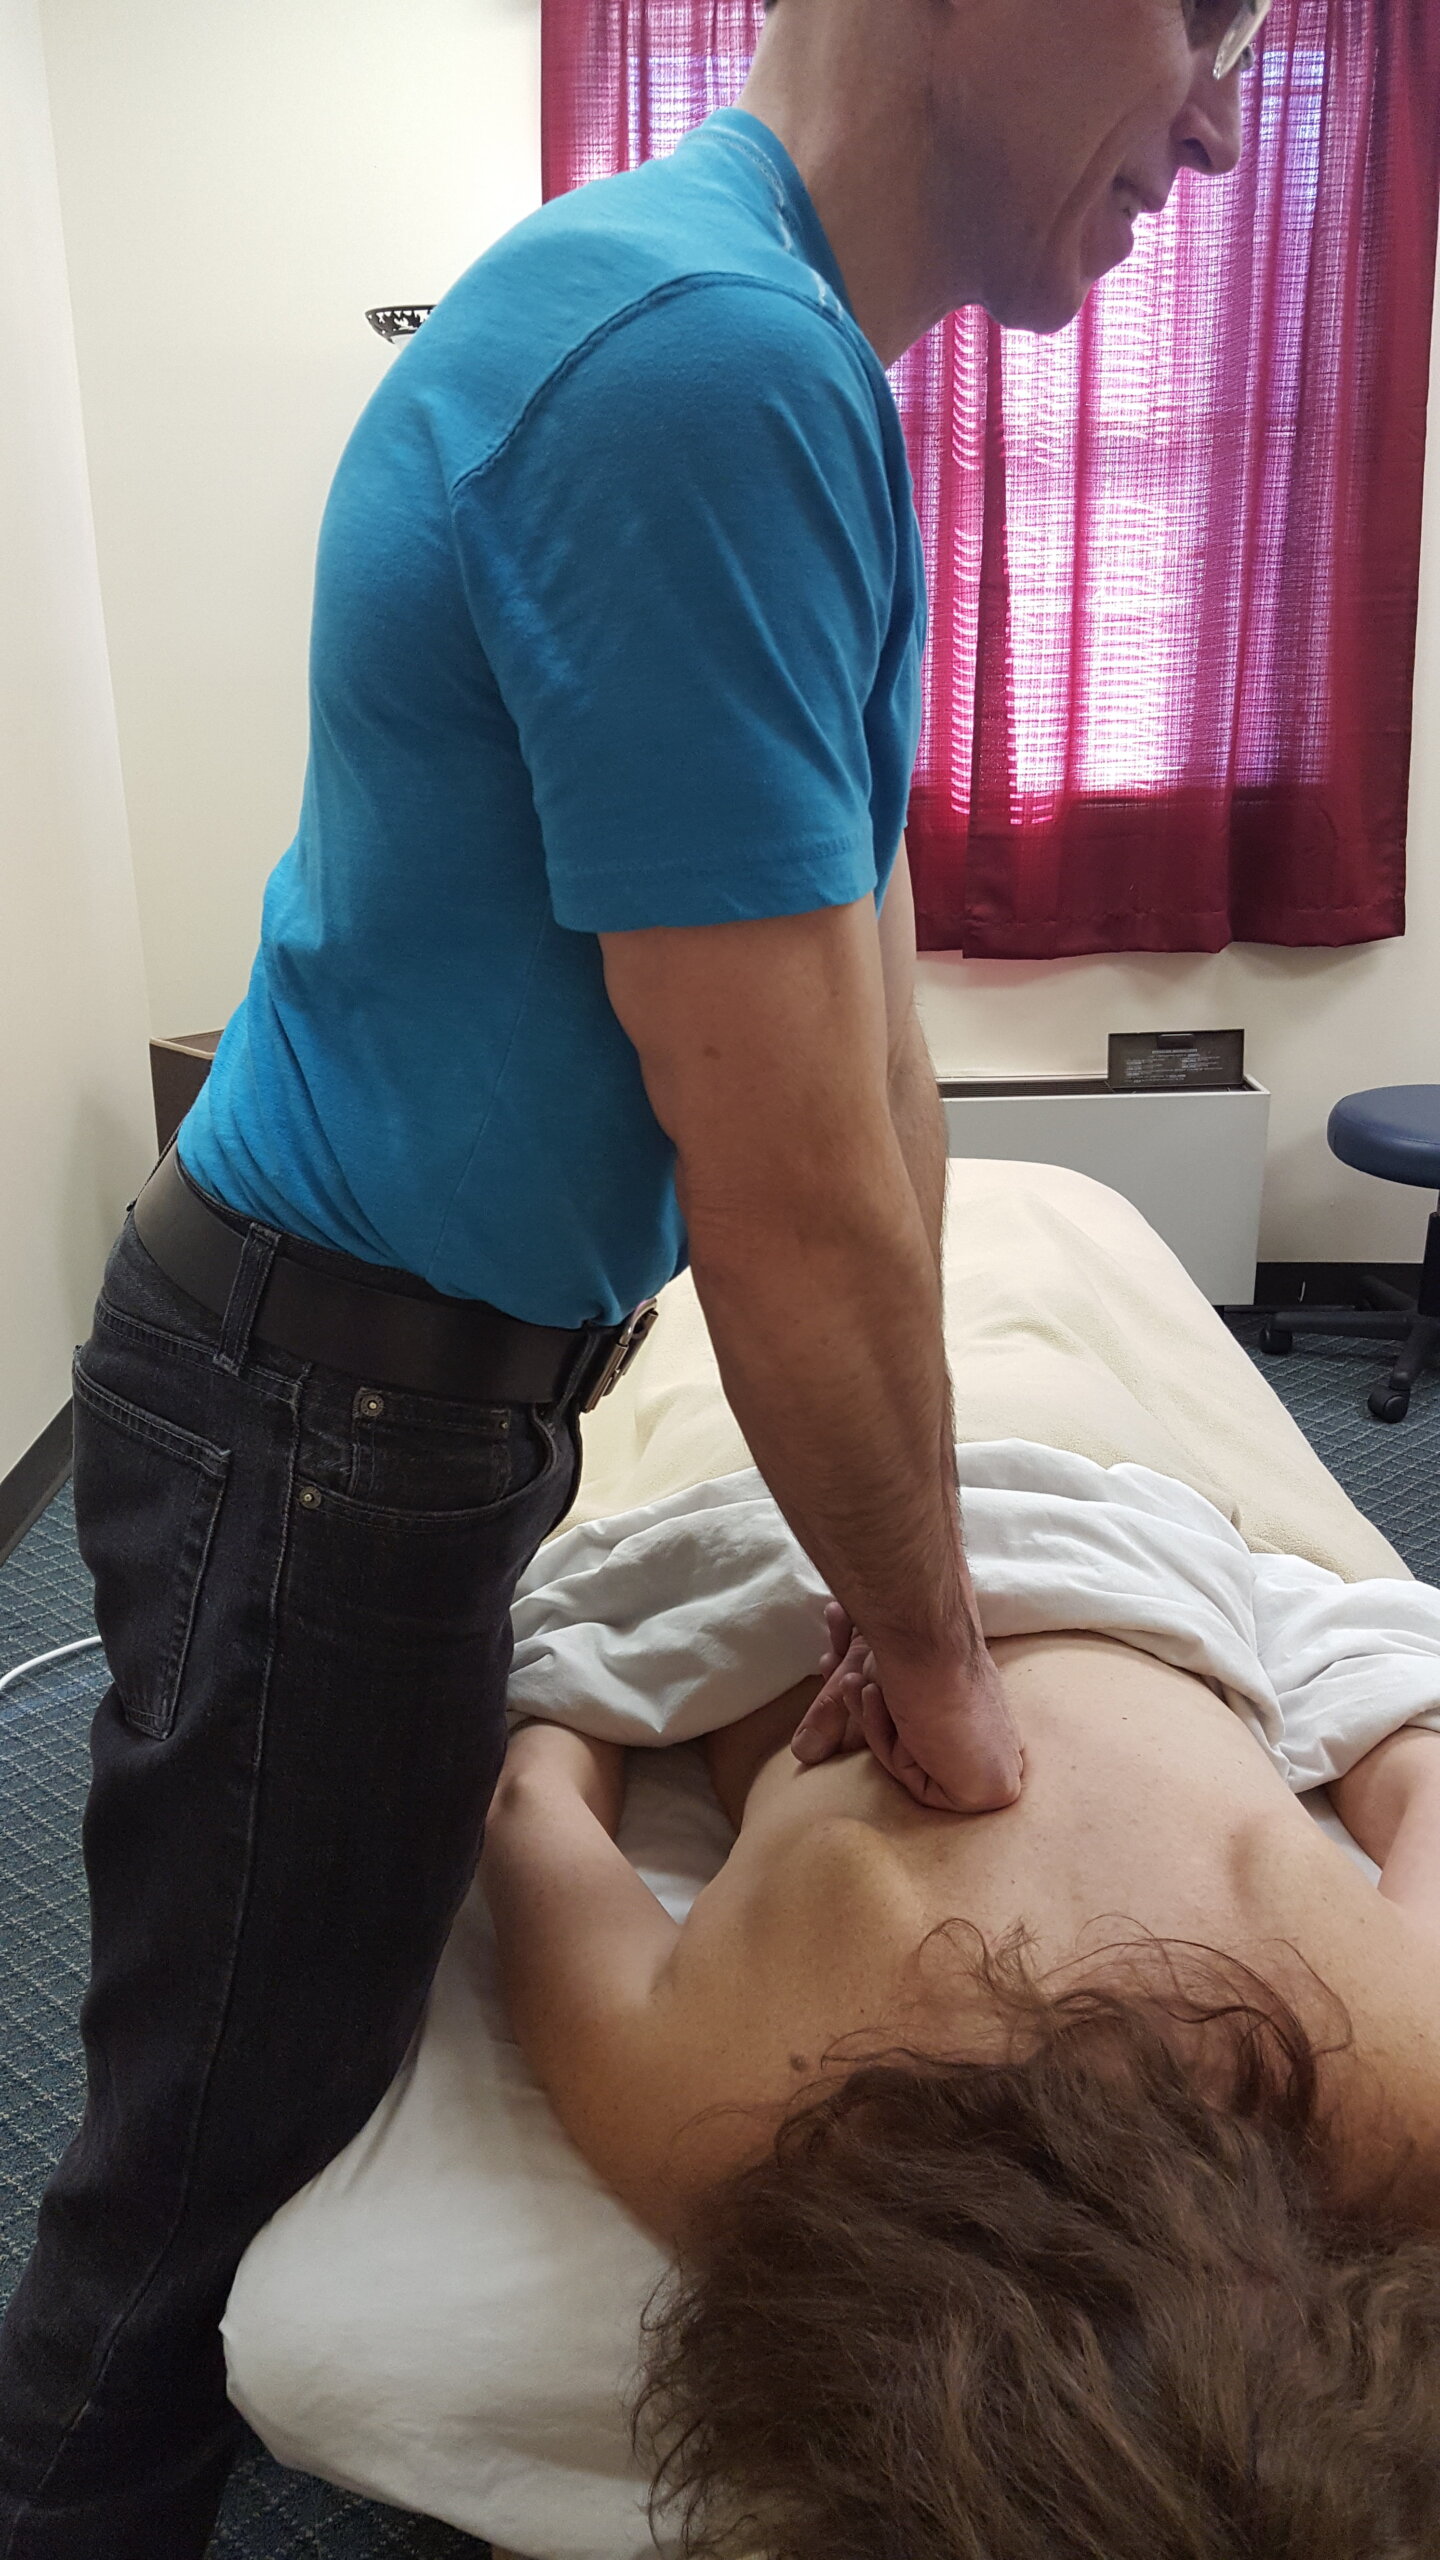
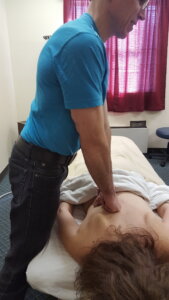
My massage emphasis is ischemic compression/trigger point so I look more like a chiropractor when I massage, meaning I’m taking full advantage of my body weight to generate pressure by working on a low table.
A forearm massage therapist who doesn’t need to be over the table may prefer a higher table to lean into. In a lunge stance she doesn’t need to use all of her body weight to generate force because she can drive from her back leg.
5. Different Chronic Conditions and Injuries
The last thing you’ll need to consider when setting your table height are any chronic conditions and injuries you have.
I started out my massage career as a forearm/elbow massage therapist. Twenty years into massage the forearm/elbow technique hurt my neck and shoulders. So, I switched to fists/knuckles.
In order to be able to transfer all of my body weight onto the client if I needed to, I lowered my table, much lower than when I was a forearm/elbow massage therapist.
Set Your Table to Save Your Body
At this point you may be thinking that setting your massage table height to save your body is crazy complicated. It’s not. It just requires asking yourself some basic questions and then doing some experimenting
Table Height Experiment
Step #1: To get your general go-to setting pick the body part that you use the most to massage with (e.g., forearm, fists, knuckles, palms, massage tools) and start leaning at your normal table height setting. This will be your baseline to compare higher table and lower table leaning. If you’re already using your body weight to generate pressure, then skip to the next step.
Step #2: Try leaning at a table height higher, one notch, than your normal table height.
Step #3: Try leaning at a table height lower than your normal table height. For a lower table I recommend experimenting with one notch if you’re a forearm person and no more than three, until you get used to low table leaning, if you’re a fist person.
If you’re new to low-table leaning, you’ll want to read this article before you start experimenting—How to Use the Massage Table for Support.
As you experiment with leaning keep these things in mind:
If you’re leaning in an asymmetrical (lunge) stance, lock your back leg and drive from your back foot to generate extra force.
If you’re leaning on a low table make sure that your using the table for support.
Once you have your go-to table height nailed down, you can then make situational adjustments as they come up.
Making Adjustments on the Fly
For instance, let’s say your normal table height was 30 inches but your new go-to table height is 31 inches. Thomas is your next client and he’s really thick. So, you decide to lower your table to 30 inches so that you can lean more effectively.
Or your normal table height was 30 inches and your new go-to table height is 24 inches. Tara is you next client and she is thin and likes light pressure. So, you decide to raise your table up to 26 inches so that you can be more upright without having to use the table for support.
Personally, I set my table height as low as possible (with the lower table legs off) so that I am always prepared for deep pressure. The challenges with using the lowest table setting for each client means that I’m not at an ideal table height for light pressure requests and thin clients.
I get around the body mechanic challenges by adapting to a low table. Specifically, I use the massage table to support my body weight and help me regulate pressure. And I break static posture when I want to stretch my back or get vertical. .
Set Your Massage Table Height Recap
Set your table height so that you can lean effectively and pain-free. Leaning allows you to take your upper-body out of the massage and can reduce neck, shoulders and arm strain.
Your go-to table height may be your current table height or it may be lower or higher than your current table height. You won’t know until you experiment.
Start your experiment by leaning at your current table height. Then try leaning at a lower and higher setting.
When you’re in a lunge stance (asymmetrical stance) lock your back leg and drive from your back foot to generate more force.
When you’re in a parallel foot stance on a low table use the table for support and shift your body weight to the balls of your feet so that you can leverage all your body weight onto the client if you need to.
If you have iffy shoulders, elbow or thumbs, then try short stroke massage.
Yep, I made up the name “short stroke massage”.
Think of it as a strategy. Basically, you’re going to cover less distance in a stroke—a lot less distance.
WTF, Mark, that’s going to be the choppiest massage ever!
Not after you make one adjustment. I’ll get into that later.
The Bad News
First, I need to tell you that if you do short stroke massage, you’re probably going to abandon some go-to moves that you’re really good at.
Why?
Because some of those go-to moves are beating the snot out of your body.
Dr. Liu and Chinese Massage
Early on in my career, I learned this vicariously. I had a back injury and went to see an acupuncturist, Dr. Liu.
I admired Dr. Liu. He was born in China, became a US citizen, had a medical degree, did research at a prestigious university and was well-known in our area.
He knew I was a massage therapist, and one day he started to lecture me about how Chinese massage was sooooooooooo much better than American massage.
I was curious and asked him if he could show me some Chinese massage techniques.
But instead of showing me techniques, he simply explained how Chinese massage strokes are done.
But I’m a massage therapist, right? Less talky and more showy, Dr. Liu.
So I pushed him: Can you show me how it’s done?
That’s when he confessed that he didn’t do Chinese massage any longer because it kills his wrists and hands.
Moral of the story: Make sure you’re a licensed acupuncturist if you continue to do massage techniques that hurt your body.
Short Stroke Massage Rules
Short stroke massage is a body-saver because no matter where you’re working (arm, back or leg), you’re always in a position to keep your joints stacked (aligned).
Leaning with stacked joints is an efficient way to deliver pressure and is easy on your body.
Stand facing a side of the table with the body part you’re using to deliver pressure down. (In this position, you will NOT be facing the direction of the stroke. Fist, knuckles and thumbs work great with short stroke massage.)
Lean and glide (or use static pressure) going left or right, but don’t travel more than a few inches either way.
Pause at the end of your mini-stroke. (By the way, that was my other option for a name for this strategy: mini-stroke massage. You can see why I went with “short”.) Move your feet. Then continue to glide.
Pretty easy, huh?
Short Stroke Massage Secret
Oh, and this how you can make short stroke massage NOT choppy: Slow down.
Think Zen. Think turtle. Think almost falling asleep. That’s the pace you want.
If your pressure is consistent and focused and you’re moving slowly, 20 short strokes from foot to head will seem like one continuous long stroke.
How do you do a longitudinal massage stroke when your shoulder hurts?
Pick a side, lean and start gliding with fingers, thumbs, knuckles, fists, elbows or forearms.
Pause when your it becomes harder to keep consistent pressure through leaning only.
Move your feet.
Start gliding until you lose your mechanical advantage again.
Rinse and repeat.
Okay, that seems easy enough, right? But before you attempt this strategy you need to know something.
You’re going to have to break an unwritten, massage rule.
Hey, I’m not a rule-breaker by nature. I get that rules are important. They keep societies together.
However, some rules are bad or don’t serve a useful purpose any longer.
In relaxation massage we have a doozy. It is in order for a stroke to be relaxing, it must be continuous (no stopping and starting).
If you’re having shoulder and neck pain, take a look to see if you’re following this rule.
It could be making things worse.
Following the Rule
I was taught that an uninterrupted stroke (e.g., gliding from the upper back to the lower back without stopping) is super relaxing to the client.
I was double convinced when it was my turn to be on the table. Continuous strokes felt incredibly relaxing!
And that’s how I did my relaxation massage for about 15 years.
Pain Made Me Stop
But then I noticed that my chronic shoulder condition would act up when I stood at the head of the table and glided with both hands from shoulders to the base of the sacrum.
Oddly, even though I knew this move hurt me, I continued to do it for a couple more years.
Hey, what can I say, rules are hard to break once they’re ingrained.
Eventually though, as the frequency of pain episodes increased, I stopped doing the move and miraculously (lol) my shoulder stopped troubling me.
Back to Following the Rule Again
But old Marky couldn’t let it go.
I went back to doing a longitudinal massage stroke in one, long swoop but with a twist.
Instead of standing at the head of the table, I now picked a side and did a continuous stroke (upper back to sacrum) using knuckles and a fist braced together.
That worked.
Well, actually it only worked for a short while, but then my other shoulder started to bother me—especially when doing deeper work.
Son of a B.
I Broke a Massage Rule and I Liked It
Alright, there had to be a takeaway here.
And there was.
I noticed that in both cases, when doing the old, longitudinal massage stroke at the head of the massage table and the new, longitudinal stroke at the side of the table, shoulder pain occurred when I started to extend my shoulder (when my elbow and shoulder joint were not stacked over top of each other).
In order to NOT do this, I needed to move my feet.
But if I moved my feet during the stroke, I would have to stop my stroke so that I could balance myself as I shifted my weight—and I would break the continuous stroke rule.
Ruh-roh.
Waiting for the Lightning Bolt
Believe me, I approached breaking this rule cautiously because I was sure that clients were going to walk.
First, I did a quick pause while doing a longitudinal massage stroke on an unsuspecting client and I didn’t get a reaction.
Okay, so on the next client I did two pauses in a stroke and held them longer than my maiden pause.
Guess what?
All good.
Hmm…how far could I take this?
Well, I started to experiment with pausing doing a single, longitudinal massage stroke as many times as I needed (sometimes 5 or 6 times during a longitudinal back stroke) to stay in good form.
Again, I didn’t lose a client—and my shoulders felt great because now I could move my feet so that I could get in the best position to deliver pressure while gliding.
I tested the pause stroke out on MTs and got the same reaction. Both the continuous and the pause stroke were relaxing.
What Gives?
So, if it wasn’t the continuous movement of a stroke that made the client relax, what did?
I don’t know for sure, but my guess is that it has to do with pressure.
If the pressure is the same during the glide phase as it is during the non-glide (pause) phase, then the person on the table is probably less likely to notice or care that I’m pausing.
Additionally, pressure seems to override stroke in this way: A client is more likely to put up with most any stroke if the pressure is spot on for relaxation.
However, I don’t think the fanciest stroke in the world would ever cancel out pressure that is NOT relaxing to the client.
Alright, enough wondering why, let’s get this show on the road.
Here’s the step-by-step for pausing when doing a longitudinal massage stroke.
How to Do a Longitudinal Massage Stroke with Pausing
1. Pick a side.
This is going to seem weird enough if you do most of your back strokes from the head of the table. But trust me working from one side allows you to stack your joints which will make your shoulders feel happy.
Now, which body part are you going to massage with? Your fingers, thumbs, knuckles, fists, elbows or forearms?
Picking a side gives you a lot of options to experiment with so that you can find the best one for your shoulder.
Now, lean and then start to glide.
2. Pause when it becomes harder to keep consistent pressure through leaning only.
Yes, your massage stroke is going to be short, but have no fear it will feel like a continuous stroke if you maintain the same pressure throughout each short movement.
3. Move your feet.
As you’re moving your feet to get in position to continue your stroke maintain the same pressure on the client.
This video will help you out with that.
4. Start gliding until you start losing your mechanical advantage again.
You won’t go far before you feel that it’s becoming harder to maintain a consistent pressure without putting stress into your shoulder(s), especially when doing deep pressure. Then you’ll need to…
5. Rinse and repeat.
I call this rinsing and repeating process Short Stroke Massage. You can can read more about there here: How to Do Short Stroke Massage.
Rethinking How You Do Massage
So, what do you think?
Remember, I’m not asking you to give up the awesome, longitudinal massage stroke if your shoulder hurts.
I’m simply asking you to rethink how you do it.
Find a way that works for you.
Pausing so that I can re-position my feet and continue the stroke with good alignment from shoulder to elbow to wrist works for me.
When I do this I’m forced to slow down because pausing and shuffling my feet take time.
That extra slowness makes the stroke even more relaxing in my book.
At this point I want to mention that I have an online, home-study “how to massage pain-free” course.
It’s a 3 CEU course that has the strategies and techniques (like short-stroke massage) that enabled me to do more massages a day at 55+ than I could at 35.
The continuous stroke rule gave you structure to work within when you first started massage, but when you mix in “taking care of your body” as you rack up the massages, it’s a rule that can hurt you.
It’s time to think: How can I get the job done (make the client feel great) without hurting my body?
And that’s when a rule should be challenged.
Oh, one more thing.
Substitute “life” for “massage” when talking about rules.
What happens?
Right, some of those life rules are probably holding you back, too.
If you’re ready to break some rules (aka, habits that aren’t working for you), sign up for my free, info-sent-weekly, email group below.
There are benefits to treating a tight/tender area with very precise pressure. One, you can sometimes only find the “That’s it!” spot with very precise pressure. Another is that very precise pressure is a more thorough treatment than a massage with less precision. Most clients appreciate thoroughness. If you’ve backed off very precise pressure because it hurts your body or it feels intimidating, here’s how to change that.
Precise Versus VERY Precise
In general, I use precise pressure to find areas of tender/tightness. I use a variety of body parts, from big (forearms and fists) to small (thumbs and fingers) to apply precise pressure.
I use VERY precise pressure to further examine the tender/tight area. However, I only use smaller body parts (thumbs, fingers, massage tools) to apply very-precise pressure.
While I’m examining the tender/tight area with very-precise pressure, I may find a spot within that area of pain that is more tender or is tighter than the rest of the pain area. (Clients sometimes shout out “That’s it!” when I hit it.) I then treat the “That’s it!” spot using very-precise pressure.
Here’s an example. Ali comes in with neck and shoulder pain. Using my knuckles around the scapula I find the locus of his pain area in his levator scapulae attachment (precise pressure).
Next I start examining the area of pain in the levator scapula attachment with my middle knuckle, looking for that exquisitely tender or tight spot (very-precise pressure).
What to Use to Find the “That’s It!” Spot
If it hurts your hands to work with very-precise pressure, I have three suggestions:
Combine body parts.
Stack and/or brace (support) body parts.
Combine a massage tool with a body part.
Pictured below are my 3 favorite ways to deliver very-precise pressure.
Stacked Fingers/Thumbs
Try not to press. Instead lean into your fingers/thumbs. The bottom finger/thumb is the primary palpation vehicle.
Knuckle-Thumb
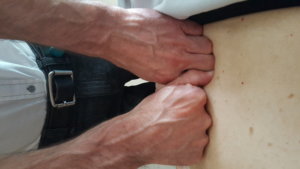
In this picture I’m directing my pressure into the middle finger of my left hand. You’ll notice that my right thumb is bent to fit in comfortably next to my left middle knuckle. This is not a mistake. In this case, my thumb’s primary role is for palpation, not for delivering pressure. My right thumb’s companion four fingers form a loose fist. They take most of the weight that I put on that hand, not my thumb.
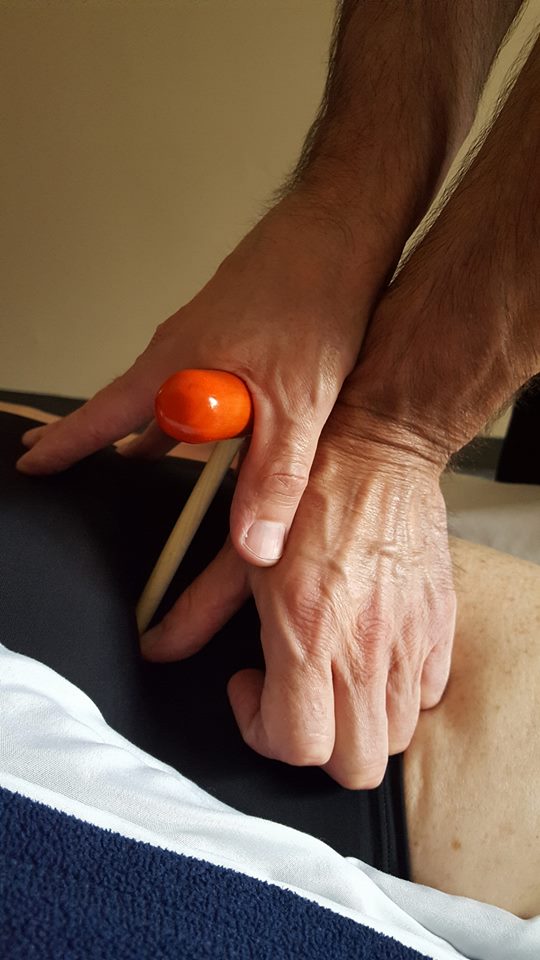
Tool-Thumb
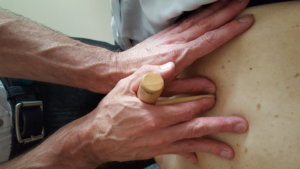
In this picture my thumb is a support, guide and the primary sensing instrument. I’m directing most of my “leaning” pressure into the tool, not my thumb.
How to Find the Spots
The way I find the tight and tender spots within the area of pain is by creating contrast. I can create contrast by the direction, length and speed of my palpating stroke.
When I’m palpating Ali’s levator scapulae attachment, I start by going across the grain of the muscle to give me enough distance to “flip” over a potential tight spot. My stroke is going to be fast enough and long enough so that I can feel the full shape of the tight/tender area. If I’m still having trouble feeling anything, I’m going to press deeper as I do the faster, longer stroke.
Going Very Precise
Once I find the tender/tight spots, I’m going to systematically investigate the areas using combined body parts, stacked/braced body parts or a massage tool and finger/thumb combination.
Next I’m going to use very precise pressure to work hyper-tender or hyper-tight spots within the pain area.
When applying very precise pressure I usually 1. press, 2. press and pull or 3. press and reciprocate. A massage tool combined with finger or thumb is insanely precise. In this video, I demonstrate how to press, press and pull, and press and reciprocate using a massage tool: T-Bar and L-bar: 3 Ways to Work Muscles Video.
Also, I like to work the pain area and the “That’s it!” spot from different angles. Lots of my clients love this.
Too Much
When you’re doing very-precise pressure, you run the risk of overworking the area. I usually can avoid this by revisiting the area instead of spending a long period of time there.
I also use a pain scale system approach when I’m unsure of the therapeutic pressure that I should be using. Here’s a quick video tutorial: Pain Scale System Video.
Lastly, I check in with the client to see how she’s feeling about the area I’m working on.
Checking in is not foolproof. The client may not have a mental gauge as to what feels like good pain and what feels like bad pain. When in doubt, move off—unless the client knows exactly what works for her.
Making Very Precise Happen
Here’s the short version for working with very precise pressure:
Find the pain/tight area by creating contrast.
You can create contrast by making your exploratory stroke longer and faster than you normally would. If you need more contrast, press deeper as you do your exploratory strokes.
Choose a body part combination that doesn’t cause you pain when you’re pressing.
My favorites are 1. Stacked thumbs, 2. Knuckle and thumb, 3. Massage tool and thumb.
Systematically work the pain area and the “That’s it!” spot (if there is one) by pressing, pressing and pulling or pressing and reciprocating.
Being very precise can help your client with her pain condition and doesn’t have to cause you pain.
Massage Tools Online CEU Course
If you want to be able to use a massage tool with every massage so that you can save your hands and deliver focused, precise pressure like nobody else can, this online course will get you there.
I taught it live for many years and now I’ve made the online version, There are lots of videos and if you have any questions while you’re taking the course, you can always ask me (mark@makethemostofmassage.com).
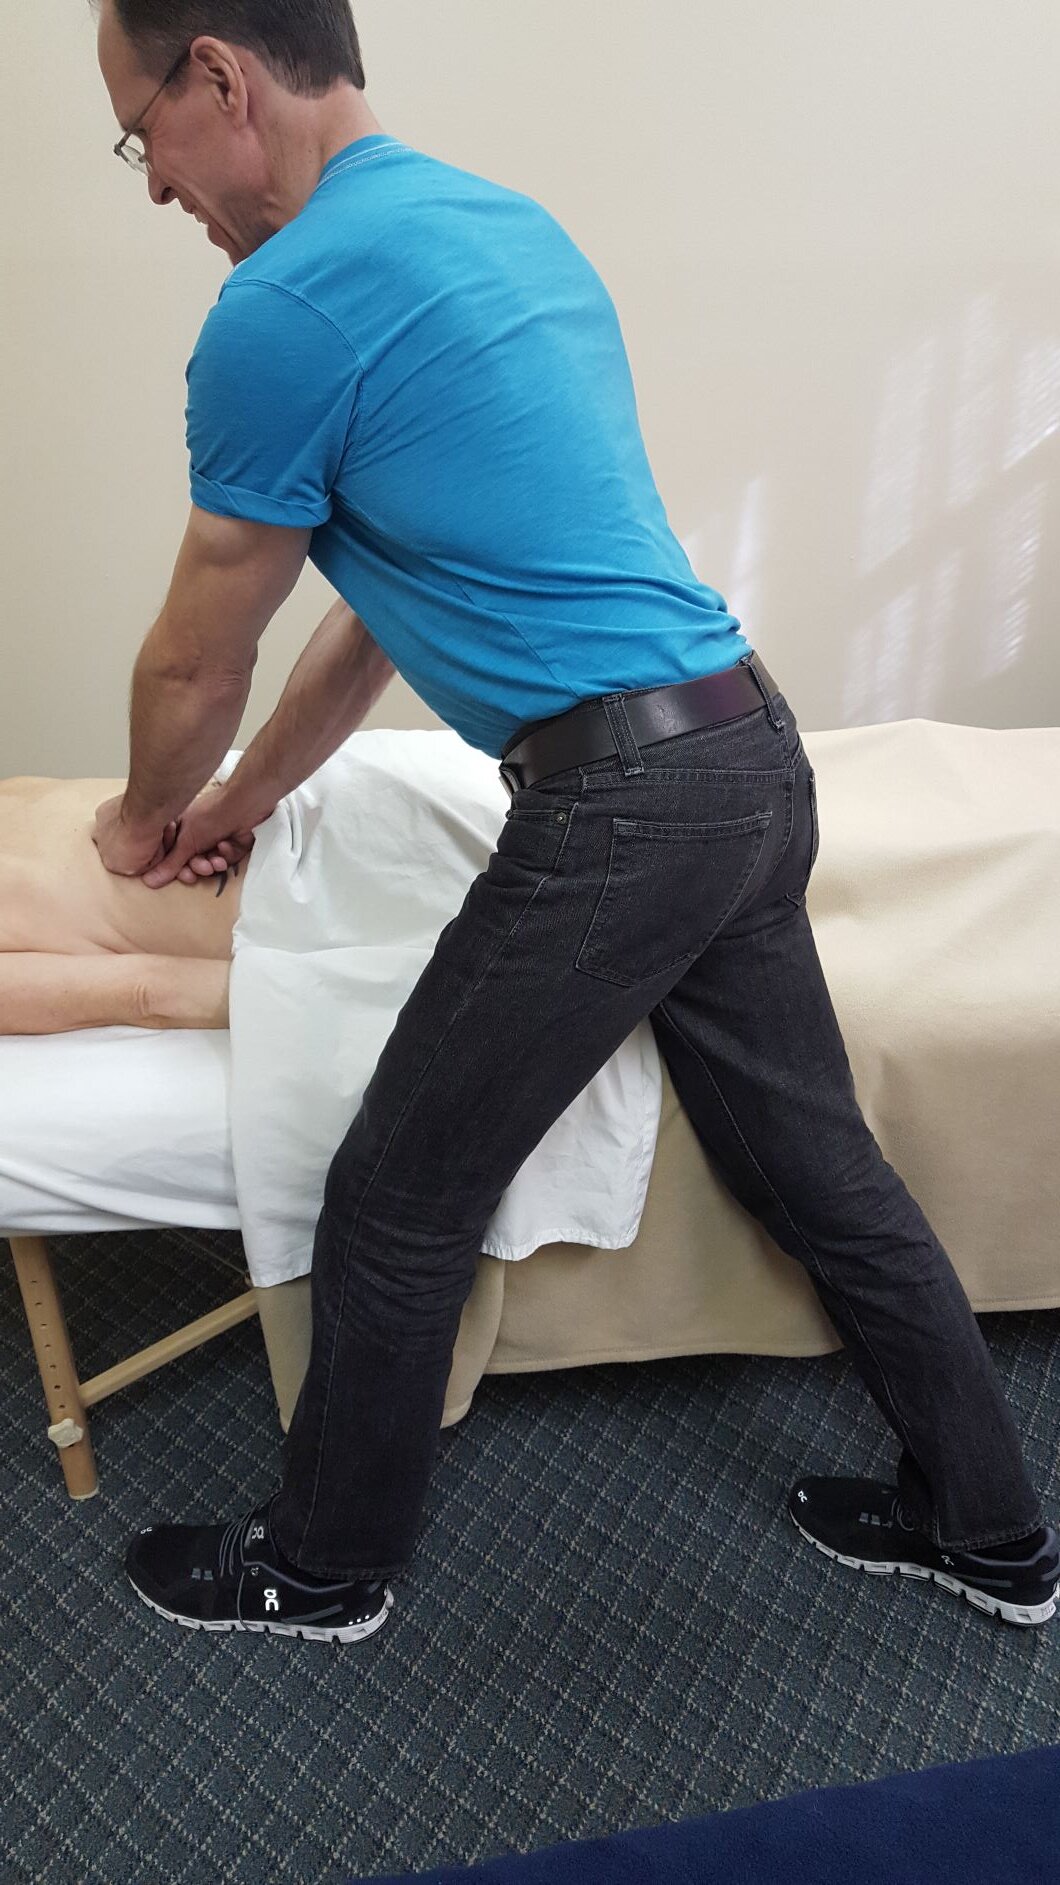
 A forearm massage therapist who doesn’t need to be over the table may prefer a higher table to lean into. In a lunge stance she doesn’t need to use all of her body weight to generate force because she can drive from her back leg.