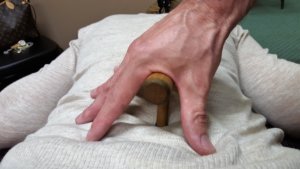
Category: Massage Tools

  • Scratch the Itch: Get the Multifidus and Rotatores

    Scratch the Itch: Get the Multifidus and Rotatores

    The multifidus and rotatores are in the lamina groove. Early on in my career, I shied away from anything close to the spinous processes. But neuromuscular therapy taught me that these muscles can be influenced and clients REALLY  like getting them worked.

    The Deep Back Muscles

    Here are the multifidus and rotatores:
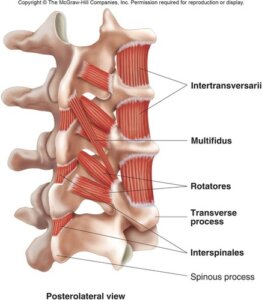
    rotatores-and-multifidi

    They multifidus stabilizes joints within the spine. The rotatores lie underneath the multifidus and are involved in postural control.

    Why Work Them?

    There are five reasons why I think that working the multifidus and rotatores improves the quality of a pain relief massage.

    1. When you’re working the multidus and rotatores, you’re also working a lot of other muscles.

    For instance, let’s say you’re massaging in the upper-thoracic lamina groove. As you’re working into the lamina groove, you’re also pressing into the trapezius, rhomboids, and other back muscles. It’s literally one stop shopping.

    1. You’re giving the client a new experience.

    I’ve found that most therapists don’t do focus work in the lamina groove. So a first-time client will probably be pleasantly surprised if you work the multifidus and rotatores.

    1. From a trigger point standpoint there could referrals.

    If you subscribe to trigger point theory, then there could be pain referral patterns stemming from these deep back muscles.
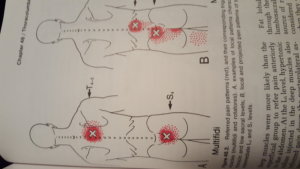
    multifidus-tp-back-pic

    (Myofascial Pain and Dysfunction The Trigger Point Manuel, Janet G. Travell, M.D., David G. Simons, M.D., Volume 1, p. 639)

    1. Allows you to really compare left to right.

    It’s fairly easy to compare left to right when it comes to the multifidus and rotatores, mainly because you can use the spinous process as a reference point.

    By comparing the left side to the right side, you can customize your massage. For instance, say I wanted to desensitize a pain area occurring around T8. If I found a higher degree of pain (not hyper-pain) in the right, T8, lamina-groove muscles, I would spend more time there than I would on left T8 side.

    1. You can scratch the client’s itch.

    My clients really like the lamina groove work. It’s not uncommon to have a new client say, You got the spot that I’ve wanted someone to get for years. I’m not special. Anyone can get this same response. You just need to get your lamina groove reps in.

    Also, when working through clothes (like when doing demo massages), targeting the multifidus and rotatores using static pressure is a very effective pain relief massage. I would argue it’s as effective as doing a regular skin-to-skin massage.

    Three Steps

    Here’s how to get comfortable working these deep muscles.

    1. Find the spinous processes.

    Once you find the spinous processes, you’ve won the battle.

    By the way, don’t be scared of the spinous processes. They are you friends (reference points).

    1. Go just lateral of the spinous processes (maybe 1/2 inch).

    For extra assurance, keep in contact with the spinous processes. You can use fingers from your pressing hand or non-pressing hand to maintain contact.

    1. Press down into the lamina groove with a thumb/finger or body parts combination.

    Here’s a video on how I use body part combinations in the lamina groove: Combining Body Parts for the Lamina Groove Video. (In the video I use the term power tools.  Now I call power tools “body part combinations”.)

    As you’re learning to calibrate your pressure in the lamina groove, you may first want to use a pain scale system.

    Here’s the pain scale system I use: tell the client to think of a pain scale from 1 to 10 where 1 is not much pain and 10 is a lot. When you press on an area, you want your pressure to feel like it’s registering in a 3 to 4 range (in acute pain areas) or a 4 to 5 (in non-acute pain areas).

    Here’s my pain-scale-system tutorial video if you want to take a deeper dive: Pain Scale Video

    Experiment With Massage Tools

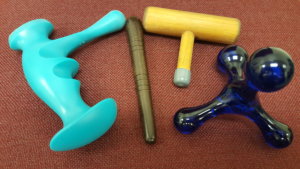
    Massage tools (especially the T-bar) are ideal for the lamina groove muscles. Why? Because with massage tools you can generate pressure effortlessly. In addition, your pressure will be more precise than your thumbs or fingers.

    Here’s how I do pain relief massage in the lamina groove using massage tools: Massage Tool Work In Then Lamina Groove Video.

    Intention is 50% of Massage

    Intention plays an important part in massage. When working in the lamina groove and directing your pressure to influence the multifidus and rotatores, you’re not only affecting those muscles, you’re impacting other muscles. In essence, you are getting a big bang for your effort.

    In my experience, clients respond favorably to intentional and focused pressure in the lamina groove. For example, I can sometimes find that one spot that a client wants addressed that no one has addressed before.

    Working the rotatores and multifidus is not difficult. You just need to find the spinous processes, go lateral and press into the lamina groove. When first starting out keep a guide finger on the spinous processes until you get comfortable working in the lamina groove.

    Here are the video tutorials to get you on your way:

    Combining Body Parts for the Lamina Groove Video

    Pain Scale Video

    Massage Tool Work in the Lamina Groove Video

    Once you start getting positive feedback and results, you’re going to be glad that you ventured into the lamina groove.

    Home Study Massage Tools (2.5 CEU) Course


    Get good with massage tools and you’ll save your hands and you’ll be able to deliver precise pressure like nobody’s business. Precise pressure is not only what my clients love, it’s also what differentiates me from the massage therapist that I compete with around town.

    How to Use Massage Tools Fearlessly

    Questions? Ask away! Email m at mark@makethemostofmassage.com. 🙂
     

  • How to Glide with a Massage Pressing Tool

    How to Glide with a Massage Pressing Tool

    Relaxation massage at medium and deep pressure can beat up my hands. That’s why I use a massage pressing tool.

    Dude, that’s called acupressure.

    True, if I only pressed, but I glide, too.

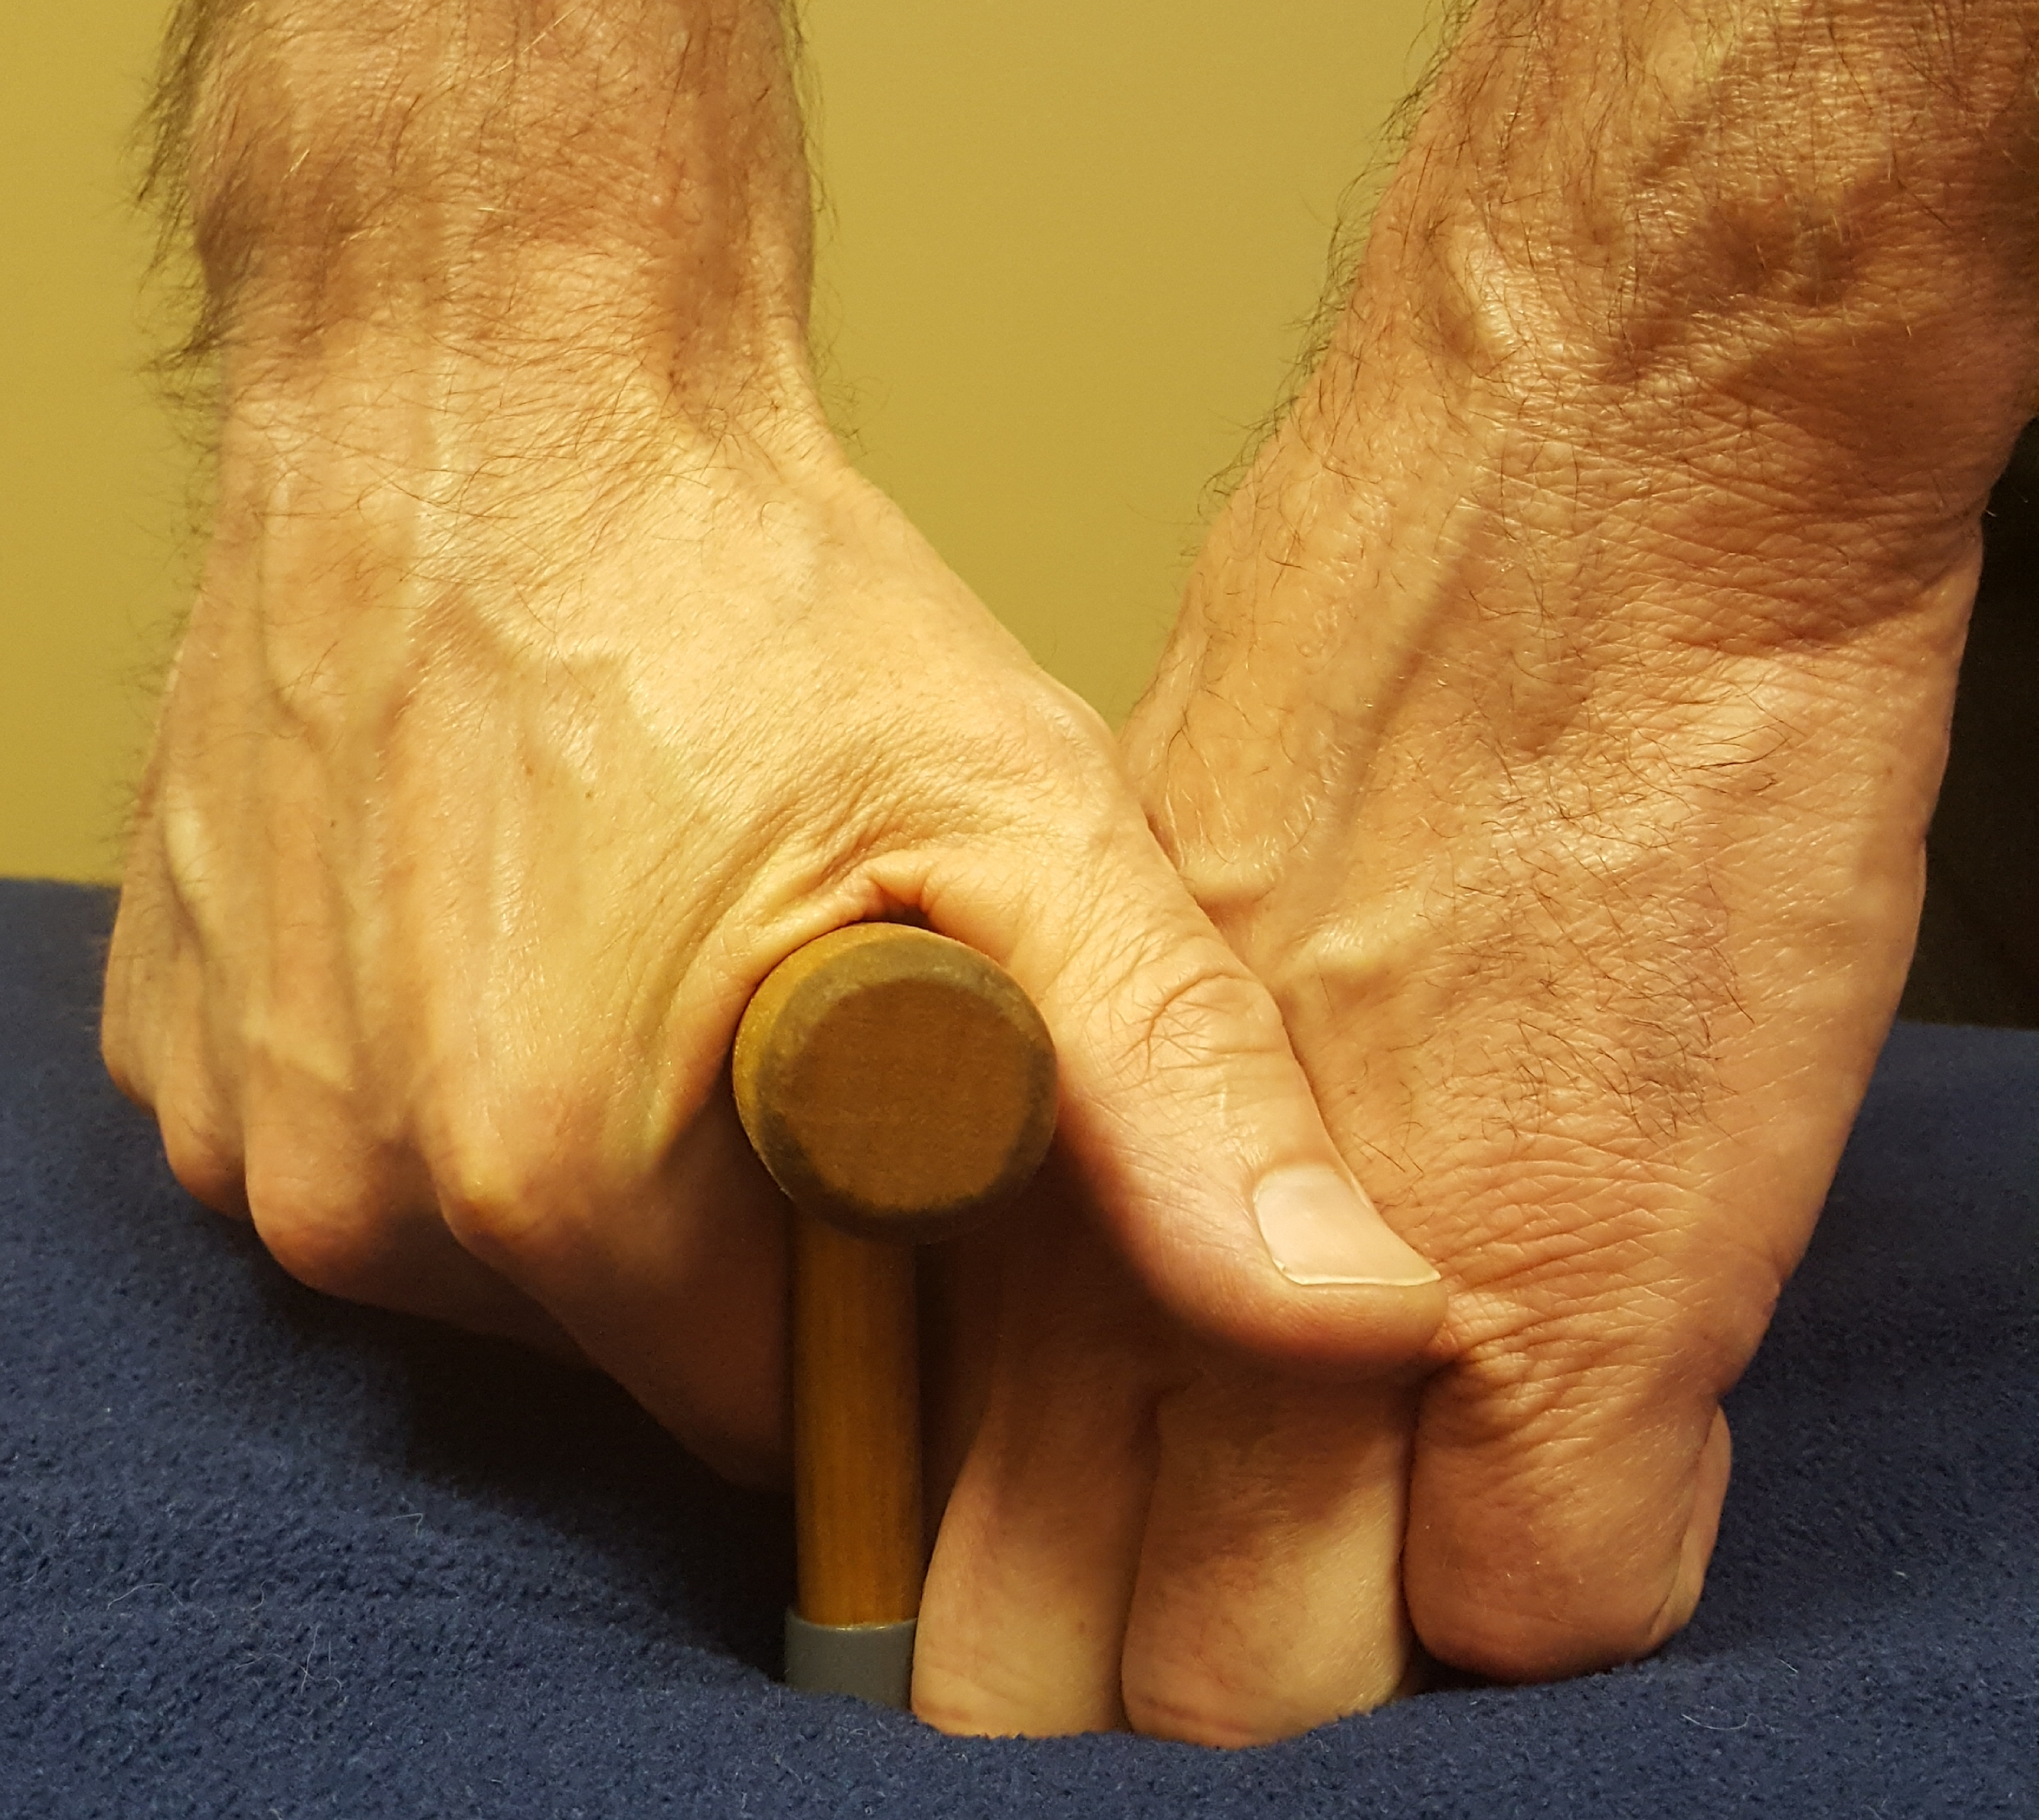
    A pressing massage tool (pictured below) not only can be used to do static or reciprocating pressure when gliding with body parts (hands, knuckles, fists, forearms), it can also be used  as the primary gliding vehicle, too.

    Using a Massage Pressing Tool for Static Pressure During a Glide Stroke

    Using a massage pressing tool for static pressure during a glide stroke is fairly straight forward.

    You glide with your favorite body parts (hands, fists, knuckles, forearms) and when you find a tight spot you pause, pick up the massage pressing tool, press, put the massage tool back down, then continue on with your glide.

    More about how to do that here:

    Gliding with a Massage Pressing Tool

    Gliding with a pressing tool requires a little more practice. But it’s worth it.

    Why?

    Because when you can glide with a pressing tool you can:

    1. Maintain consistent flow.
    2. Save your thumbs and hands.
    3. Seamlessly do static or reciprocating pressure at anytime during the glide stroke.

    Gliding with a pressing tool can be a little awkward at first, but I have 2 tricks to make it easy.

    First, do an exploratory stroke WITHOUT a massage pressing tool.

    Trick #1: Exploratory Strokes

    For an exploratory stroke glide with your favorite body parts (hands, fists, knuckles, forearms).

    As you glide note the tight and tender areas along the way. Now you have a basic mental map of the areas you may want to focus on.

    With that map in mind pick up a massage pressing tool and start to glide, which brings us to trick #2.

    Trick #2: Don’t keep the same pressure through the entirety of the initial pressing tool stroke.

    So, say you’re gliding with deep pressure in the lamina groove with a T-bar.

    If you initially do the whole stroke with deep pressure, you’re going to hit some tight spots on the map, and it’s NOT going to feel so relaxing to the client when you slam into them with that deep pressure.

    So, instead of slamming into tight spots as you glide, back of the pressure as you approach them.

    How will you know where they are?

    Use your map.

    So, this means that you’ll go over the first tight spot with the lighter pressure, then you’ll stop, back up a little and do your magic (possibly deeper static pressure) to provide pain relief to that area.

    The whole stroke looks like this: Starting stroke with a deep pressure glide using a T-bar…tight spot coming up…lighten up a little…over it…stop…back up…on it…find the pain relief pressure for that spot…make the client sigh…done…glide on with deep pressure…next tight spot coming up…lighten up just before you make contact…over it…stop…back up…on it…pain relief provided…move on and repeat this same process until the end of the stoke.

    By the way, my relaxation glide stroke is pretty damn slow. So, it’s not like I’m jamming on the brakes when I stop and pause on a tight/tender spot.

    Personally, I think that stopping and addressing tight/tender areas when doing a relaxation massage (in a relaxing way) is what separates an average relaxation massage from a good relaxation massage.

    Okay, sounding pretty good so far?

    Well, here’s the bad news. When you actually glide with a massage pressing tool for the first time this is what’s going to happen:  The massage tool is going to fall out of your hands OR you’re going to squeeze so hard your hand will hurt.

    Here’s how you fix that: Use two hands.

    In this video I demonstrate how to hold a TheraPress with two hands while gliding.

    Okay, got it, Mark, two hands…glide but not too much pressure at first…slow the stroke down…then come back to the tight spot on Thursday, but not Friday…

    Yeah, let’s simplify things for gliding with a massage pressing tool.

    1. Do an exploratory stroke WITHOUT the massage tool.
    2. Use two hands to brace the tool.
    3. Lighten up on the pressure when you first come up to tight spots.

    Boom!

    If you’re getting serious about using massage tools to save your hands, check out How to Hold a Massage Tool.

    Massage Tools Online Class

    And if you want to get really serious about saving your hands and using a massage tool to deliver focused pressure, I have an online, home-study class for you: How to Use Massage Tools (Fearlessly and Effectively). 


  • Which is the Best Massage Tool for a Massage Therapist?

    Which is the Best Massage Tool for a Massage Therapist?

    Which is the best massage tool for a massage therapist?

    That’s an easy answer.

    The massage tool that works best for you (the massage therapist).

    The harder question is: Which massage tool works best for you?

    To answer that question, you need to ask yourself more questions:

    1. Does the massage tool stress my hand when I use it for a few minutes?

    In 2018, I wrote a massage tools article for Massage & Bodywork Magazine. I wanted to write exclusively about the T-bar because it was my go-to massage tool.

    But the editor rejected that idea and asked me to do a comparative massage tools article. So, I went to the local massage supply store and played with the massage tools on display.

    I eliminated 80% of the massage tools for the article by simply pressing them into the display table. If I had hand or wrist discomfort and couldn’t figure out a way to grip the massage tool so that I didn’t—adios.

    By the way, I didn’t care if the packaging said “Voted Best Massage Tool for Feet” or “Designed by NASA Engineers!”, if it hurt my hand, it hurt my hand. Period.

    I should point out something here: Like any hand-held tool, a massage tool is going to bother something (your palm, fingers or wrist) if you hold it too long.

    That said, the massage tool that you don’t want to buy causes immediate discomfort when you hold it AND scores low on question #2.

    2. Can I hold the massage tool comfortably in multiple ways? 

    Basically, when you’re using any massage tool you will need to mix up your holds.

    As I mentioned above, if you hold anything one way for a long period of time (even a pencil), you are going to over-stress certain joints and muscles.

    When you use different holds you spread the workload (and stress-load) out.

    You can spread the workload out even more by becoming ambidextrous with the massage tool. Don’t worry about that right away. That will come with time.

    How do you figure out different holds?

    You allow your hands to experiment with different holds. I call this adapting to the massage tool.

    Adapting to the Massage Tool

    If the massage tool works well in the cervical erectors with one hand, but hurts your hand in the thoracic erectors because you have to tighten your hold, try using two hands on the massage tool.

    More about holding a massage tool here.

    So, adaptation isn’t only limited to holds. Adaptation should also influence how you use the massage tool.

    How you hold a massage tool and how you use a massage tool often work together.

    In other words, trying different holds will often result in you being able to use the massage tool in more areas than you first thought you could.

    In this video, I demonstrate various adaptation responses when using a long T-bar.

    https://www.youtube.com/watch?v=-1uF_FkjBDs

    The last question to ask regarding which massage tool is best for you is:

    3. Is the massage tool only good for one pressure or can I use it for light, medium, and  deep pressure? 

    A lot of massage tools are fine for light pressure, but for medium or deep, not so much.

    To do medium and deep pressure, I advocate leaning your body weight into the massage tool, rather than pressing with your upper body.

    Massage tools with handles are ideal for leaning because they provide enough surface area to lean into.

    That’s why I’m not a big fan of the Jacknobber for medium to deep pressure.

    It doesn’t have a place for me to rest my hand comfortably. And it makes my hand ache when leaning to do medium or deep pressure.

    Putting it All Together

    All that to pick out one freakin’ massage tool, Mark!

    Well, finding one or two massage tools that are perfect for you are going to change how you do massage forever.

    When you do you’ll be able to increase your massage max while saving your body.

    Here’s the criteria I use for picking the best massage tool on the market (aka, the best massage tool for you):

    1. The massage tool doesn’t stress my hand when I lean into it for a reasonable amount of time.

    2. I can comfortably hold the massage tool many different ways.

    3. The massage tools is good for light, medium and deep pressure.

    How to Use Massage Tools Fearlessly and Effectively Online, Home-Study Course (2.5 CEU)

    If you get competent with massage tools you can increase your massage max (make more money) and brand your massage.

    It just takes knowing what to do and a little practice. Get competent with massage tools here: How to Use Massage Tools Fearlessly and Effectively (2.5 CEU).

  • Take the Strain Out of Occiput Work

    Take the Strain Out of Occiput Work

    Over the years occiput work beat up my fingers and thumbs. At one point, my hands ached so bad that I thought about taking occiput work out of my massage.

    But instead I experimented for about a year and discovered that when I changed one bad habit and found other ways to get the job done, my hands felt better. Here’s what I did.

    The Supine Habit

    In massage school I learned how to do occiput work when the client was supine. The idea was this: the weight of the client’s head on your fingertips would be the force that “generated” the pressure. Do it this way and there would be less strain on your hands.

    But my hands told a different story. They ached from years of supine occiput work. When I started to pay attention to my hands, I realized that supine occiput work wasn’t just about supporting the weight of the client’s head with my fingers. More times than not it also involved pressing up into the client’s skull in order to generate enough pressure.

    It was time to try prone.

    Go Prone

    I was first introduced to prone detail work while training to be a neuromuscular massage therapist. We used a T-bar in the lamina groove.

    I liked prone work because I could generate the pressure I needed by simply leaning into the client with my body weight. Using the T-bar in the lamina groove inspired me to experiment with my thumbs and knuckles in the lamina groove.

    1. Thumbs and Knuckles

    A middle knuckle is a wonderful thing. It’s especially helpful for prone occiput work. Why? Because you can generate all the pressure you’ll ever need (and then some) by leaning in with your knuckle.

    Another great prone occiput technique is double thumbs braced together. I use double thumbs for light to medium pressure and I use my middle knuckle when I have to apply deeper pressure.

    The key to these techniques is to use the massage table to help support your body weight.

    In this video, 2 Prone Occipital Massage Techniques, I show you how to work the occiput using double thumbs and a middle knuckle.

    1. T-bar or L-bar

    6 Finger Pic

    A great way to give your fingers a break is to you use a T-bar or a L-bar. In the occiput, you can use a T-bar or L-bar even more precisely than you could use your thumb.

    In addition, you don’t need to exert a lot pressure because the tips of these massage tools are small and the pressure is focused. And when you position your hand so that it rests against the client’s upper trap, it couldn’t be easier on your hands.

    In this video, T-bar for Occiput and Back Muscles, I show you some easy-to-pick-up T-bar techniques for the lamina groove and occiput.

    1. Fourth and Fifth Fingers

    Take a look at your hands. Which fingers do you use most during a massage?

    My finger usage rating, from most used to least used, goes like this: 1. Thumb, 2. 2nd finger, 3. Middle finger, 4. Fourth finger, 5. Pinky.

    Another way to gauge finger usage during a massage is to ask yourself: if I only had time to cut three fingernails on each hand before I did a massage, which ones would they be? My guess is that your fourth finger and pinky would not make the cut. (Pardon the pun.)

    If you really love supine occiput work and don’t want to remove it entirely from your massage repertiore, try using your middle, fourth and 5th (pinky) fingers when doing supine occiput work.

    It will feel weird at first, but after a couple of times, you’ll fingers will adapt. Once they do, you can give your go-to fingers a break when doing supine occiput work.

    Where There’s a Will There’s a Way

    You can do some great occiput work without killing your hands. Here are my three favorite techniques:

    1. Prone occiput work with a knuckle or double-barred thumbs.
    2. Prone occiput work with a T-bar or L-bar.
    3. Occasional supine occiput work with non-dominant fingers (for me my 3rd, 4th and 5th fingers).

    I am 100% convinced that by breaking bad habits and thinking creatively you can do a great massage and stay out of pain.

    Save-Your-Body, Online, CEU Course

    A while back I almost quit massage because of pain and injuries.

    Then I spent a year revamping my massage to see if I could massage pain-free. That’s where incorporating the lower half of my body into the massage came in along with a bunch of other strategies that ultimately saved my massage career.

    I pulled all that first-hand experience together and made a live CEU class which I taught for about 5 years. During those 5 years I listened to the massage therapists taking the course and worked out the learning kinks.

    Now I have an online version of the live body mechanics class that is kink-free and will help you massage pain-free.

    Check it out here.