Category: Massage Tools

  • How to Fearlessly use a Contoured Edge Massage Tool

    A massage tool with a contoured edge may look like there’s going to be some blood on your sheets after the massage is over, but I have a way to make it less scary: Put a guide finger/thumb (from the hand that’s not holding the massage tool) next to the contoured edge.

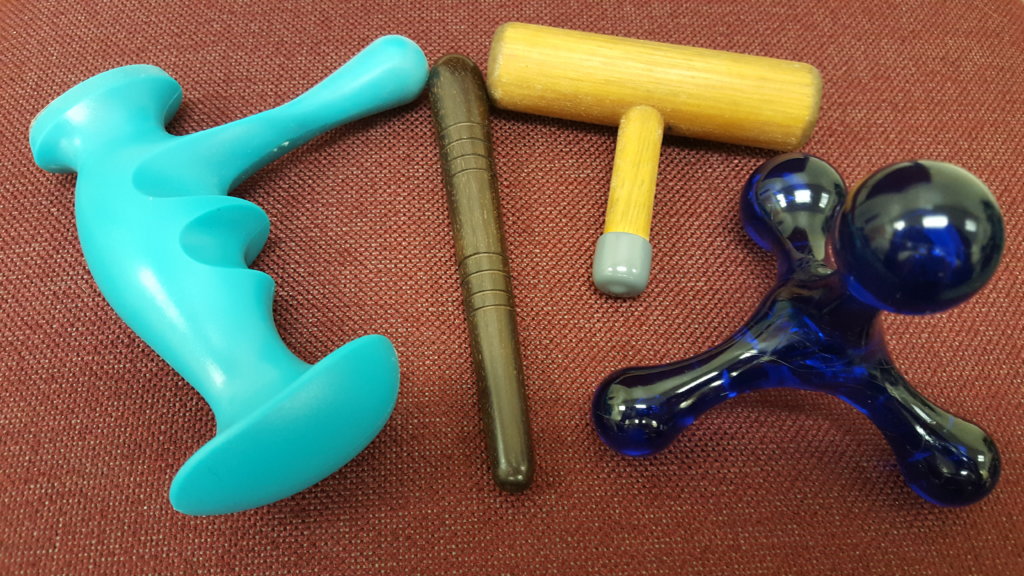
    I’m going to show you how I do that in a minute, but, first, let’s look at two examples of tools with contoured edges.

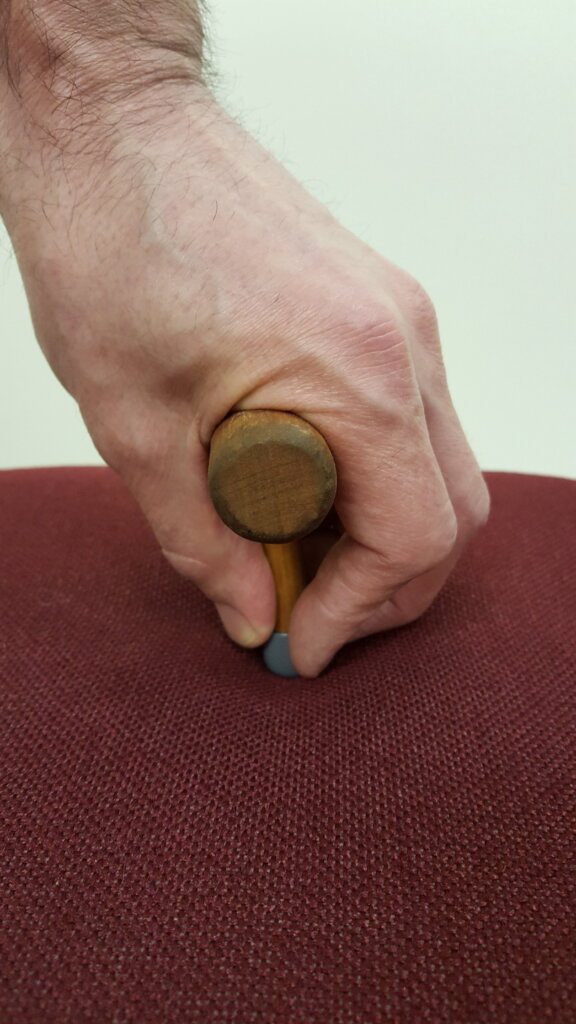
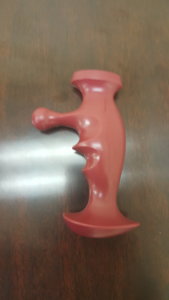
    This is a wooden tool.

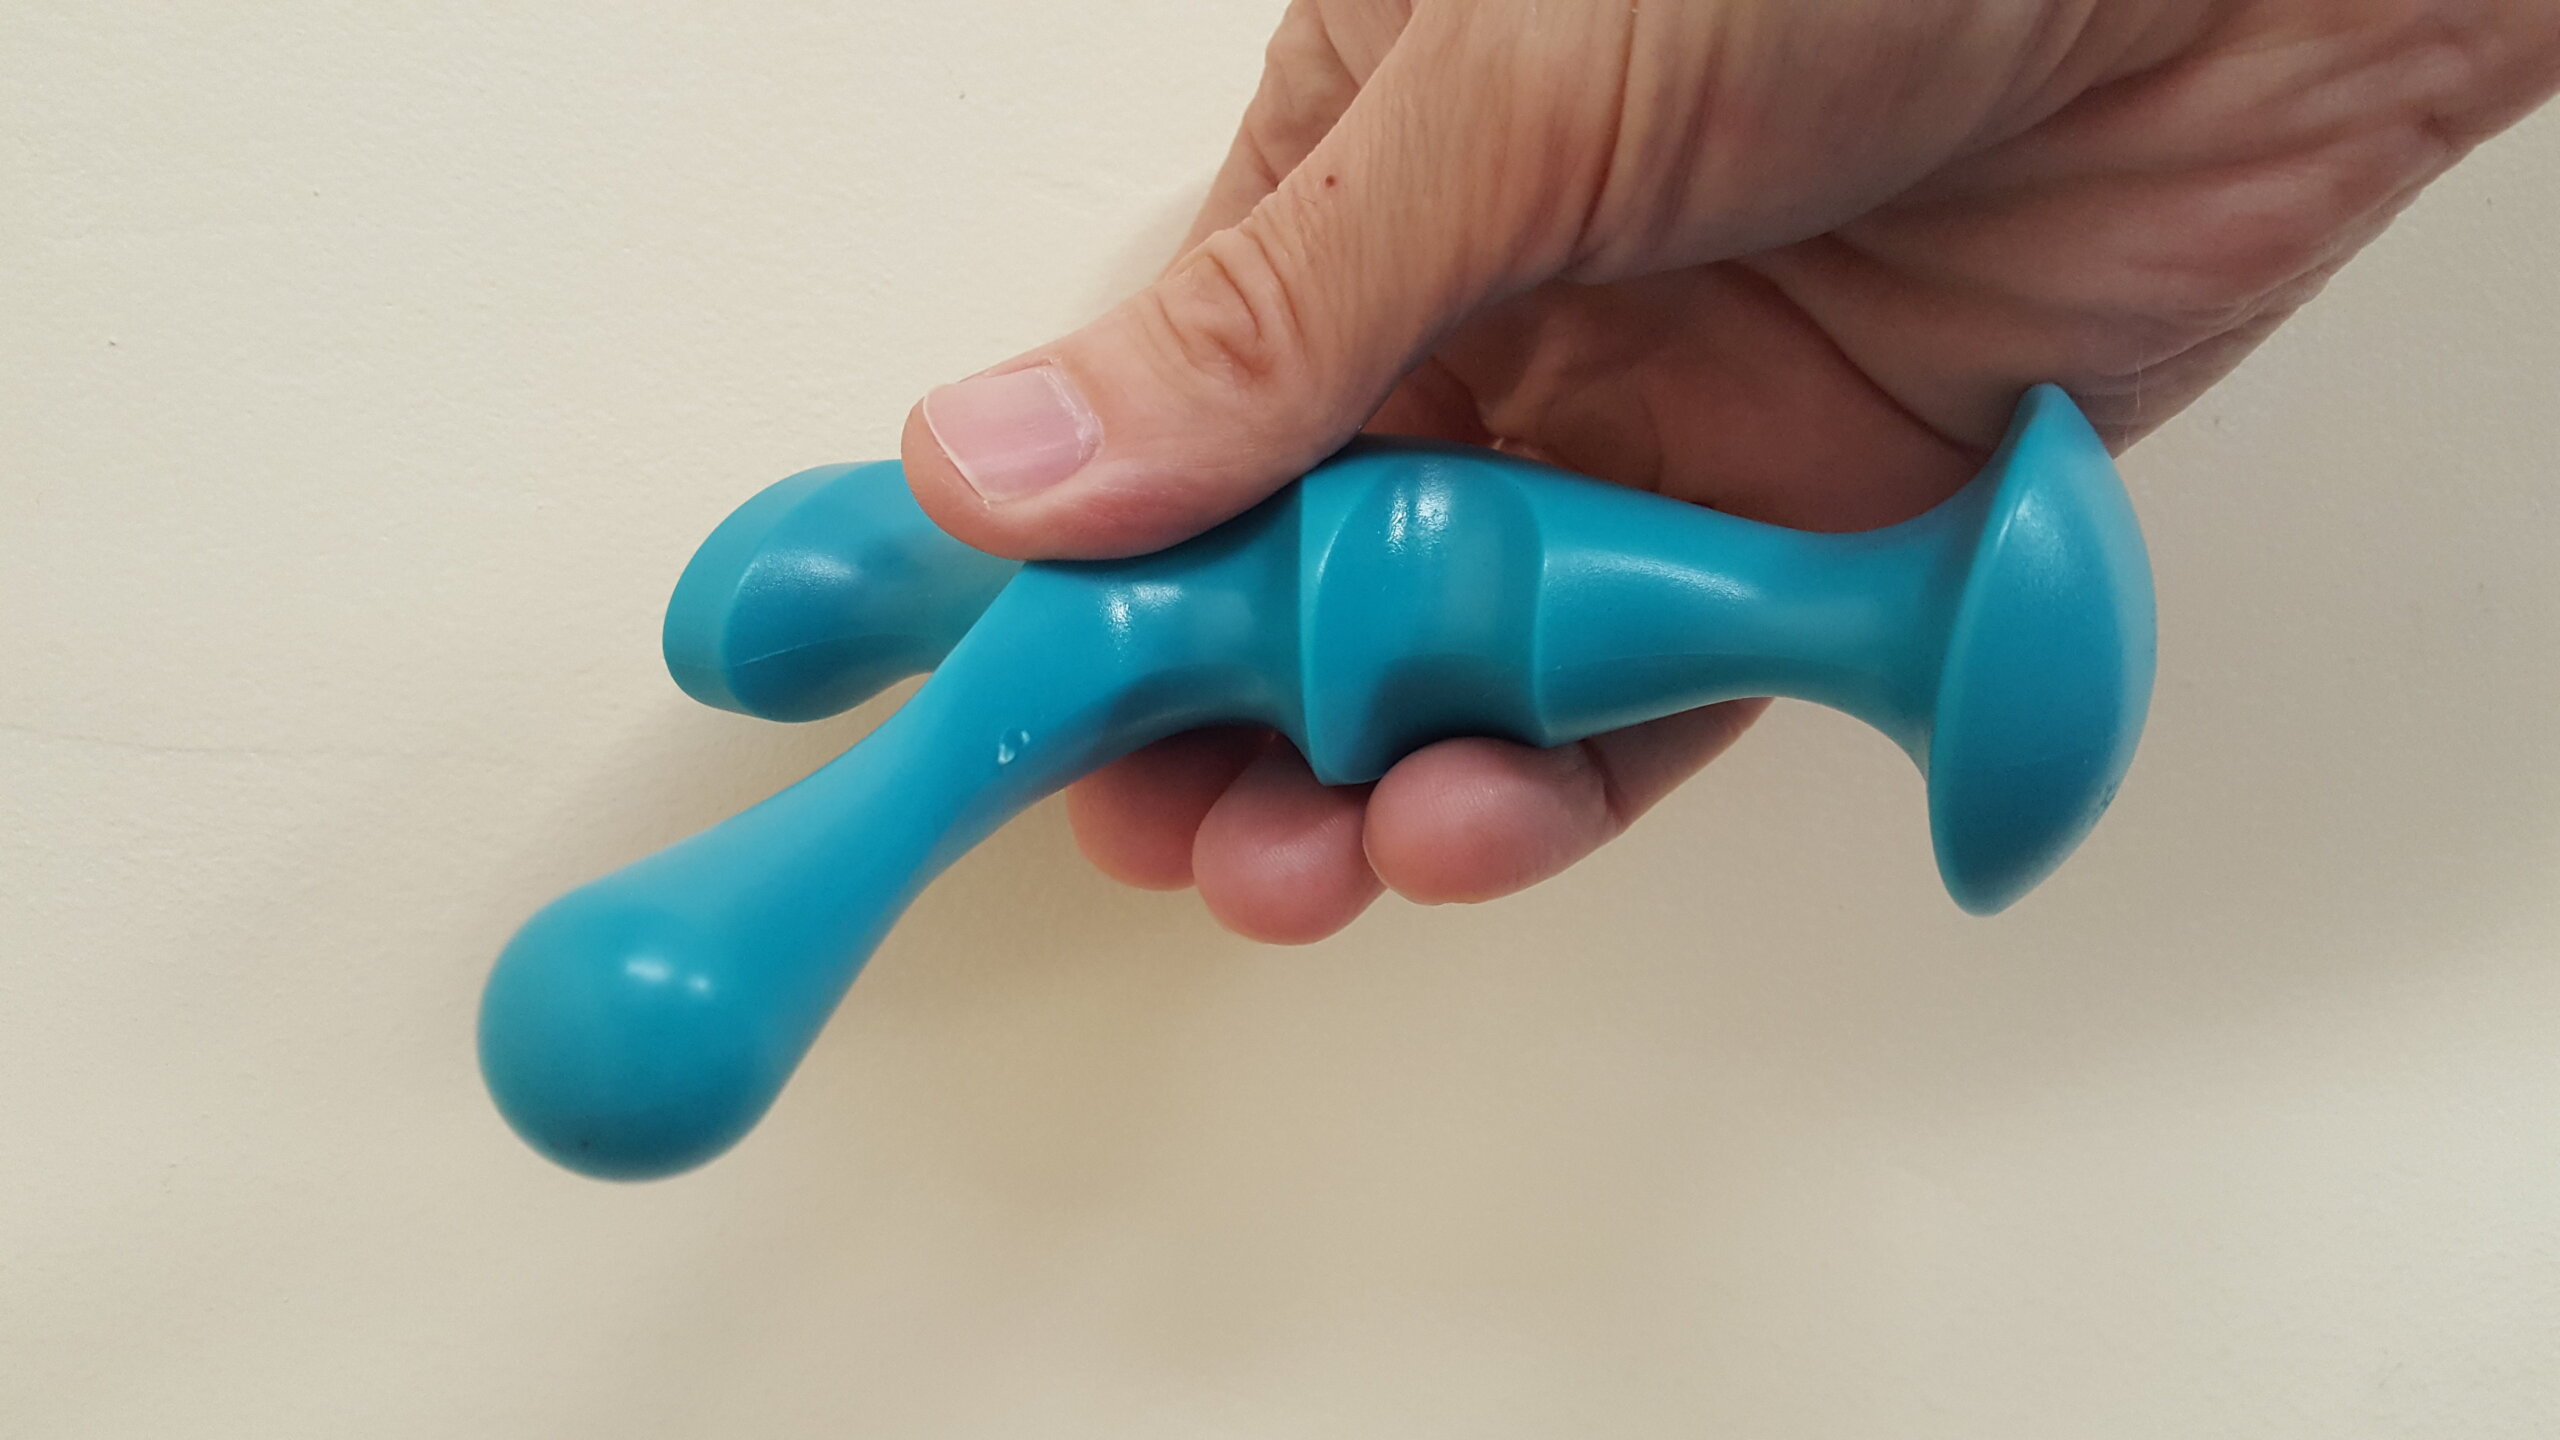
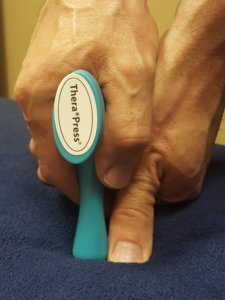
    This is a plastic tool with a contoured edge.

    Yeah, they’re a little scaring looking.

    Time to make them less scary.

    Ready?

    Take your thumb or finger from the hand that’s not holding the massage tool and put it next to the contoured edge of the massage tool.

    That guide finger/thumb is a sensor.

    And it’s wired to your brain.

    So, you’re going to be able to maintain sensitivity when using the contoured edge.

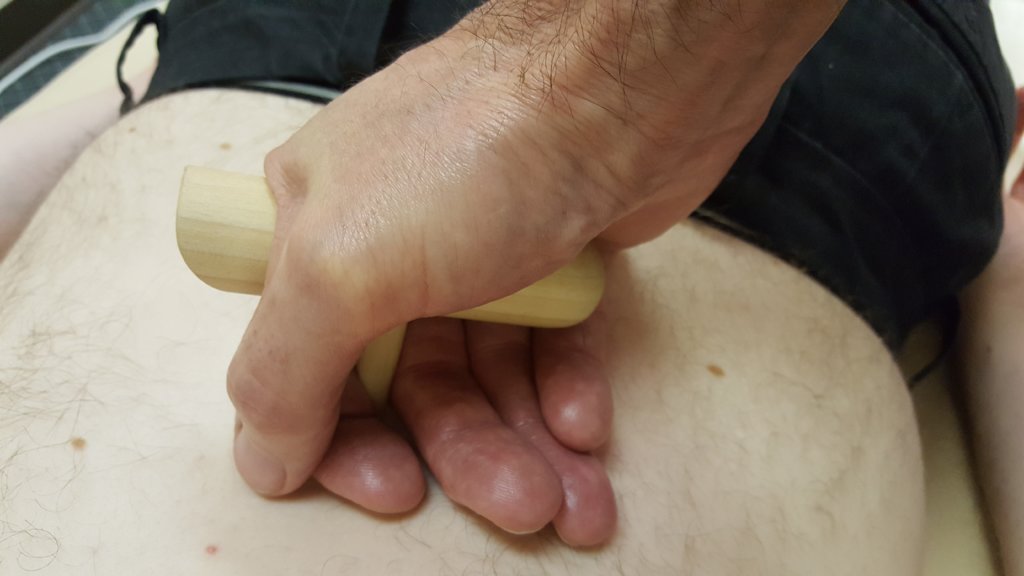
    Now, slide your guide finger/thumb over part of the edge on the massage tool.

    You can use that finger/thumb to help you press and get very precise pressure.

    Wait, Mark, why do all that?

    Why not just press using the tip of the T-bar?

    1. Spread out the pressure.

    You can, but if an area is too sensitive for pinpoint pressure (tip of the T-bar), the contoured edge of the T-bar might just do the trick.

    Why?

    The contoured edge is not as pinpoint as the tip of the T-bar and it’s more likely to contact surrounding tissue outside the pain area.

    That could reduce pain through distraction.

    In other words, it’s harder for the client to feel (focus on) the pain when other tissue around the pain area is being stimulated.

    There are more things you can do with the contoured edge.

    2. Cross-Fiber Friction

    The contoured edge is great for cross-fiber friction while being kind to your thumbs.

    It’s easy.

    Ready?

    Find your spot.

    Press down with the contoured edge and your guide finger.

    Have at it going back and forth across the affected fibers.

    The contoured edge can also be a great tool for palpation.

    3. Palpation

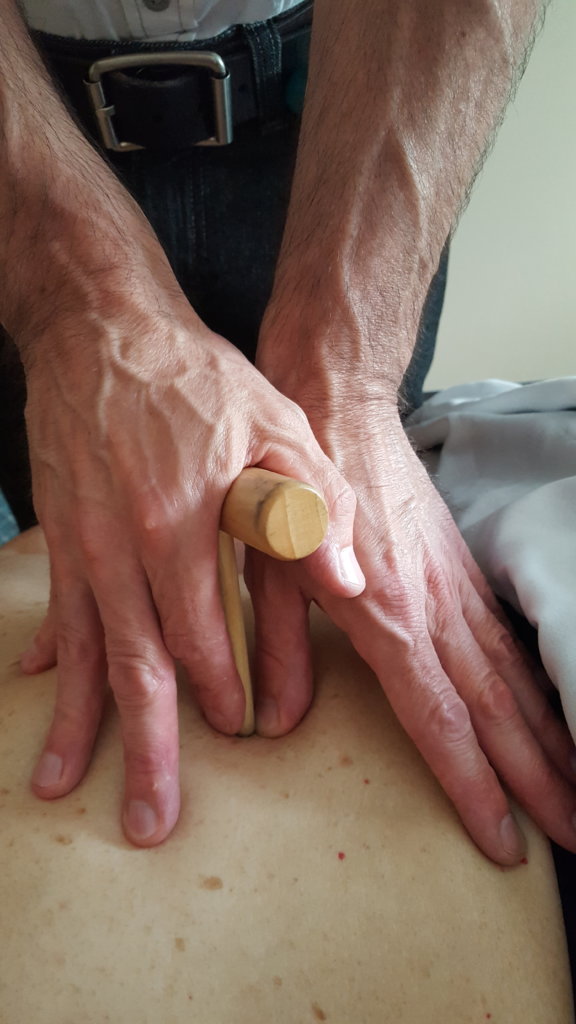
    To find tight/tender areas I place the contoured edge down on the area I want to examine.

    Next comes my guide finger/thumb.

    I press down on the contoured edge.

    I go back and forth east and west and/or north and south creating contrast as I press.

    When I find an area of tightness I can home in on it by pressing the guide finger onto the contoured edge where the pressure is needed.

    Fearlessly Using a Contoured Edge Massage Tool

    Using a contoured edge is not so scary anymore, right?

    Keep that guide finger/thumb next to the contoured edge to sense and palpate.

    And use that finger to help apply more precise pressure on the contoured edge when you need to get more exact.

    Here’s a quick video to help you out:

    More about using massage tools here.

    Massage tools for sale soon at Pain-Free Massage Therapist.

    Also, if you want to get crackin’ on getting competent with massage tools, I have an online, home study course: How  to Use Massage Tools and Fearlessly and Effectively.


  • Massage T-bar: Get Sensitive with Pressure

    How do you get good at applying the right pressure with a massage T-bar?

    Don’t press and hold the T-bar when you’re first working on an area. (I’ll explain why later).

    Instead…

    1. Find the area you want to work with your finger, knuckle or thumb.

    2. Then press down with the T-bar to the depth of what was needed to find that area with your finger/thumb.

    3. Next ease up on your pressure slightly.

    4. Last step: Increase the pressure until it feels like the same pressure you would use to work the area with your finger or thumb (probably similar to your palpation depth).

    This seems pretty straightforward, right?

    But it’s slightly more complicated than that.

    Here’s what I mean.

    Grip Versus Hold

    If you grip the T-bar like this…

    …or if you grip any massage tool too tight or for too long the tool is going to hurt your hands.

    Been there, done that.

    Okay, but isn’t gripping going to give me fine-tune control of the T-bar, Mark?

    Yes, but there’s another way to have great control over the T-bar without gripping.

    It starts with a relaxed hold.

    Relaxing your holding hand does two things.

    1. The more your T-bar-tool-holding hand is relaxed, the more it needs help from the other hand to keep the T-bar upright.
    2. Two hands supporting the T-bar together make it easier to hold the the T-bar without gripping.

    Supporting the Massage T-bar with Two Hands

    Here’s a picture of a relaxed hand hold with support from the non-holding hand.

    If I look way comfortable here, it’s because I am.

    See all the points of contact (fingers on back) that are supporting the T-bar?

    That’s a really stable configuration.

    The T-bar is not going anywhere and my hands can chill.

    But where’s the control if I crank up the pressure?

    Those fingers are going to have to tighten around the T-bar, right?

    Not if I pin the T-bar between my hand and the tissue I’m working on.

    Pinning the T-bar

    How do I pin the T-bar?

    I lean into it.

    So, instead of pressing the T-bar using my shoulder and arm, I “balance” some of my body weight on the T-bar.


    My body weight is doing the work.

    How much I lean determines how much pressure I’m exerting.

    Here’s what it looks like sitting:

    I know, balancing on top of a little, wooden T-bar doesn’t seem so fine-tuned.

    But it is once you get comfortable pinning the T-bar.

    This should help you out with pinning and leaning:


    Alright, let’s let’s go over this pressure trick one more time.

    The Massage T-bar Pressure Trick

    Don’t immediately press and hold an area with a T-bar.

    Why?

    Because you want to mimic your thumb with the T-bar.

    To do that you need to establish different “feels”.

    You need the palpating the trigger point feel (the deeper pressure).

    And you need the lighter pressure feel.

    Now you have the two end points to work in between.

    Here are the finding-the-right-pressure steps:

    1. Find the area you want to work with your finger, knuckle or thumb.

    2. Then press down with the T-bar to the depth of what was needed to find that area with your finger/thumb.

    3. Lighten your pressure a little.

    4. Slowly increase the pressure (by leaning) until it feels spot on with the pressure you’d be pressing with your finger or thumb to work that area.

    How to Use Massage Tools Online, Home-Study CEU Course

    This online, home-study course will give you everything you need to know to get competent with a massage tool: How to Use Massage Tools  Fearlessly and Effectively (2.5 CEU).

    Once you’re feeling comfortable with using a massage tool you can increase your massage max and have a massage brand that stands out from the crowd.

  • TheraPress Trigger Point Massage Tool Review

    TheraPress Trigger Point Massage Tool Review

    The TheraPress Trigger Point Massage Tool (say that 10 times fast) is a massage tool that I’ve grown to like once I figured out how I could adapt to some of its design challenges.

    Challenges When Using a TheraPress Trigger Point Massage Tool

    First, it’s a heavy tool.

    Believe it or not, an ounce or two makes a big difference in terms of hand fatigue if you’re using tools often during a massage.

    Heavy also means you’re gripping harder to keep the tool from falling over.

    Another challenge with the tool is that the handle is big which also means more over-gripping.

    I know, that’s a lot of complaining about a massage tool that I say I’ve grown to like.

    But the heaviness and big handle can essentially be reduced to non-factors with one simple adaptation.

    1. Use the TheraPress Trigger Point Massage Tool as a two-handed massage tool.

    Why Two Hands Are Better Than One

    When you have a two-handed hold on the TheraPress Trigger Point Massage Tool, you don’t have to grip hard. The support/guide hand provides stability so that you can relax the other hand on the handle.

    Once you get competent with two-handed holds, the TheraPress Trigger Point Massage Tool is good for pressing into big muscles, like hamstrings, quads, calves, and back muscles.

    I also use it for light to deep pressure on feet.

    Oh, and the thumb-sized knob on the end makes it a good, light-to-medium pressure glide/press massage tool when using a two-handed hold.

    I put this video together to demonstrate the press and glide-press techniques I do with the TheraPress Trigger Point Massage Tool.

    For the basics on using massage tools, check out Why You’re Not Using Your Massage Tool.

    My Bottom Line on the TheraPress Trigger Pioint Massage Tool

    Use two hands with the TheraPress Trigger Point Massage Tool and you’ve got a decent pressing tool for light to deep pressure on legs, glutes and muscles in the lamina groove.

    And it’s a solid glide-press, two-handed tool for light to medium pressure.

    For smaller hands (6.5 inches or less)…

    Source: choosehandsafety.com

    …you might want to try the TheraPress 2 Trigger Point Massage Tool.

    P.S. If you want to learn how to incorporate massage tools into your massage so that you can deliver precise pressure without hurting your hands, I have an online, home-study massage course for you.

    Massage Tools CE Course

    Objective: To be able to seamlessly incorporate massage tools into a relaxation/pain-relief/medical massage so that you can deliver focused pressure without hurting your hands.

    Byproduct: You’ll be able to do more massages pain-free.

    Class: How to Use Massage Tools (Fearlessly and Effectively)

    CEU; 2.5

    Type: Online, home-study (lots of videos and no fluff material)

    Guarantee: Money back if you don’t like the class.

    Final Words: Massage tools will not feel awkward in your hands once you use a guide finger and a couple of other techniques. Promise.

  • Why You’re Not Using Your Massage Tool

    Why You’re Not Using Your Massage Tool

    Are you using your massage tool? Hmm…let me guess why you’re not.  Maybe it’s because that hunk of wood or piece of twisted plastic doesn’t let you feel anything, and you have no idea how hard you’re pressing. I hear ya, but hold on, there’s a way around these problems. Use a guide finger next to the tip of the massage tool.

    Before I get into the how, let me introduce four pressing tools that are dying to have a guide finger next to them.

    Starting at the left and going to the right we have TheraPress, massage stick (Mu-Xing Pointer), T-bar (my massage therapist friend, Matt, makes T-bars–I’ll have more details soon) and Jacknobber II. Here’s how I use a guide finger with each of them:

    How to Use a Guide Finger

    1. With your guide finger palpate to find the area you want to work.
    2. Once you find the area press to determine the pressure you want to apply.
    3. Now you’re ready to press the massage tool into that area.
    4. After you’ve pressed that area with the massage tool, put your guide finger back on the area to re-establish sensitivity and recalibrate for the next press with the massage tool.

    Alright, let’s take these tools out for a spin.

    What a Guide Finger Looks Like in Action

    Here are some action shots of a guide finger next to the massage tool.

    Mu-Xing Pointer


    Jacknobber II


    Thera*Press

    T-bar

    You’re guide finger could be a knuckle.

    Or it could be a bunch of fingers, bent, also known as a fist.

    Essentially, any part of the hand that’s not holding the massage tool can be a “guide” for the massage tool.

    Okay, that’s a wrap…not quite…

    The Little Bit Extra

    There’s a process here that you’ll need to refine. You remember that the guide finger finds the tight spot and figures out the pressure that needs to be applied, then in comes the massage tool, right?

    Well, there’s a little more to it. To a large extent you can sense how much pressure you were exerting with your guide finger and then try to match that with the tool in the other hand. But you do have an object in your hand that’s not neurologically wired to your brain. Some guessing is required.

    You’re going to make up that guessing gap by getting feedback from non-paying and paying clients when you’re practicing with the massage tools.

    For paying clients, the feedback will come in the form of reactions, like the verbal “Wow, that feels good” or the more subtle fidget because something is off.

    Also, with paying customers use the massage tool in short spurts in case your pressure is off.

    Lastly, have someone work on you with the massage tool so that you get a firsthand feel. This way of learning works best for me.

    Don’t Sacrifice Your Thumbs

    If you’ve come this far in the article, you’re probably in pain or sick of sacrificing your thumbs to the massage gods.

    If you’re ready to make a change, it’s time to break out that massage tool. Get comfortable with it by using a guide thumb, finger, or hand. Get you reps in by using it in every massage (30 seconds or more). Remember to:

    1. Use the guide finger to find the tight spot.
    2. Establish pressure with the guide finger.
    3. Press the massage tool into the tight spot.
    4. Re-establish pressure and sensitivity with the guide finger.

    If you’re new to massage tools, I would do this:

    1. Learn the fundamentals: Massage Tools will Save Your Hands
    2. Tweak the fundamentals: How to do very Precise Pressure
    3. Tweak some more: Massage Tools—Working in Light to Medium Pressure


    Massage Tools Online CEU Course

    If you want to be able to use a massage tool with every massage so that you can save your hands and deliver focused pressure like nobody else can, this online course will get you there.

    I taught it live for many years and now I’ve made the online version, There are lots of videos and if you have any questions while you’re taking the course, you can always ask me (mark@makethemostofmassage.com).

    Check it our here: How to Use Massage Tools (Fearlessly and Effectively).