Category: Massage Pain-Free

  • The Key to Massage Longevity: Massage Options

    The Key to Massage Longevity: Massage Options

    Here’s the foundation to staying out of pain when doing massage: massage options (as in different ways to get the job done).

    I’m not talking about advanced massage techniques here.

    I’m talking about options for pressing, gliding, squeezing, stretching and vibrating soft tissue without causing yourself pain.

    For example, say you were taught to use your thumb to press on tight areas. Six months into massage you get pretty good with your thumb and it becomes waaaay comfortable to do, right?

    But guess what happens in a year?

    Your thumb hurts (trust me).

    Now what?

    Well, if you continue to be a one-trick-pony you’ll soon be talking about massage like this: “Back in the day, when I did massage….”

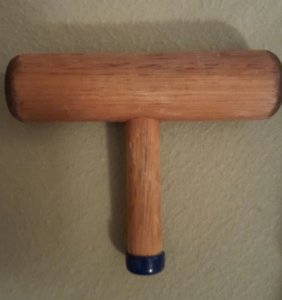
    Here’s an alternative to burning out your thumb(s): You find other options to pressing with your thumb, like two thumbs barred together, one thumb over a thumb, knuckle(s), knuckle and a thumb together, massage tools (like a T-bar, L-bar, My Precious, TheraPress, Effleurage T-bar, JackNobber II, Pointer) and the list goes on.

    But I need to be honest, having more massage options is not easy to do.

    In fact, here’s what’s probably going to happen. You’ll be gung-ho about finding more massage options.  Then you’ll do this.

    Nothing.

    No judgment here.

    I was the king of doing nothing when it came to acquiring more massage options.

    For one, I didn’t know what to try. And, two, I was afraid to try anything.

    Here’s how I changed that.

    To address “what to try” I broke down massage options into three categories: 1. Pressing, 2. Gliding, 3. Squeezing. Then I started experimenting.

    To get you started experimenting, I’m going to offer an alternative option to the traditional way of pressing, gliding and squeezing. Think of my suggestions as fodder to fuel your experimentation so that you can come up with your own strategies and techniques that work best for you.

    Pressing Option

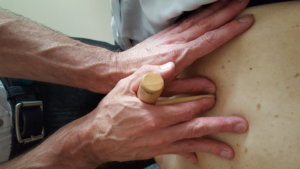
    Instead of pressing with your thumbs use a massage tool. Here’s an example of what I mean:

    Gliding Option

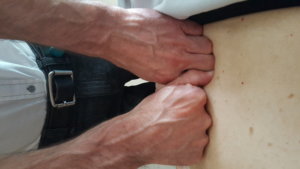
    Instead of gliding with your palms or forearms, try fists.

    Squeezing Option

    Instead of squeezing with one hand, do a two-handed press.

    So, go ahead try one…I’ll wait…anytime…just pick up that massage tool…or put your fists down on that back…or press that trap between your knuckle and thumb…hmm…not happening, is it?

    I know, you’re afraid. 

    I was, too–because a mistake would mess up my flow.

    Here’s how my brain played out me interrupting the flow of the massage: I’m massaging along…I find a tight spot…I pick up the massage tool and jab it into the tight spot and the client screams, then gives me a bad review on Yelp…I lose my confidence, close my office and start hording cats…at least, they won’t know how crappy of a massage therapist I once was…

    Flow is everything to a relaxation massage, right? Mess up the flow and you mess up the massage.

    But is that really true?

    I mean, yeah if you’re doing a herky-jerky massage, absolutely. But if you have a couple of hiccups, no way.

    You can always get back in the flow AND you can practically avoid any flow interruptions while gaining more massage options by first (1) working on friends and colleagues, (2) working on a client who you can get feedback from without disrupting the massage, (3) initially trying out the new technique for a very short period of time (seconds). 

    Okay, we got flow under control, what else do you need to know?

    How about how many massage options do you need?

    More than when you started massage.

    More than 6 months ago.

    More than a month ago.

    In other words, the “more” should never stop.

    The more massage options you have, the less likely you are to overuse a joint or muscle. And the more prepared you’ll be to deal with adversity, like an injury or challenge.

    How to Deliver Deep Pressure Without Hurting Yourself

    Don’t over-think massage options.

    Try some of the options that I’ve suggested and get your brain churning.

    If you need more help, email me. I’m here to help:-)

    I also have a book and online, home-study classes.  


  • How to Do VERY Precise Pressure

    How to Do VERY Precise Pressure

    There are benefits to treating a tight/tender area with very precise pressure. One, you can sometimes only find the “That’s it!” spot with very precise pressure. Another is that very precise pressure is a more thorough treatment than a massage with less precision. Most clients appreciate thoroughness. If you’ve backed off very precise pressure because it hurts your body or it feels intimidating, here’s how to change that.

    Precise Versus VERY Precise

    In general, I use precise pressure to find areas of tender/tightness. I use a variety of body parts, from big (forearms and fists) to small (thumbs and fingers) to apply precise pressure.

    I use VERY precise pressure to further examine the tender/tight area. However, I only use smaller body parts (thumbs, fingers, massage tools) to apply very-precise pressure.

    While I’m examining the tender/tight area with very-precise pressure, I may find a spot within that area of pain that is more tender or is tighter than the rest of the pain area. (Clients sometimes shout out “That’s it!” when I hit it.) I then treat the “That’s it!” spot using very-precise pressure.

    Here’s an example. Ali comes in with neck and shoulder pain. Using my knuckles around the scapula I find the locus of his pain area in his levator scapulae attachment (precise pressure).

    Next I start examining the area of pain in the levator scapula attachment with my middle knuckle, looking for that exquisitely tender or tight spot (very-precise pressure).

    What to Use to Find the “That’s It!” Spot

    If it hurts your hands to work with very-precise pressure, I have three suggestions:

    1. Combine body parts.
    2. Stack and/or brace (support) body parts.
    3. Combine a massage tool with a body part.

    Pictured below are my 3 favorite ways to deliver very-precise pressure.

    Stacked Fingers/Thumbs

    Try not to press. Instead lean into your fingers/thumbs. The bottom finger/thumb is the primary palpation vehicle.

    Knuckle-Thumb

    In this picture I’m directing my pressure into the middle finger of my left hand. You’ll notice that my right thumb is bent to fit in comfortably next to my left middle knuckle. This is not a mistake. In this case, my thumb’s primary role is for palpation, not for delivering pressure. My right thumb’s companion four fingers form a loose fist. They take most of the weight that I put on that hand, not my thumb.

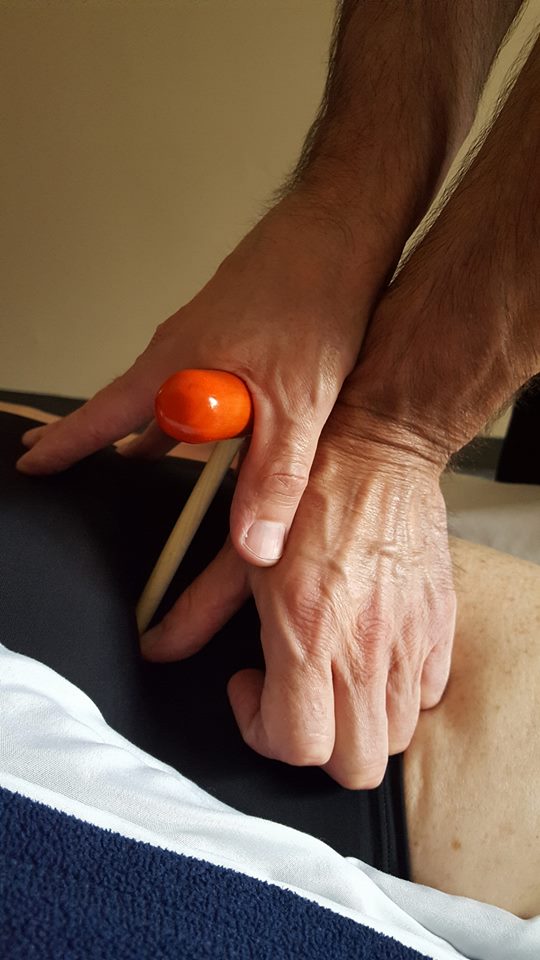
    Tool-Thumb

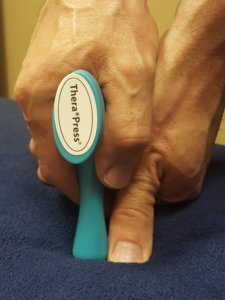
    In this picture my thumb is a support, guide and the primary sensing instrument. I’m directing most of my “leaning” pressure into the tool, not my thumb.

    How to Find the Spots

    The way I find the tight and tender spots within the area of pain  is by creating contrast. I can create contrast by the direction, length and speed of my palpating stroke.

    When I’m palpating Ali’s levator scapulae attachment, I start by going across the grain of the muscle to give me enough distance to “flip” over a potential tight spot. My stroke is going to be fast enough and long enough so that I can feel the full shape of the tight/tender area. If I’m still having trouble feeling anything, I’m going to press deeper as I do the faster, longer stroke.

    Going Very Precise   

    Once I find the tender/tight spots, I’m going to systematically investigate the areas using combined body parts, stacked/braced body parts or a massage tool and finger/thumb combination.

    Next I’m going to use very precise pressure to work hyper-tender or hyper-tight spots within the pain area.

    When applying very precise pressure I usually 1. press, 2. press and pull or 3. press and reciprocate. A massage tool combined with finger or thumb is insanely precise. In this video, I demonstrate how to press, press and pull, and press and reciprocate using a massage tool: T-Bar and L-bar: 3 Ways to Work Muscles Video.

    Also, I like to work the pain area and the “That’s it!” spot from different angles. Lots of my clients love this.

    Too Much

    When you’re doing very-precise pressure, you run the risk of overworking the area. I usually can avoid this by revisiting the area instead of spending a long period of time there.

    I also use a pain scale system approach when I’m unsure of the therapeutic pressure that I should be using. Here’s a quick video tutorial: Pain Scale System Video.

    Lastly, I check in with the client to see how she’s feeling about the area I’m working on.

    Checking in is not foolproof. The client may not have a mental gauge as to what feels like good pain and what feels like bad pain. When in doubt, move off—unless the client knows exactly what works for her.

    Making Very Precise Happen

    Here’s the short version for working with very precise pressure:

    1. Find the pain/tight area by creating contrast.

    You can create contrast by making your exploratory stroke longer and faster than you normally would. If you need more contrast, press deeper as you do your exploratory strokes.

    1. Choose a body part combination that doesn’t cause you pain when you’re pressing.

    My favorites are 1. Stacked thumbs, 2. Knuckle and thumb, 3. Massage tool and thumb.

    1. Systematically work the pain area and the “That’s it!” spot (if there is one) by pressing, pressing and pulling or pressing and reciprocating.

    Being very precise can help your client with her pain condition and doesn’t have to cause you pain.

    Massage Tools Online CEU Course

    If you want to be able to use a massage tool with every massage so that you can save your hands and deliver focused, precise pressure like nobody else can, this online course will get you there.

    I taught it live for many years and now I’ve made the online version, There are lots of videos and if you have any questions while you’re taking the course, you can always ask me (mark@makethemostofmassage.com).

    Check it our here: How to Use Massage Tools (Fearlessly and Effectively).

  • TheraPress Trigger Point Massage Tool Review

    TheraPress Trigger Point Massage Tool Review

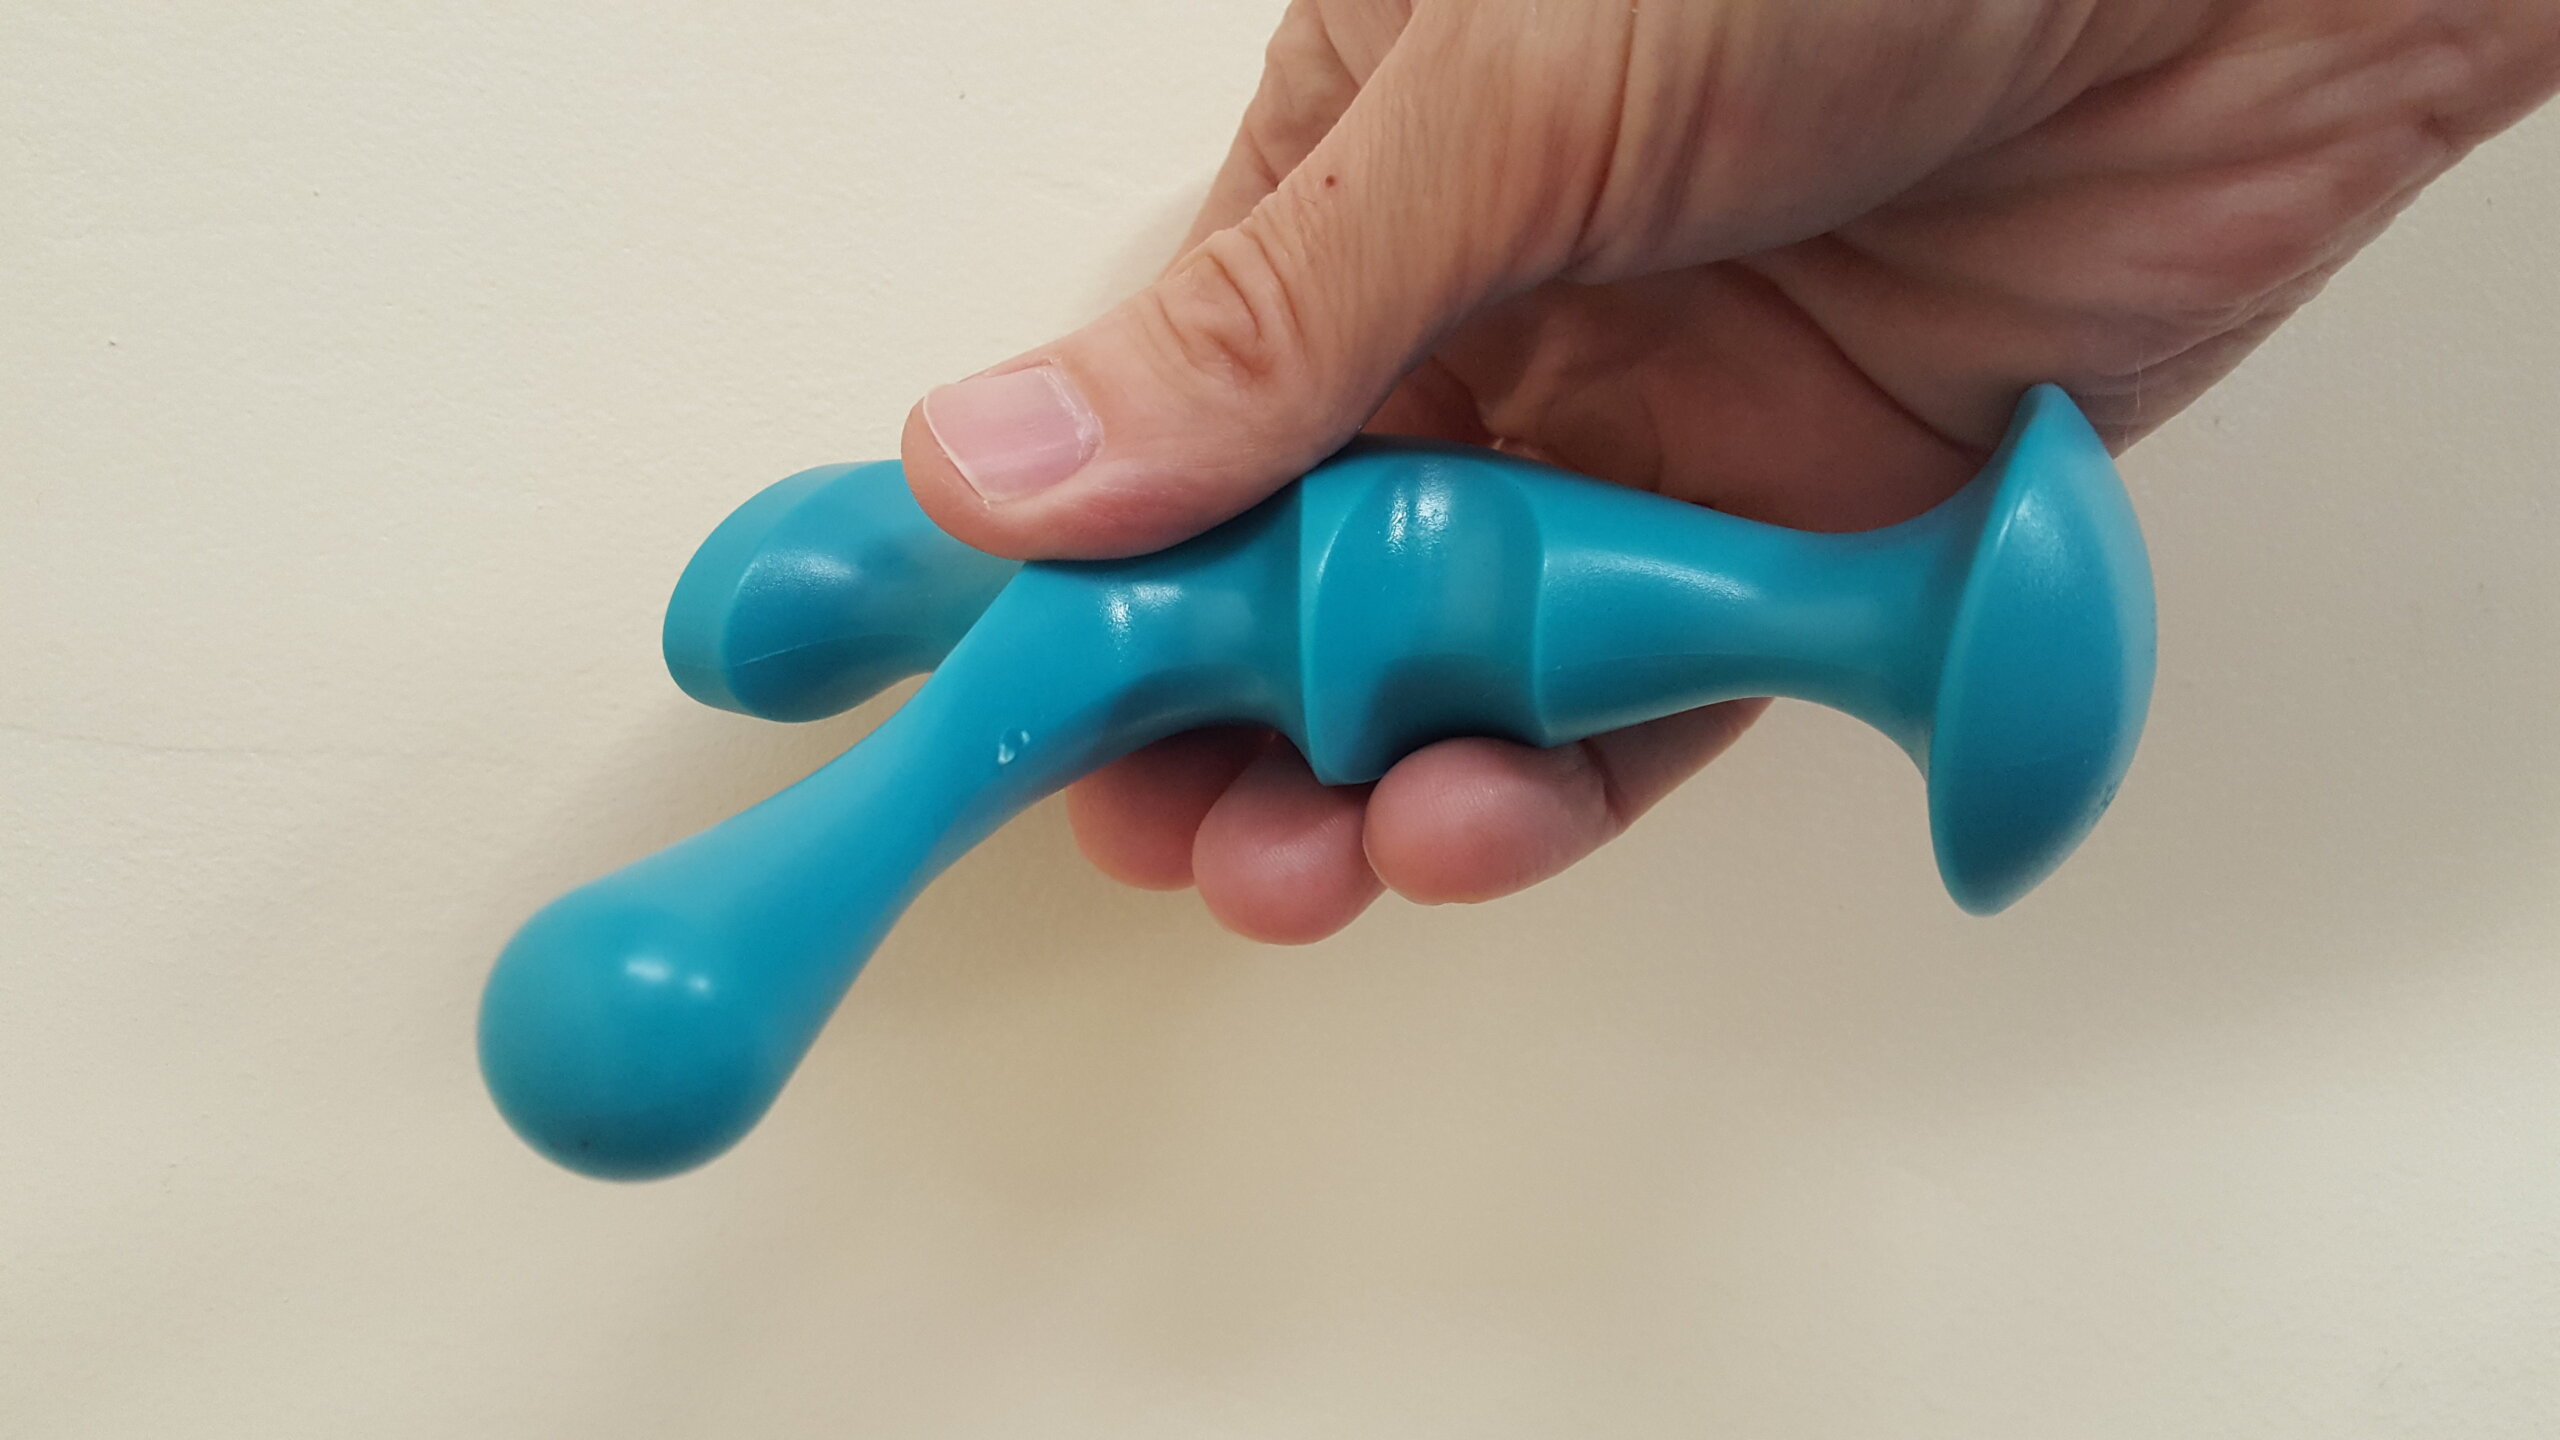
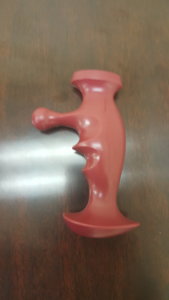
    The TheraPress Trigger Point Massage Tool (say that 10 times fast) is a massage tool that I’ve grown to like once I figured out how I could adapt to some of its design challenges.

    Challenges When Using a TheraPress Trigger Point Massage Tool

    First, it’s a heavy tool.

    Believe it or not, an ounce or two makes a big difference in terms of hand fatigue if you’re using tools often during a massage.

    Heavy also means you’re gripping harder to keep the tool from falling over.

    Another challenge with the tool is that the handle is big which also means more over-gripping.

    I know, that’s a lot of complaining about a massage tool that I say I’ve grown to like.

    But the heaviness and big handle can essentially be reduced to non-factors with one simple adaptation.

    1. Use the TheraPress Trigger Point Massage Tool as a two-handed massage tool.

    Why Two Hands Are Better Than One

    When you have a two-handed hold on the TheraPress Trigger Point Massage Tool, you don’t have to grip hard. The support/guide hand provides stability so that you can relax the other hand on the handle.

    Once you get competent with two-handed holds, the TheraPress Trigger Point Massage Tool is good for pressing into big muscles, like hamstrings, quads, calves, and back muscles.

    I also use it for light to deep pressure on feet.

    Oh, and the thumb-sized knob on the end makes it a good, light-to-medium pressure glide/press massage tool when using a two-handed hold.

    I put this video together to demonstrate the press and glide-press techniques I do with the TheraPress Trigger Point Massage Tool.

    For the basics on using massage tools, check out Why You’re Not Using Your Massage Tool.

    My Bottom Line on the TheraPress Trigger Pioint Massage Tool

    Use two hands with the TheraPress Trigger Point Massage Tool and you’ve got a decent pressing tool for light to deep pressure on legs, glutes and muscles in the lamina groove.

    And it’s a solid glide-press, two-handed tool for light to medium pressure.

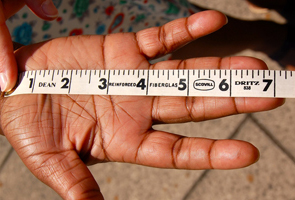
    For smaller hands (6.5 inches or less)…

    Source: choosehandsafety.com

    …you might want to try the TheraPress 2 Trigger Point Massage Tool.

    P.S. If you want to learn how to incorporate massage tools into your massage so that you can deliver precise pressure without hurting your hands, I have an online, home-study massage course for you.

    Massage Tools CE Course

    Objective: To be able to seamlessly incorporate massage tools into a relaxation/pain-relief/medical massage so that you can deliver focused pressure without hurting your hands.

    Byproduct: You’ll be able to do more massages pain-free.

    Class: How to Use Massage Tools (Fearlessly and Effectively)

    CEU; 2.5

    Type: Online, home-study (lots of videos and no fluff material)

    Guarantee: Money back if you don’t like the class.

    Final Words: Massage tools will not feel awkward in your hands once you use a guide finger and a couple of other techniques. Promise.

  • Massage Injury Prevention: How to Save Thumbs + Index Fingers

    Massage Injury Prevention: How to Save Thumbs + Index Fingers

    At first, this is not going to sound like a massage injury prevention guide for your thumb and index fingers, but it really is.

    Ready?

    Your client, Taro, is waiting on the table. When he was changing you had grabbed a quick snack, but then remembered that you nails were like daggers.

    You frantically fumble for your nail clippers but know if you don’t get in that room like now, Taro is going to be major grumpy. You decide that you only have time to cut 3 nails per hand. Which 2 nails on each hand are you going to leave uncut?

    Let me see if I can guess…

    …hmm…

    …could it be these two?!
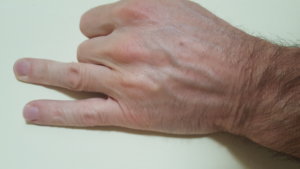
    Let’s take this a step further. Here are two hands. The fingers are numbered 1 – 5, starting with the thumbs.
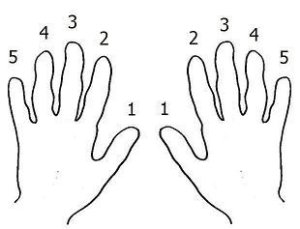
    If you taped your 4th and 5th fingers to your palm, could you do a massage?

    Yeah, no problem, right?

    Now imagine that 1, 2 and 3 are taped down to your palm. That massage ain’t happening, is it?

    For me, fingers 1 and 2 do the most massage work. Finger number 3, the middle finger, comes in third. Finger 4 gets used some. And finger 5 is basically along for the ride unless I’m squeezing which I rarely do (Trap Release Without Squeezing).

    Years of Overuse Can Cause A Massage Injury

    Now imagine what happens after 20 or so years of primarily using fingers 1 and 2. It’s a massage injury waiting to happen, right?

    Here’s a common sense but under-utilized strategy that will set you on a course to saving your thumb and index finger.

    The strategy is: Take the workload off the overworked parts. Also known as use overworked parts less.

    How to Prevent a Finger Massage Injury

    Experimenting with Fingers 4 and 5

    For the longest time, when it came to massage, fingers 4 and 5 were decorations on my hand.

    But when fingers 1 and 2 started to feel persistently tight, I started experimenting with offloading some of the work to fingers 4 and 5.

    At first, it was like trying to eat with my non-dominant hand. But after a few months, fingers 4 and 5 started to adapt, and fingers 1 and 2 got happy again.

    Substituting fingers 4 and 5 for fingers 1 and 2 has its limitations, but the substitutions work particularly well in these situations:

    Three Ways to Use Fingers 4 and 5

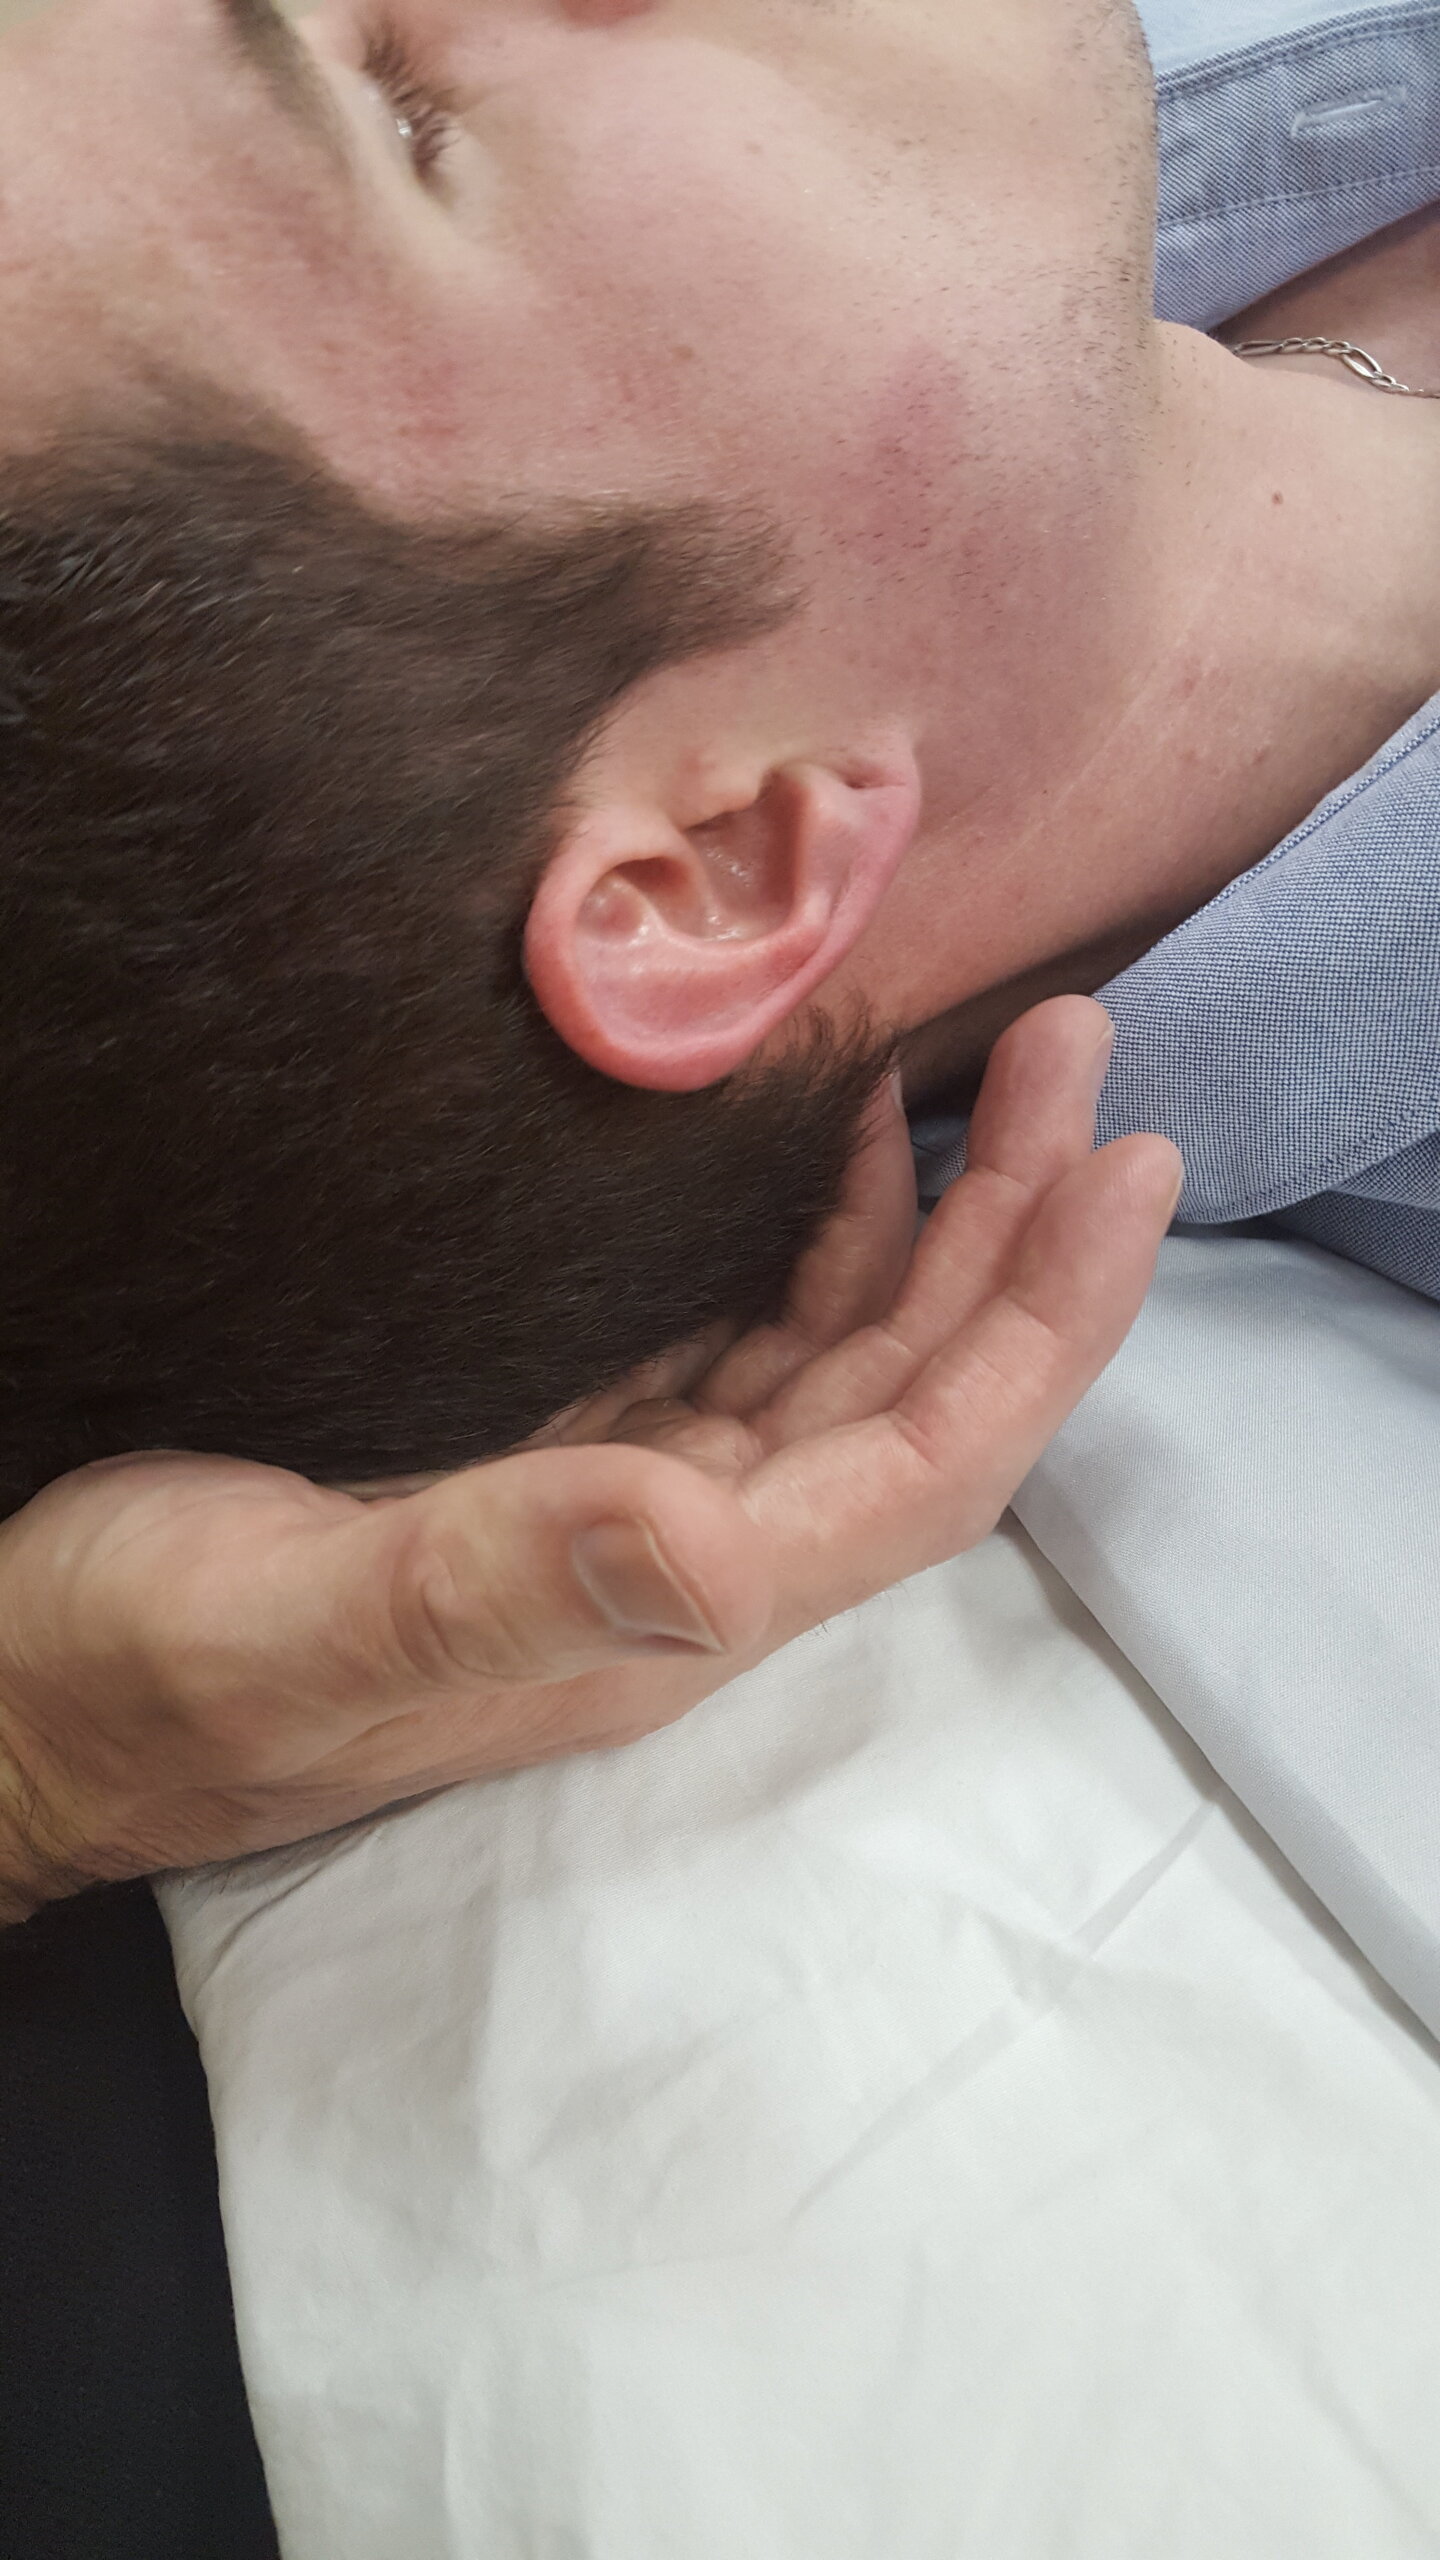
    Supine Occiput Work
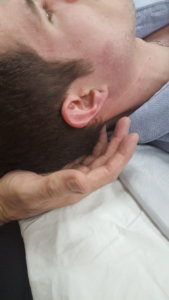
    This is the best starting point for engaging fingers 4 and 5 more and using fingers 1 and 2 less.

    Why?

    Because you don’t have to press hard with fingers 4 and 5 to do this technique. The weight of the client’s head resting on your fingers creates the pressure. And slightly pressing up with fingers 4 and 5 is a great way to start to strengthen them.

    Temporalis, Masseter, and Pterygoids Work

    From a requiring strength standpoint, working jaw muscles is a more advanced move than the supine occiput work. I would start by getting some reps in with fingers 4 and 5 on the body of the temporalis.
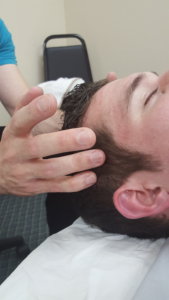
    Then I’d work in the masseter and pterygoids.
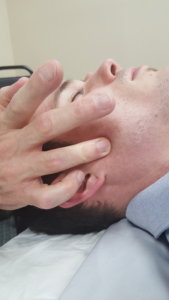
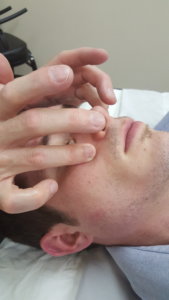
    Sinus Work

    When you’re ready to fine tune your pressure with your 4th fingers, try them out on sinus cavities. It’s definitely challenging at first, but like anything else, it gets easier after a few attempts.
    Cervical Work (Light to Medium Pressure)

    When you resign yourself to learning how to spread the workload out to prevent a massage injury, it’s only natural to experiment. I find that it’s during heavy massage weeks, when body parts get tired, that I experiment the most. This move came about when I had a lot of necks to do in one week.
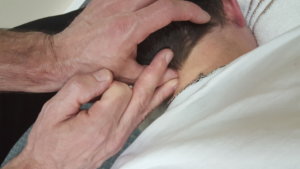
    I’m combining finger 4 and my thumb on the opposite hand. This combination is good for light to medium pressure.

    Going to the Next Level

    If you want to take spreading the workload out to the next level, try substituting fingers 4 and 5 for other tasks that finger 1 and 2 do.

    For instance, when I’m doing a massage, this is how I usually get cream from a massage cup.
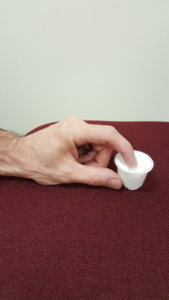
    Finger #2 working hard.

    Here’s what I try to do now.
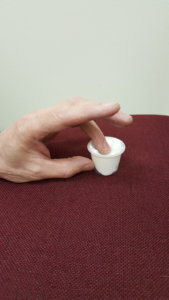
    This is a minuscule task in the grand scheme of overuse. But in this case, it’s not about changing an action to prevent a massage injury. Instead it’s about making you feel more adept using finger 4. When I do things like this, I want to use fingers 4 and 5 more often in daily life. Here’s what I mean.

    Spilling Over Into Life

    The other day my wife was watching me type, or as she put it “pound the keyboard”.

    What can I say, I GET EXCITED WHEN I WRITE!

    But she also made another interesting observation. She pointed out that I was only really using 3 fingers on each hand to type.

    Guess which ones?

    Yep, fingers 1, 2  and 3.

    Well, of course, I can’t let this go. So, I’m fixing this by forcing myself to use fingers 4 and 5 about 15%ish of the time when  I type. I hate it because it really makes me slow down. But I know I’ll like the end result.

    At this point, I need to talk about obnoxious thumb pain. If you’re in a state where your thumbs are aching all the time, you’re going to want to seriously consider these suggestions.

    Other Ways to Save Your Thumbs and Index Fingers

    This is my favorite:

    1. Use a T-bar or an L-bar.

    The T-bar…

    …and L-bar
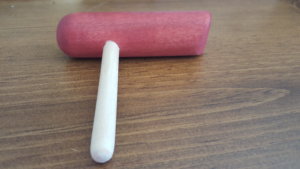
    …are my top choices for massage tools. For one, they have a simple design which means you can hold them in a variety of ways. Over-designed tools lock you into one or two holds.

    T-bars and L-bars are the ultimate thumb savers because they literally substitute for thumbs. And they don’t stress thumbs because you can hold them in many different ways.

    Here’s a quick T-bar and L-bar intro: Save Your Hands: Use a T-bar and L-bar.

    1. Use knuckles and fingers in combinations.

    Combining body parts is foundational to saving your thumbs. When you combine body parts, you brace and stabilize joints and spread out the workload.

    If you want to get started combining body parts, begin here: How to Do Very Precise Pressure

    The last thing you need to know is that you have to experiment.

    Embrace the Experiment to Prevent a Massage Injury

    Experimenting live (on a client) is a little scary because we’re not sure how it feels to the client.

    You can lessen the chances of the client saying “Ouch! What the hell are you doing?!” by first working on people who can give you immediate feedback, like friends.

    I never use this approach for this reason: I’m a wimp. If something hurts during a massage, I want it to stop hurting. So, automatically, I start experimenting with different techniques until the pain goes away.

    Introducing a New Technique

    So, when I introduce a new technique, I look for warning signs with the client, like a leg twitch, as an indicator to determine if what I’m doing is okay.

    And I don’t spend a lot of time using that new technique at first. Rather I introduce it briefly, look for client reactions, and then reintroduce it in small doses. It slowly becomes a tool in my toolkit when I know clients like the technique and I’m comfortable with it.

    Joyriding with Fingers 4 and 5

    Ready to take fingers 4 and 5 for a spin?

    I’d start with supine occipital work. Then I’d try out jaw work, and when I felt comfortable with that I’d fine-tune my finger 4 touch with sinus work.

    If you’re thumbs and index fingers need a serious break, try using a T-bar, L-bar or body part combinations.

    Now you have the information that will help you prevent a massage injury to your thumb or index finger. And if you’re currently in pain, experiment. You just need to find the way out.
    Get Help With Your Specific Pain Issue

    If you need more help with saving your hands (and the rest of your body) when you massage, consider reading my DIY book, The Pain-Free Massage Therapist.

    About seven years ago my body was falling apart after 20+ years of massage. I gave myself a year to figure out how to massage pain-free, and if I couldn’t, I’d have to find a new career.

    In that year I discovered the things I was doing wrong for my body in the massage room. But the process to becoming a pain-free massage therapist was not as simple as replacing one technique with another. It involved changing my thinking so that I caught trouble before it happened along with knowing how to adjust when I was in pain.

    This book is your head start. You don’t have to come up with the strategies and techniques to save your body. You just need to try out the ones I recommend. Keep the ones that work for your body; pass on the ones that don’t.

    The book comes with a website link where you can access free how-to-massage-pain-free videos. You can purchase the book on Amazon.

    Purchase Book

    If you have any questions or want to talk about your specific pain issues, email me mark@makethemostomassage.com 🙂