Category: Massage Pain-Free

  • Why You’re Not Using Your Massage Tool

    Why You’re Not Using Your Massage Tool

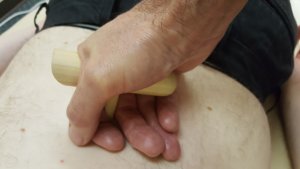
    Are you using your massage tool? Hmm…let me guess why you’re not.  Maybe it’s because that hunk of wood or piece of twisted plastic doesn’t let you feel anything, and you have no idea how hard you’re pressing. I hear ya, but hold on, there’s a way around these problems. Use a guide finger next to the tip of the massage tool.

    Before I get into the how, let me introduce four pressing tools that are dying to have a guide finger next to them.
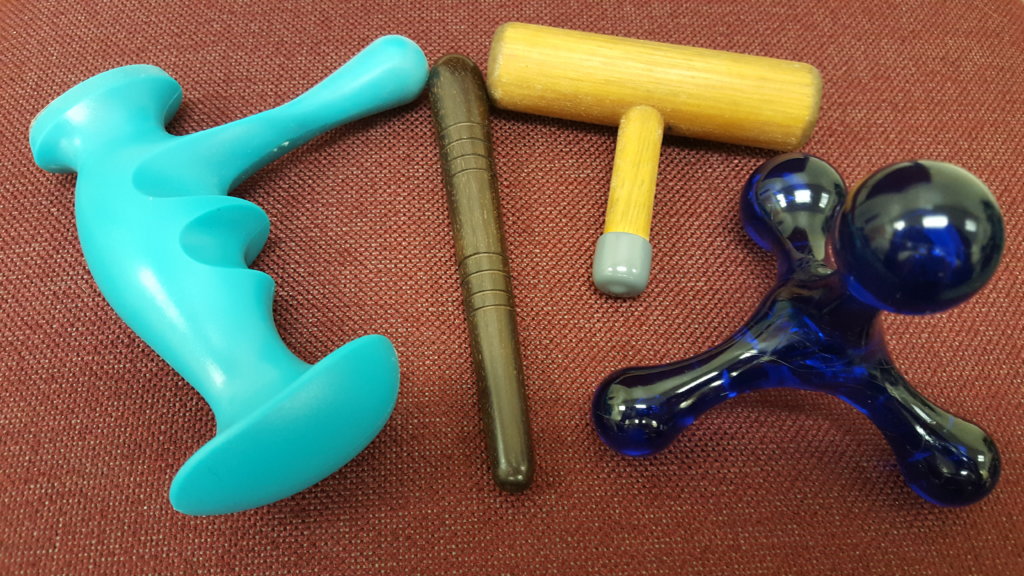
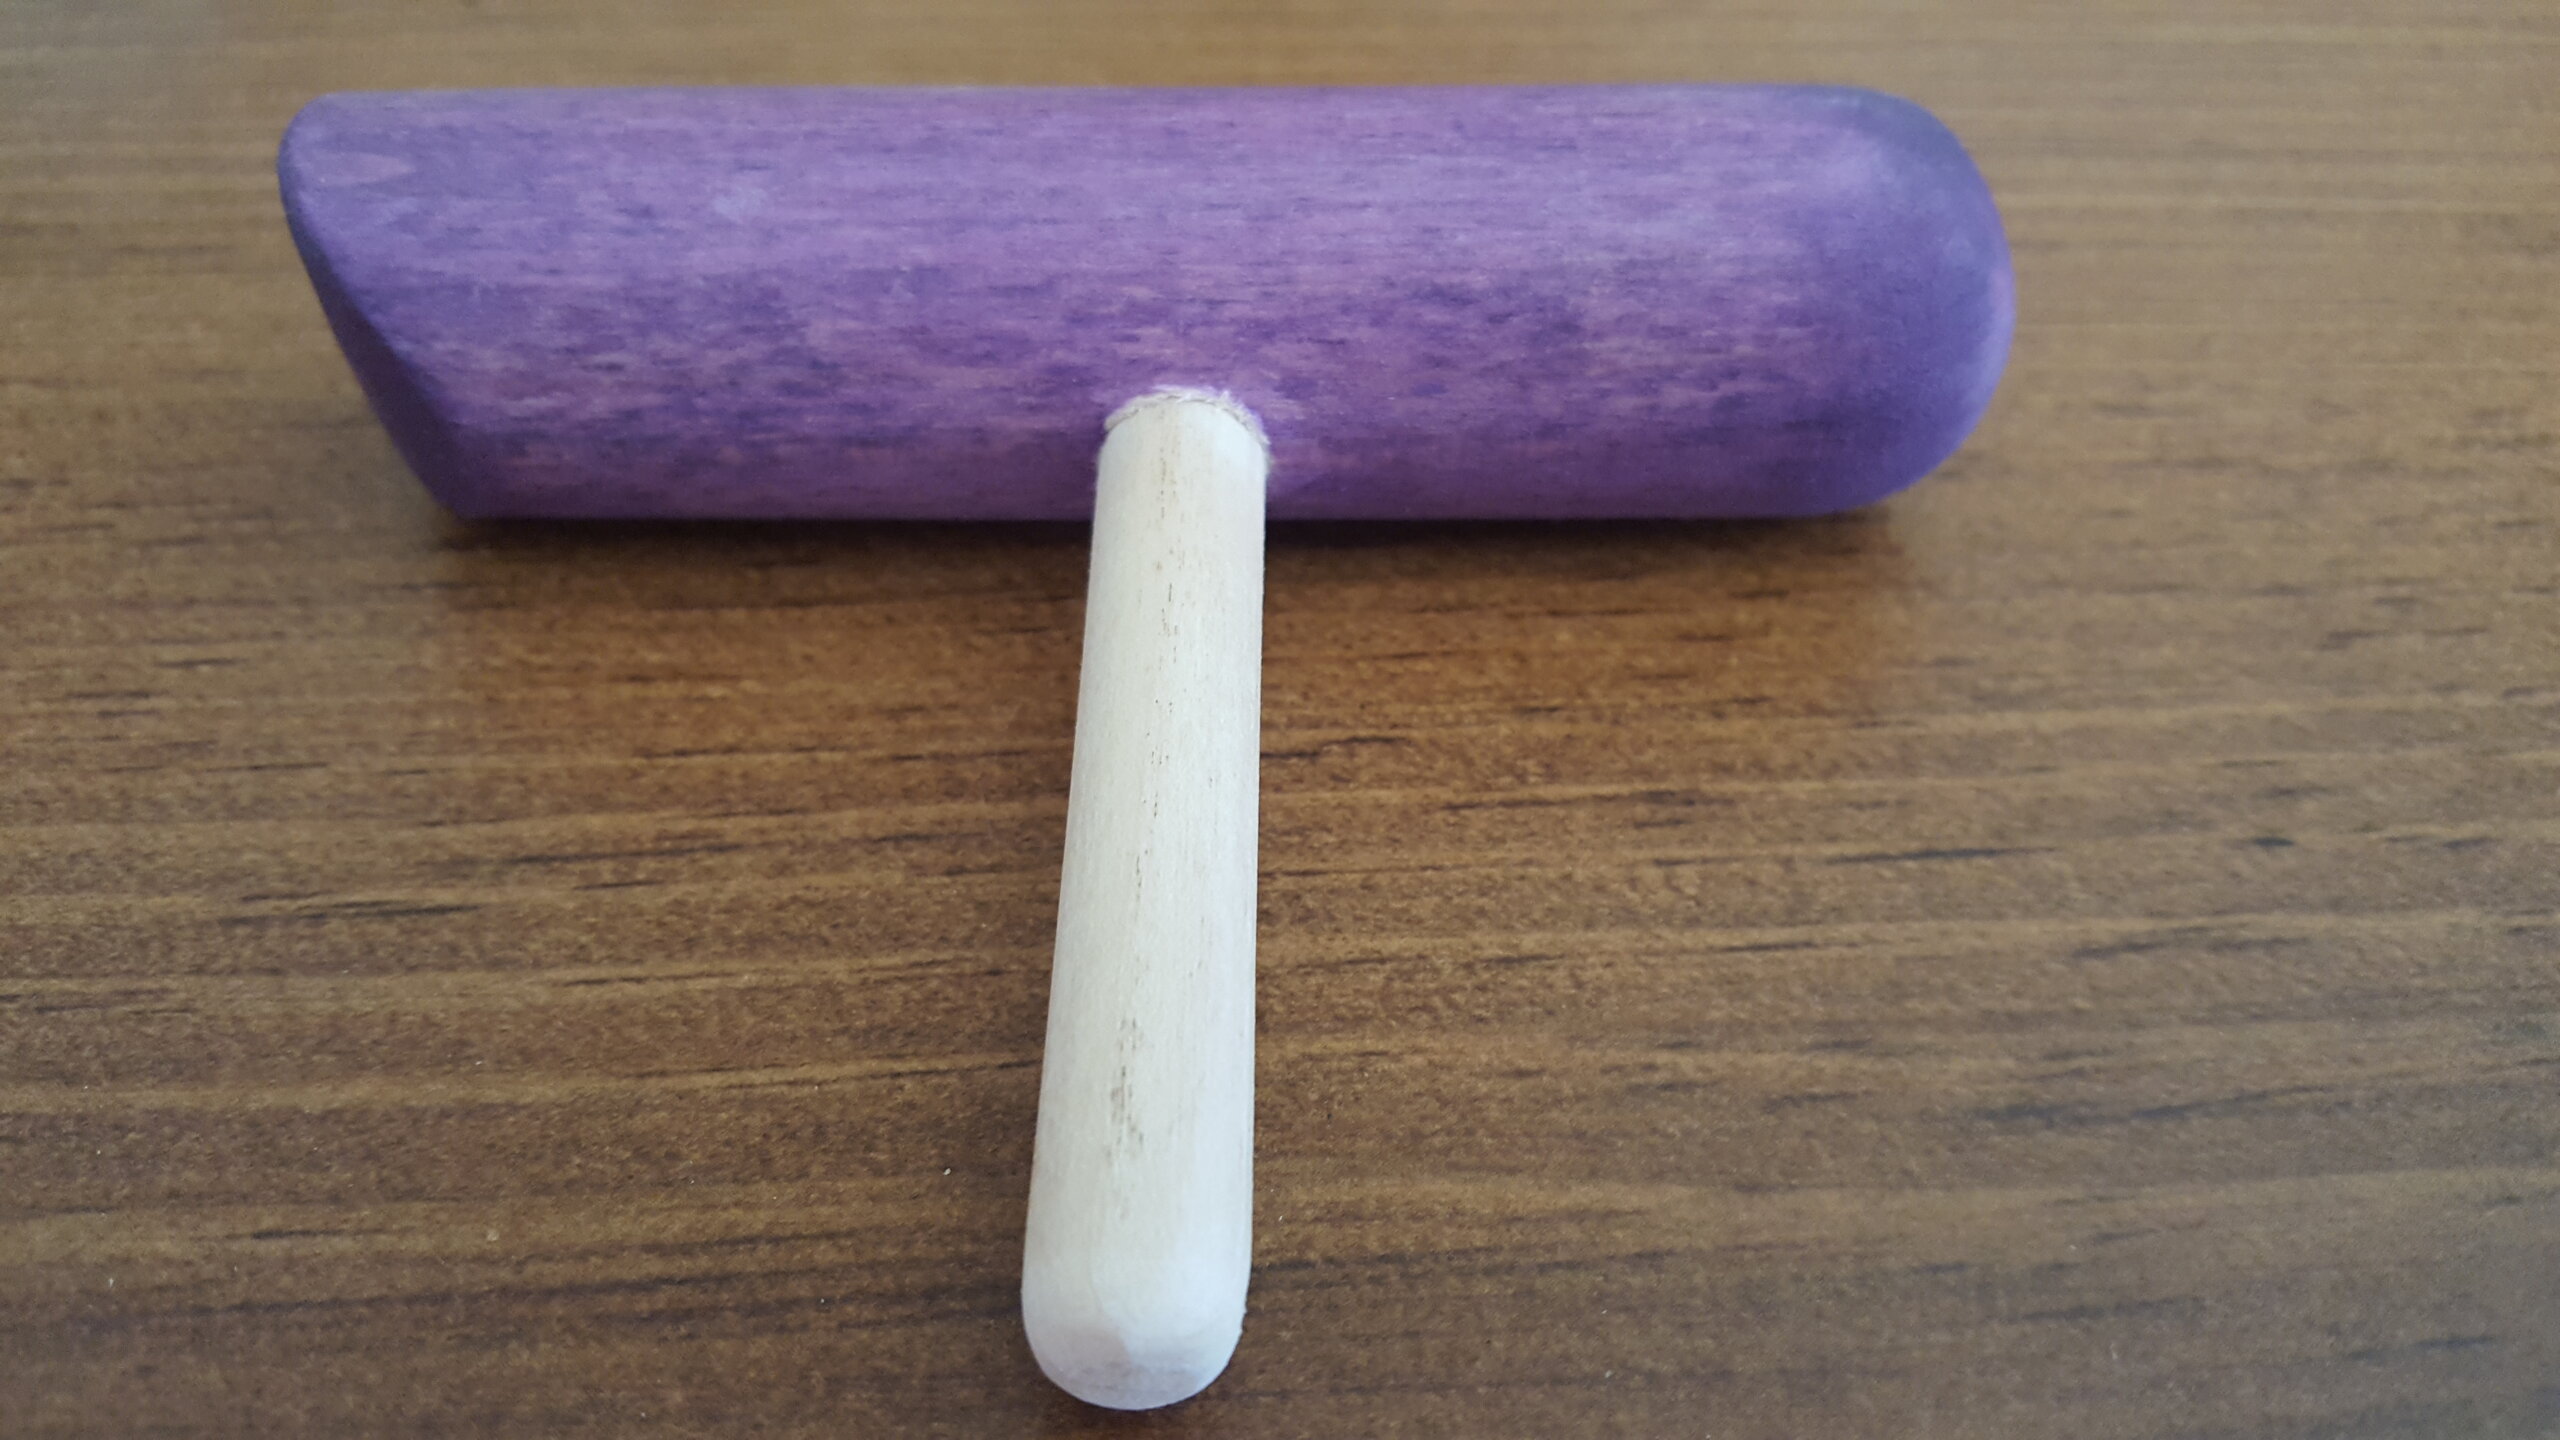
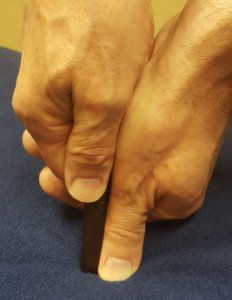
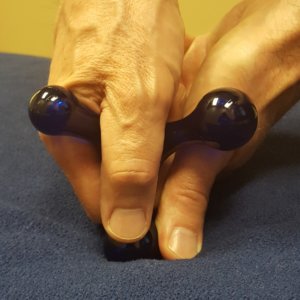
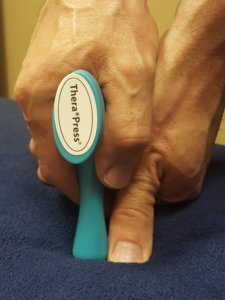
    Starting at the left and going to the right we have TheraPress, massage stick (Mu-Xing Pointer), T-bar (my massage therapist friend, Matt, makes T-bars–I’ll have more details soon) and Jacknobber II. Here’s how I use a guide finger with each of them:

    How to Use a Guide Finger

    1. With your guide finger palpate to find the area you want to work.
    2. Once you find the area press to determine the pressure you want to apply.
    3. Now you’re ready to press the massage tool into that area.
    4. After you’ve pressed that area with the massage tool, put your guide finger back on the area to re-establish sensitivity and recalibrate for the next press with the massage tool.

    Alright, let’s take these tools out for a spin.

    What a Guide Finger Looks Like in Action

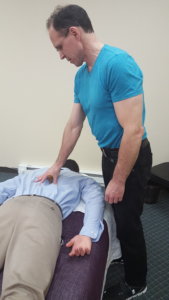
    Here are some action shots of a guide finger next to the massage tool.

    Mu-Xing Pointer


    Jacknobber II


    Thera*Press
    T-bar

    You’re guide finger could be a knuckle.
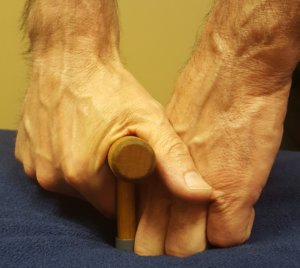
    Or it could be a bunch of fingers, bent, also known as a fist.

    Essentially, any part of the hand that’s not holding the massage tool can be a “guide” for the massage tool.

    Okay, that’s a wrap…not quite…

    The Little Bit Extra

    There’s a process here that you’ll need to refine. You remember that the guide finger finds the tight spot and figures out the pressure that needs to be applied, then in comes the massage tool, right?

    Well, there’s a little more to it. To a large extent you can sense how much pressure you were exerting with your guide finger and then try to match that with the tool in the other hand. But you do have an object in your hand that’s not neurologically wired to your brain. Some guessing is required.

    You’re going to make up that guessing gap by getting feedback from non-paying and paying clients when you’re practicing with the massage tools.

    For paying clients, the feedback will come in the form of reactions, like the verbal “Wow, that feels good” or the more subtle fidget because something is off.

    Also, with paying customers use the massage tool in short spurts in case your pressure is off.

    Lastly, have someone work on you with the massage tool so that you get a firsthand feel. This way of learning works best for me.

    Don’t Sacrifice Your Thumbs

    If you’ve come this far in the article, you’re probably in pain or sick of sacrificing your thumbs to the massage gods.

    If you’re ready to make a change, it’s time to break out that massage tool. Get comfortable with it by using a guide thumb, finger, or hand. Get you reps in by using it in every massage (30 seconds or more). Remember to:

    1. Use the guide finger to find the tight spot.
    2. Establish pressure with the guide finger.
    3. Press the massage tool into the tight spot.
    4. Re-establish pressure and sensitivity with the guide finger.

    If you’re new to massage tools, I would do this:

    1. Learn the fundamentals: Massage Tools will Save Your Hands
    2. Tweak the fundamentals: How to do very Precise Pressure
    3. Tweak some more: Massage Tools—Working in Light to Medium Pressure


    Massage Tools Online CEU Course

    If you want to be able to use a massage tool with every massage so that you can save your hands and deliver focused pressure like nobody else can, this online course will get you there.

    I taught it live for many years and now I’ve made the online version, There are lots of videos and if you have any questions while you’re taking the course, you can always ask me (mark@makethemostofmassage.com).

    Check it our here: How to Use Massage Tools (Fearlessly and Effectively).


  • Your Injury Can Be An Opportunity

    Your Injury Can Be An Opportunity

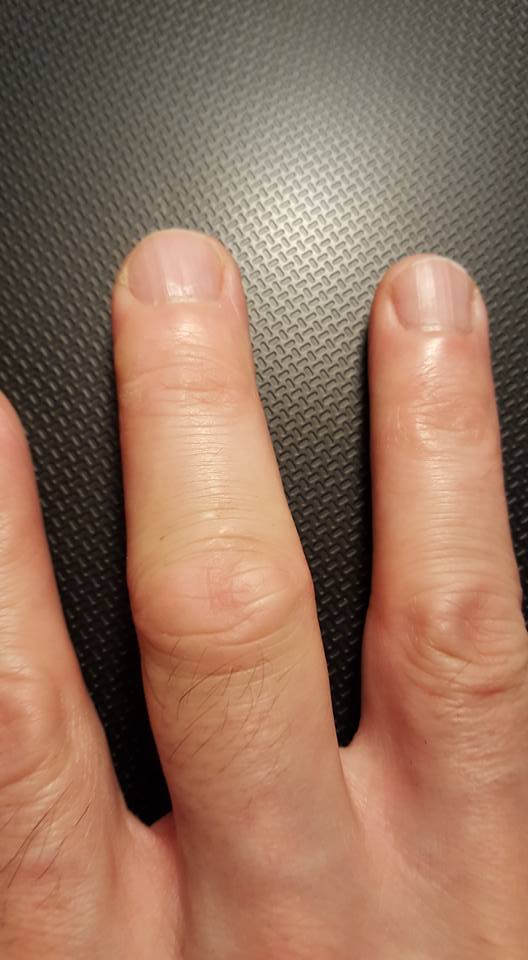
    A few winters ago I had dry-skin challenges of winter and I developed a significant skin crack on the knuckle of my right middle finger. This knuckle is a tool that I use when I need to deliver precise, deep pressure.

    At first, I thought about cancelling some deep pressure clients, but I didn’t. Instead I worked around the injury—and I’m glad I did. For one, I got better at using my left (non-dominant), middle-finger knuckle to deliver deep pressure. I also “created” and got efficient at using new power tools (two or more tools—fingers, thumbs, knuckles, fists, elbows-forearms—that are used together). In essence, my injury helped me become a more durable and balanced therapist. Here’s my process for working around a hand injury:

    Think “Work Around” Not “Work Through”

    We’ve all done it–repeat the same mistake over and over. My injury was a perfect example. At first I taped my knuckle and tried to work through the discomfort, like I’ve done in the past, but my knuckle just got angrier. Finally, after my knuckle became sore to the touch, I decided to work around the injury instead of through it. In other words, I would not use, or minimally use, my right, middle-finger knuckle. Instead I would figure out other ways to deliver precise, deep pressure. When I gave that knuckle a rest, it finally had time to heal and within a week, it was good to go again. This time I think (hope) the lesson has stuck.

    Think: Opposite Side

    Since I wasn’t going to use my right, middle-finger knuckle during a massage and I wasn’t cancelling any clients, the pressure was on. I needed to immediately figure out new ways to deliver precise, deep pressure during the upcoming scheduled massages. The good news was that I was familiar with using my left, middle-finger knuckle to deliver deep pressure, but I just wasn’t good at it. So with my right knuckle out of commission, I put my left knuckle to work. It took some work but to my surprise, within 10 massages I felt competent with my left knuckle. Which begs the question: If my right knuckle wasn’t injured, would I have ever gotten better with my left? My guess is probably not.

    Think: T-Bar

    I also tried substituting my thumbs and fingers for my right knuckle, but this wasn’t sustainable because I used my thumbs and fingers a lot throughout a massage already. So I started experimenting with my T-bar. The fact is that I also used my T-bar a lot throughout a massage, but the T-bar didn’t overtax my hand muscles and finger joints because I could hold it in a variety of ways. Substituting the T-bar for a knuckle was new to me, but I found it to be an excellent substitute when doing precise, deep pressure in the arches of the feet, on the levator scapulae attachment and in the upper cervical areas.

    Think: New Power Tools

    Though I had temporarily stopped massaging with my right, middle-finger knuckle, I habitually kept placing my hands down as if I were going to use my injured knuckle. When that happened I found myself experimenting with using other knuckles on my right hand. Because I never experimented with these knuckles individually, it felt comfortable to support them with another tool. Soon I had more power tools (two or more tools—fingers, thumbs, knuckles, fists, elbows-forearms—that are used together) at my disposal. My new power tools were right, pinky-knuckle braced with left thumb and right, index-finger knuckle braced with left thumb. These combinations were great for detail work in the back and upper shoulders.

    In this video I demonstrate some combinations:

    The Rewards

    There’s no doubt that it can be scary when you get injured. But if you can work around an injury there’s potential for multiple payoffs. For one, you’ll become more versatile with under-used tools. You’ll also begin to “create” and use new power tools in ways you never imagined before. Lastly, you’ll feel more confident in your ability to succeed in massage because despite being injured you will have gotten the job done without compromising the quality of your work.

    Can you massage pain-free?

    Take the pain quiz and get an instant video that will help you with your pain problem.

    PAIN QUIZ
  • How to Palpate without Palpating

    How to Palpate without Palpating

    I stunk at palpation in massage school. All my classmates found the tight spot on the massage model right away. When it was my turn, if I didn’t find the tight spot by the third pass, I would pretend that I did.

    My palpation skills did improve over time (hallelujah!), but they could have improved IMMEDIATELY if someone had explained to me the key to finding the most important tight and/or pain spots (the ones your client wants you to address).

    The key is to pay attention with your eyes and ears.

    The MT Measure

    It makes sense that we, MTs, measure how skillful we are by what we pick up through our hands. But what we pick up through our eyes and ears will allow us to zero in on the tight/pain spots that our clients wants us to address quickly and ensures that we’ll never miss them.

    In My (Simple) Secret to Pain Relief Massage I talked about how to find the client’s pain spots before the client is on the table. Now I want to share a detailed example of putting “palpating without palpating” into  action.

    Ian the Ex-Runner

    I didn’t know what to expect when I walked into Ian’s running store. We had made an appointment to talk, but that didn’t mean he was a proponent of massage. It could be that he was just looking for some freebie massages to help keep his customers happy. Fortunately, that wasn’t the case. Ian was waaay into massage.

    He asked me questions about the kind of massage I did and he talked about the times he got massaged. Not surprisingly, he had a strong opinion on what made a good MT. To him, a good MT should be able to find problem areas and tight spots by just using her fingers.

    I Got This

    Immediately I offered to do a free massage on Ian, knowing our future business connection rested entirely on whether I could find his pain spots.

    When I went home, I told Lisa, my wife, that I’m going to hit a home run with Ian.

    Why was I so confident?

    Because, unknowingly, Ian told me the exact location of his pain spot.

    Bad Hammy

    Ian was once was a competitive runner but at one point he tore his hammy really bad and it took him about a year to get better. After that, anytime he’d try to run a marathon, his hammy would seize up midway through the race.

    “It’s like a rock,” he said when I had met him. “You’ll find it.” But he didn’t tell me which leg he had injured.

    Hmm…I wanted to make sure that I’d find it. Normally, I would ask the client to show me exactly where the injury is, but if I had asked Ian, I would have lost cred in his eyes. So I began to ask open-ended questions, like “What happens when it seizes up?”

    At least two times when Ian was talking about his hammy, he reached down and grabbed his right hammy, midway between his knee and buttock.  Now I knew the side and location of his old injury.

    Wait…There’s More

    I was in a time crunch that day and had to leave his store before we could finish our conversation. But I wrote down important points regarding our conversation in my cell. Then before I was scheduled to work on Ian, I went back to his store to drop off my cards. Ian and I had another conversation.

    This time Ian talked about his bad knee, probably compensation from his hammy injury he thought. Again, I probed with open-ended questions, like: When does it bother you the most?

    It turns out that the combination of injuries (hammy and knee) made Ian switch from running to cycling. And now his neck and lower back bothered him more than his hammy. As he talked about his current pain spots, he grabbed his neck, the C1 – C3 area.

    I updated my notes when I left his store. Unless he had a new issue the day I was going to work on him, my game plan was to work his : 1. Neck, 2. Lower back, 3. Right hamstring.

    Batter Up!

    With all that information, it was nearly impossible for me to screw up. And on massage day, Ian was amazed that I knew exactly where to go.  It wasn’t just a home run. It was an out of the park home run because I had asked open-ended questions, listened and watched.

    Palpation Without Palpating Checklist

    Most people are not going to test your palpation skills. However, that doesn’t mean a client is going to volunteer all the information that you’ll need in order to find her pain spots. Here’s my checklist for Advanced Palpation Without Palpating:

    1. Before you drill down with specific questions, ask open-ended questions.

    If you ask too specific questions in the very beginning, you may be narrowing your search too soon. That was the case with Ian. After the first meeting I drilled down too fast because I was in a rush and I had assumed that his right hammy was his number one priority. But during the second meeting when I had more time to ask open-ended questions, I found out that his neck and lower back were higher priorities.

    1. Watch for clues.

    Recently a client talked about general shoulder pain, but for whatever reasons, wouldn’t tell me where it was. However, she did reach back to her right levator scapulae attachment and upper rhomboid area. That was the clue I needed and once on the table, I found her pain spot immediately.

    1. Write things down.

    It’s not disingenuous to write down information that a client tells you so that you can incorporate it into your conversations and game plan. In fact, it makes for great therapeutic rapport. If you struggle with therapeutic rapport, check out A Quick Way to Connect with a Client.

    1. Review notes before you see the person again.

    If I hadn’t reviewed my notes before I saw Ian the 2nd time, I wouldn’t have been able to facilitate the conversation to the point where I actually got the order of his pain issues correct.

    Tell Me Your Success Stories

    There’s no getting around that at some point you’ll need to find the pain spot with your fingers. But through asking open-ended questions (before you drill down with specific questions), listening and watching, you can make it a heck of a lot easier on yourself and be confident that you will find your client’s pain spots.

    Need  More Help?

    Sign up for my email group and get my latest info. It’s free and you can unsubscribe whenever you want:-)

  • How to do One Hand Massage

    How to do One Hand Massage

    I give my mom credit for helping me embrace one hand massage.

    When I was a kid I’d sometimes give her the sass face, and she’d say: Your face is going to get stuck like that!

    Yikes!

    I stopped.

    For a while. Then I decided to check in the mirror after I made the sass face. Hmm…nothing seemed to be stuck.

    Many years later in massage school I was taught to keep two hands on the client all the tiime.

    Why?

    I’m not entirely sure…maybe because the client was paying for two hands, not one.

    Anyway, I did two hand massage forever. Then one day my shoulder hurt and my subconscious must have remembered my mom’s horrible, life scarring lie to me about my facing freezing as I sassed her, and I lifted one hand off my client and continued the massage.

    Interestingly, my pain went away. And when it was time for my client to pay, he didn’t demand a 50% refund.

    Thanks to my mom, one hand massage has made me a durable MT and kept me out of pain.

    One Hand Massage Is Not Complicated

    One hand massage is not a massage modality.

    It’s a strategy.

    Here’s the strategy: at select times when doing static pressure use one hand.

    Here are two things you’ll need to do:

    One Hand Massage Basics

    (1) Lean to generate pressure.

    That means you’ll need to have your table height set so  you can effectively  leverage your body weight. onto the client. More about that here: Table Height is Everything.

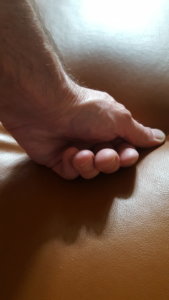
    (2) Press with a with a thumb, knuckle(s), fist, fist-thumb (same hand), or massage tool.

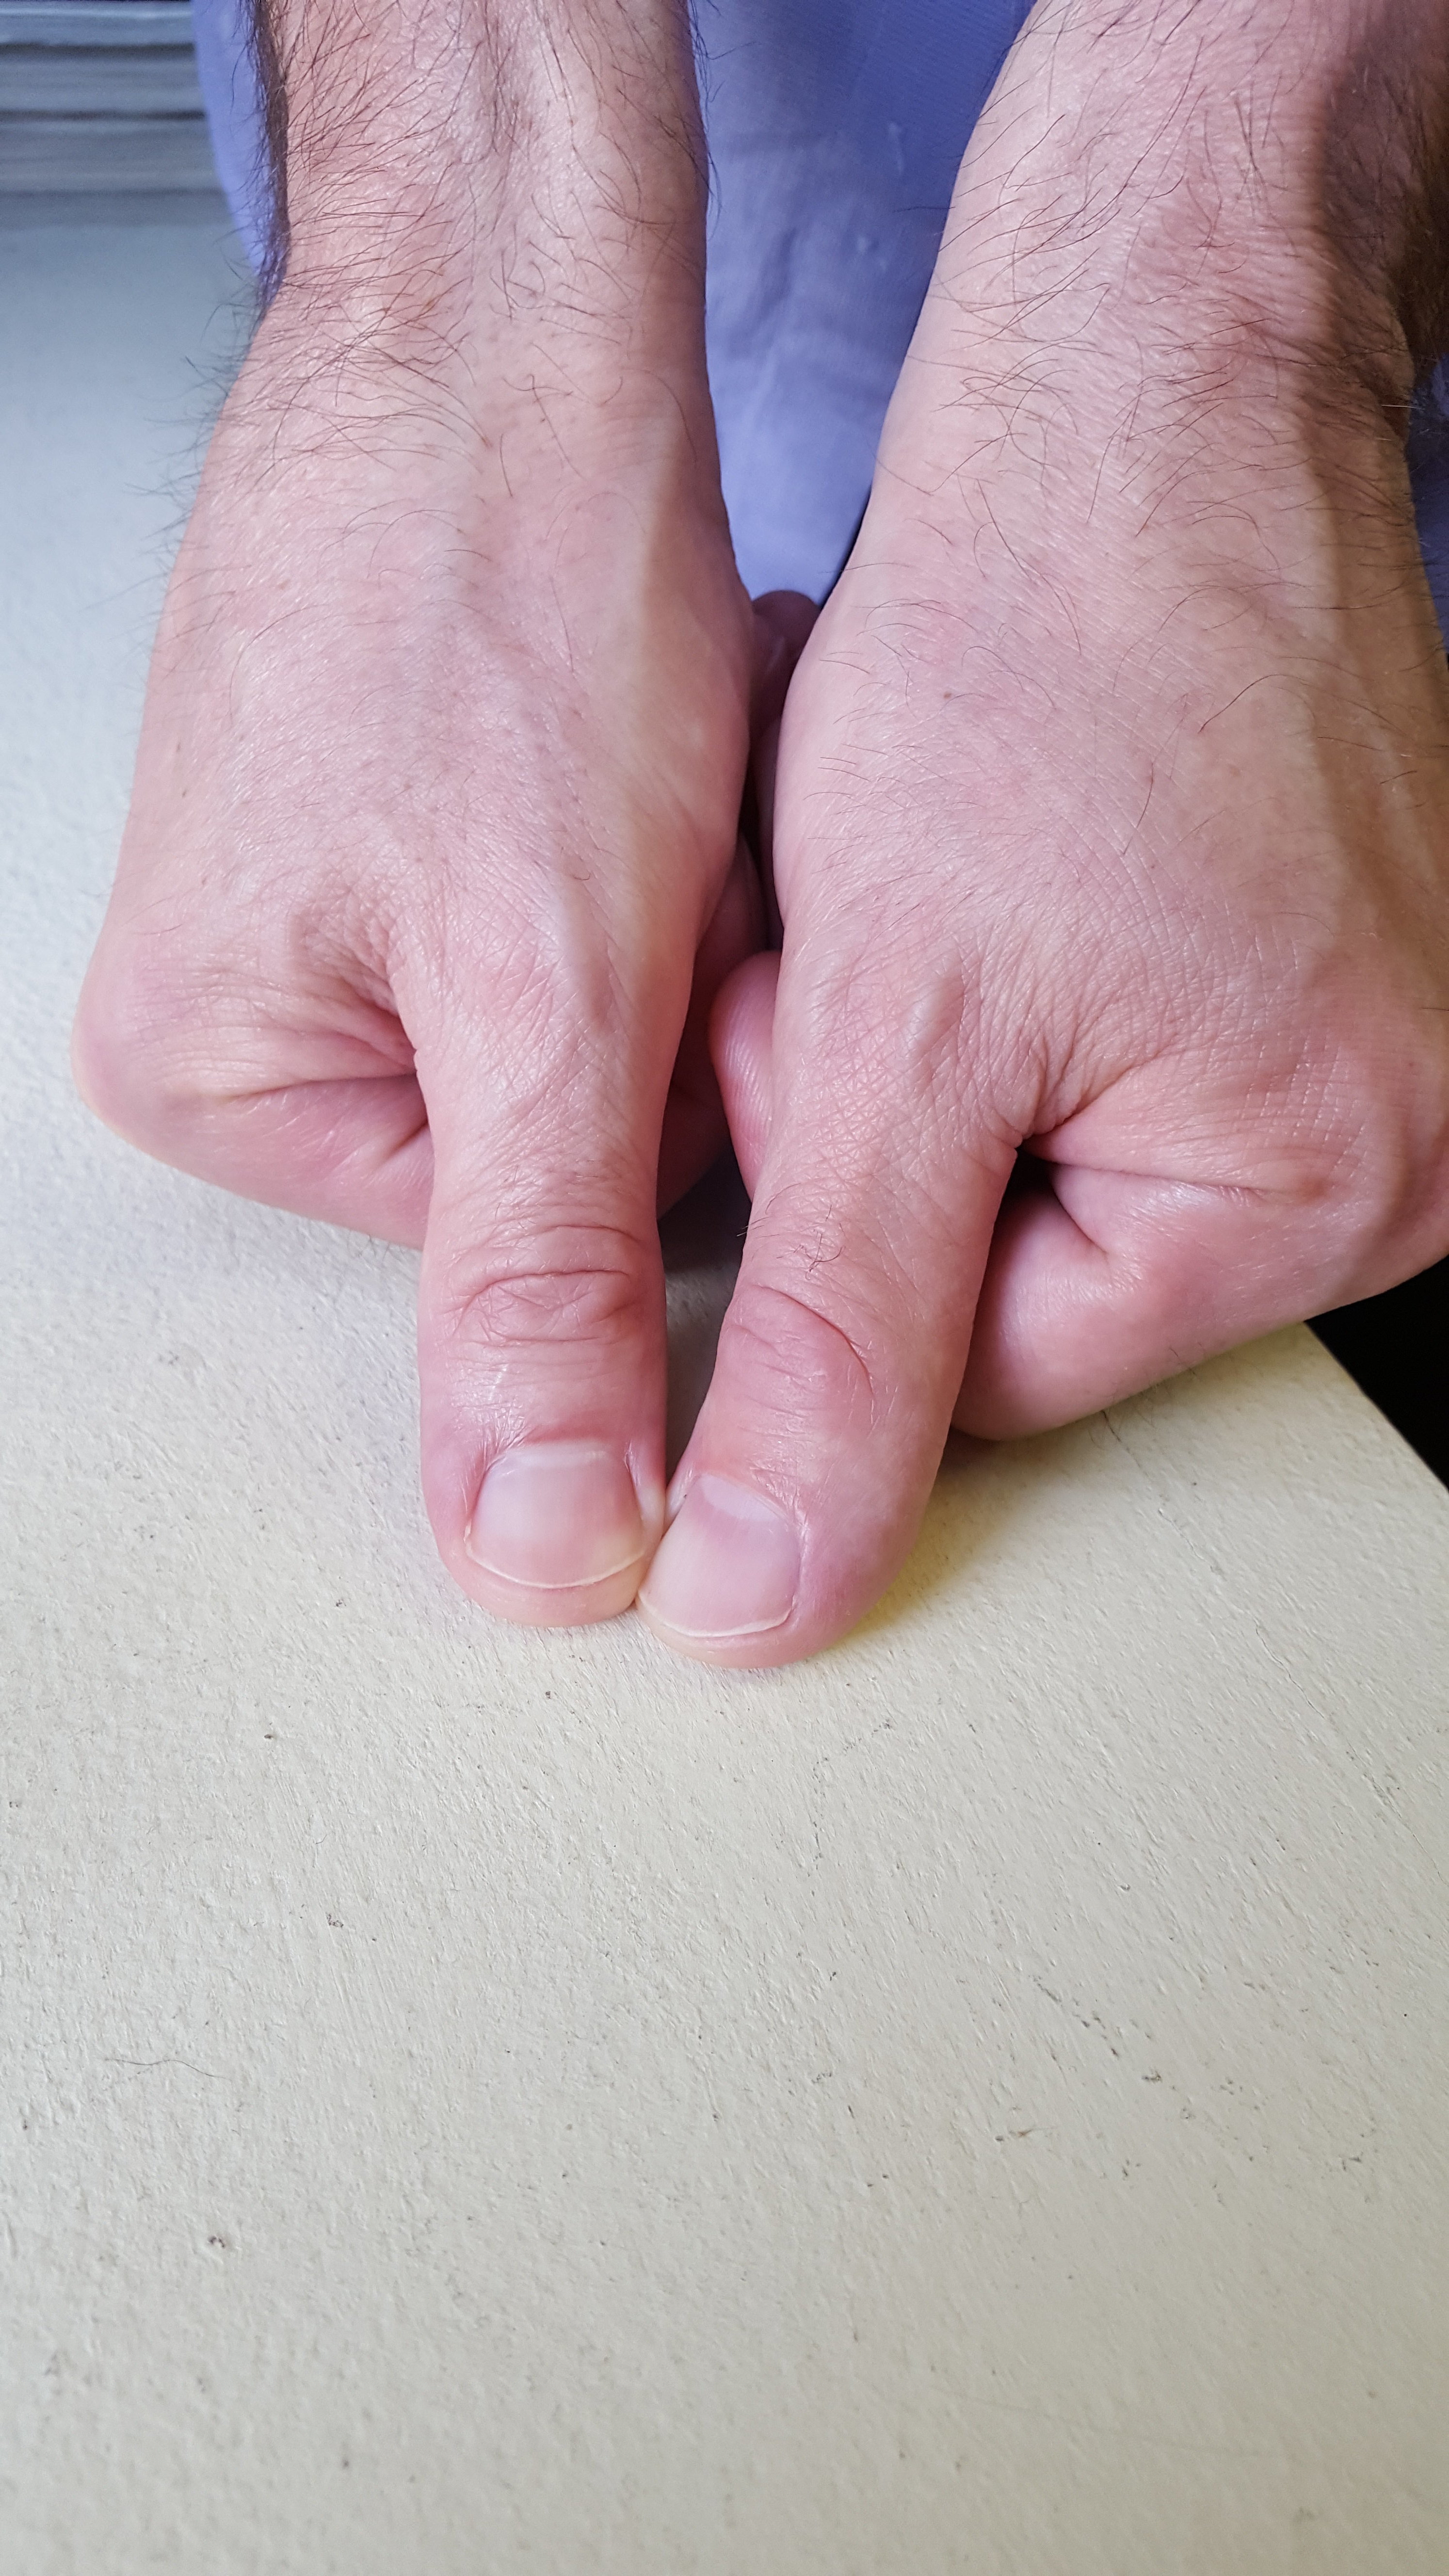
    We all know what knuckles and thumbs look like, but a fist-thumb may be new for some. Here it is:

    A have a very relaxed hand when using a fist-thumb. Notice that my fingers are not balled tight.

    With a fist-thumb you can adjust where the focus of the pressure goes by simply directing more pressure into the fist or thumb.

    Okay, Mark, we’re getting a little deep here. Before I invest anymore eyeball time into this article, how’s this going to save my body?

    Fair enough.

    One Hand Massage Saves Your Body

    The first way it will help save your body is pretty obvious.

    1. You can rest the hand that’s not working.

    A 15 or 30 second break is sometimes all your fingers need to feel less taxed. And if you become ambidextrous with one arm massage, you’ll get to rest both hands during the course of a massage.

    2. You can change positions.

    When doing a massage stroke, you either face the direction of the stroke.

    Back stroke from lumbar to cervical.

    Or you don’t face the direction of the stroke.

    Back stroke from lumbar to cervical.

    Either way, both hands are down and you’re locked into one position.

    This means that you glide in that one position.

    You press in that position.

    You sort of become that position, right?

    But look what happens when you switch to one hand.

    You can put your body in a different position and get a break from having two hands down. And here’s the bonus.

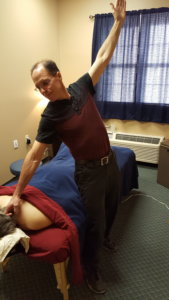
    3. You can make postural adjustments and stretch.

    Think of one hand massage as an office workstation break. It’s time to get up from your desk and stretch.

    For us, MTs, it’s a time to be less hunch-y and more vertical.

    If you breath in and lift your rib cage up while doing one hand massage, you can reset your posture.

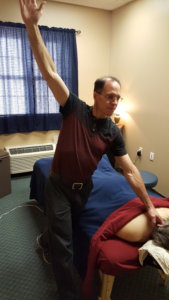
    And if you raise the other hand, you can reach up, extend your back and counter chronic, back flexion.

    Whoa, Mark! You’re getting a little carried away here. Remember, you’re actually doing a massage.

    Hey, I’m not slacking.

    My pressure is precise. And I’m leveraging my body weight with which allows me to sustain any pressure with minimal effort.

    One Hand Massage Example

    Here’s an example of one hand massage in action.

    Your gliding with deep pressure on Maria’s back. You hit a tender spot and she wants you to hold that deep pressure.

    You do. But your body has been in that one massage position too long and things are starting to cramp up.

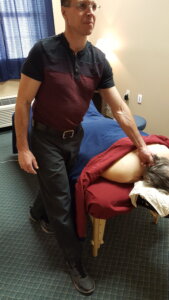
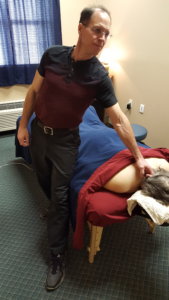
    So you switch to a one-handed position and lean into the tender spot.

    She asks for a little more pressure. You move your body so that you’re in the best position to transfer your body weight. Then you lean in.

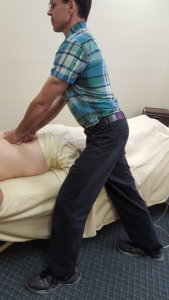
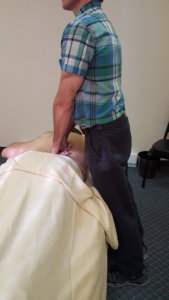
    In this picture I’ve maneuvered so that I can effortlessly lean in with all my body weight if need be.

    Now I’m adding the stretch.

    Oh, one more thing. You can even throw in a tool.

    One Hand Massage Quick Start

    If you want to add one hand massage into your work, start with areas that are easy for you to access with one hand.

    For me, these areas are neck, back, and hammies.

    1. Find a tight/tender spot.
    2. Lean in with one thumb, knuckle(s), fist, fist-thumb or massage tool.
    3. Adjust your body position so that it feels comfortable.
    4. Make postural correction and/or add a stretch.

    To transition out of one hand massage, simply move your feet so that you can comfortably put the other hand back down. Then continue on with two hands until you need another break.

    If you need a little more motivation to keep you going, jump in my email group. I’ll send you links to updates, tutorials, workshops, downloads, everything! It’s free and you can opt out whenever you want:-)

    Massage Pain-Free

    It took me a while (like 20 years, ugh) to figure out how I could massage efficiently and effectively without being in pain. But now in my 50s I can comfortably do more massages than I could in my early 30s.

    The trick?

    Steroids.

    Haha,

    The trick is not a trick; it’s actually a series of strategies and techniques that allow you to maximize your work effort while minimizing stress and strain on your body which I write about in my upcoming book, The Pain-Free Massage Therapist, due out July 10.   .

    You can read about that here.

    Have a question? Email me at mark@makethemostofmassage.com.