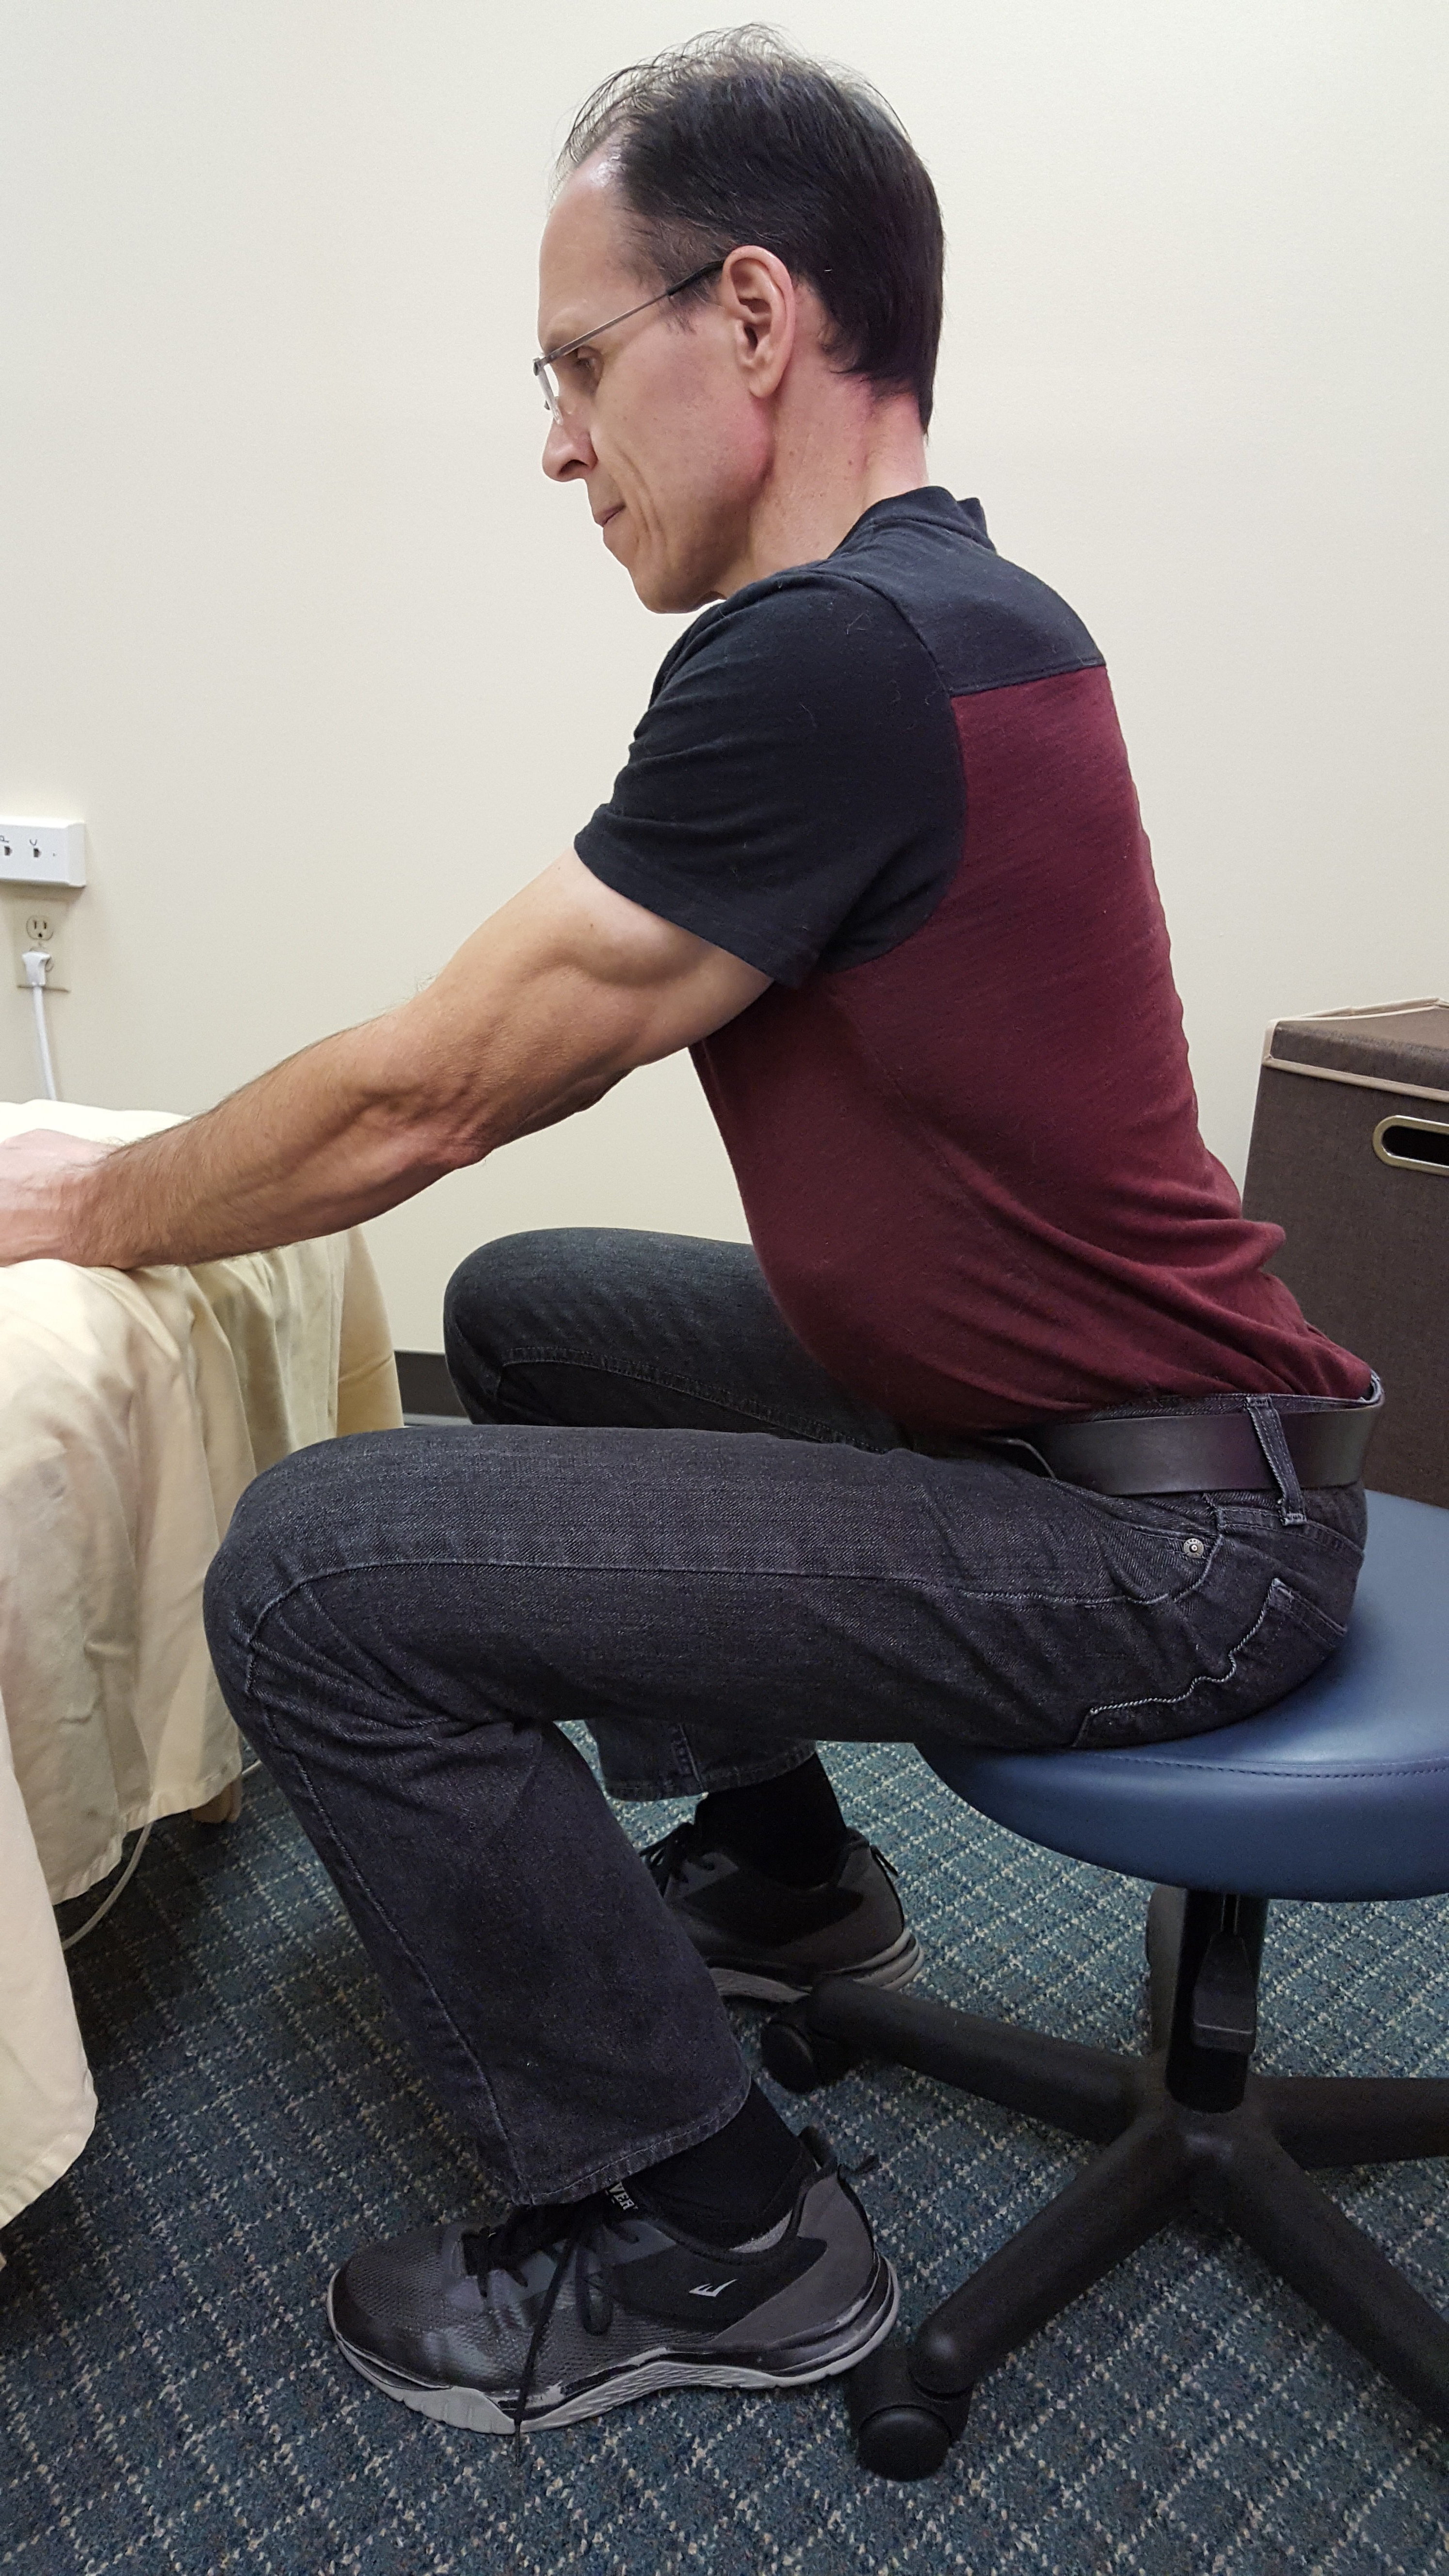
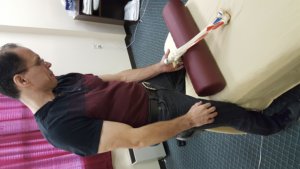
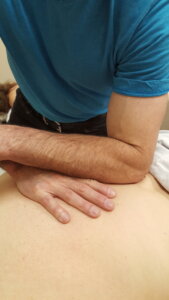
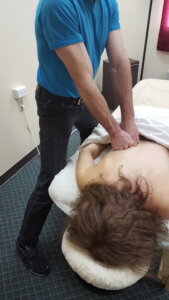
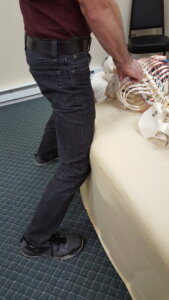
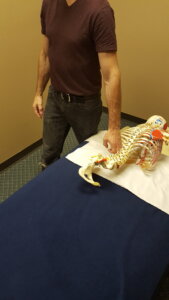
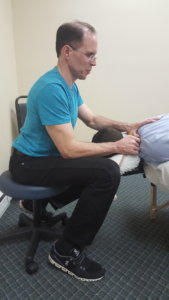
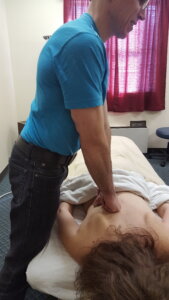
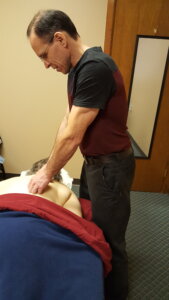
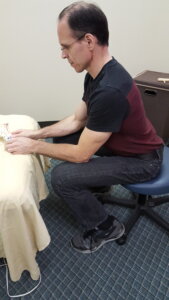
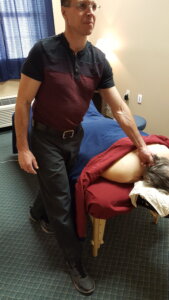
If you struggle with pain around the neck and upper traps when doing massage, here’s one simple massage strategy that could help you out: sit down when you can.
Pain in the Trap Area
When the orthopedist diagnosed me with an unstable shoulder and cervical radiculopathy a while back, I knew I needed to change some things around or I would have to find a new career. At the time, pain symptoms kicked up in trap/levator scapulae area when I was doing detailed work and having to stand in one position for a long time.
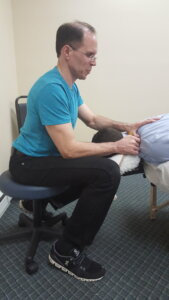
Then one day I sat down to work the neck of a client who was prone. I rested my forearms on my knees and the pain in the trap/levator scapulae area practically went away. But as I pressed, the pain returned.
To me, this pain could be associated with muscular contraction of my neck and upper shoulders and/or a change in my shoulder/neck positioning. I wondered how I could take “contracting my shoulder and neck muscles” out of the equation when doing seated massage.
Over the course of the next year, I discovered the other piece of the puzzle: leaning.
Seated Leaning
I had become efficient with leaning to generate pressure when standing, but it didn’t cross my mind to lean when I was sitting and working. When I eventually did, the trap/levator scapulae area stopped acting up.
The hinge for leaning when seated is the waist. When you’re leaning from the waist, the weight of your torso will sustain the pressure. If you’re not leaning, your shoulder and arm muscles will be working hard to sustain the pressure.
Seated massage is ideal for doing prone cervical work. In this video, I break down the process into 3 steps: sit, support arms, and lean: Seated Massage Body Mechanics Video.
Sit and Work Using a Massage Tool
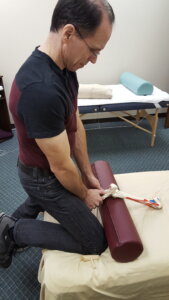
I would strongly recommend experimenting with a massage tool in the seated position. Specifically, I would choose to work with an L-bar because it has a longer shaft than the T-bar. The longer shaft will allow you to get into the cervical erectors easier.
When you use a massage tool like the L-bar while seated, you’ll be able to really focus your pressure because the end of the L-bar has a small surface area. This means that you’ll barely have to lean to generate appropriate pressure. I hardly feel like I’m working when I’m seated and leaning with my L-bar.
There are many other ways that you could incorporate seated massage into your massage routine. Here I’m working the plantar side of the foot with my arms supported on my legs. From this position, I can easily get my pressure up to medium.
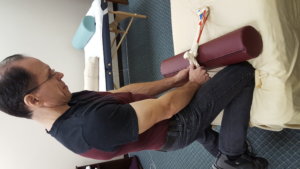
If I need deeper pressure, I would stand and support my arm and hand with my leg.
If you want to give your hands a break, try the same standing supported-arm technique with a T-bar.
It’s Not Hard
There is only one way to change how your body feels when doing massage and that is to experiment. If you’re having trap area problems, try doing some of your work seated.
In my book, the three most important steps for seated massage are:
Sit
Support
Lean
Once you get those down, think about adding “looking straight ahead”and you’ll put even less strain on your traps/neck.
Watch a Video Before You Start Your Next Client
For quick reference, here are the videos. They are short so that you can watch them during the time you allot for your client to get on the table.
Massage body mechanics has a physics part (what is the most efficient way to massage in general) and a personal part (what is the most pain-free way for you to massage).
It’s been my experience that the personal part is often left out of most massage body mechanic courses.
But it’s the combination of the two—general efficiency and personal efficacy—that should determine your body mechanics when doing a massage.
Let’s breakdown these two aspects of body mechanics further.
The Physics Part of Body Mechanics
Would you agree that if you’re doing light pressure massage you’re less worried about straining muscles and injuring joints?
In my experience, it’s the medium and deep pressure that causes pain. So, what’s the most efficient way to deliver medium to deep pressure?
I would argue it is to use your body weight to generate pressure.
If you can transfer your body weight onto the client you don’t need to press with your upper-body, and it’s much easier for you to keep your shoulders, elbows and wrists aligned. When you can keep your joints aligned, the assumption is that you’re less likely to injury a joint.
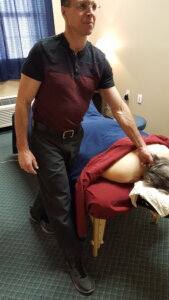
In this picture you can see that my table is low.
It’s low so that there is enough distance between my client and myself so that I can transfer my bodyweight onto the client when I lean.
If my table were high, I wouldn’t be able to do that.
Ah, Mark, but a low table will hurt my back.
That would be true if you didn’t do this one thing—use the table for support.
Take a look at this pic.
Do you see how my one leg is leaning against the table?
The massage table is actually helping to support my weight which takes the strain out of my back. I could even straighten up if I wanted to.
To get an idea of how leaning against the table can take the strain out of your trunk muscles just lean against the wall. Muscularly speaking, it’s a lot easier to stay upright, right?
Leaning and using your body weight to deliver pressure efficiently takes a little practice, but is not crazy hard to do.
The challenge to good body mechanics is part two—the personal part of body mechanics.
The Personal Part of Body Mechanics
We all come in different shapes and sizes and injuries and challenges. Theoretically, leveraging your body weight may look good on paper, but it may not be the pain-free thing to do for your body in every massage situation.
My wife, Lisa, is a massage therapist, too. She uses her upper-body a lot when massaging and that can aggravate her neck and shoulders.
She does not work on a low table because she doesn’t want to lean into the massage table for support. It’s physically and mentally uncomfortable to her.
So, if she did work on a low table without leaning into the massage table for support she’d aggravate her low back which is already set up for pain issues.
Time to trash the strategy of leaning to generate pressure for Lisa?
Not at all.
Lisa does a lot of her massage work sitting. She can lean when sitting down.
Okay, that’s me leaning while sitting, but you get the point. I’m leaning to generate pressure rather than contracting my upper-body to generate pressure.
Let’s go through another example. I’m going to use me. Many years ago I was a forearm massage therapist. But overtime cervical radiculopathy and an unstable left shoulder caught up with me and anytime I did forearm work, my left neck and arm ached and my elbows and hands would tingle.
It didn’t matter if I was leaning with my shoulder stacked over my elbow—I still was in pain.
I decided to take my shoulder and neck out of the equation by leaning on my fists instead of my forearms.
Well, that meant that I had to lower my table even more so that I would have enough distance between my client and my fists to transfer my body weight onto my client.
Once I did that I could stack my shoulders over my elbows and my elbows over my wrists.
Guess what?
No more neck and shoulder pain.
So, leaning, keeping my work below and in front of me and keeping my joints stacked pretty much took care of my shoulder and neck pain when massaging.
These kinds of experiences made me realize that when I taught “good massage body mechanics” to a massage therapist, I was actually teaching strategies not axioms.
I was saying to the massage therapist: Go ahead, take this strategy out for a test drive. How does it ride?
Sometimes the massage therapist would just need to let the new strategy settle in, sometimes we would need to tweak the strategy to make it work for a specific requirement and other times we needed to pass on the strategy altogether.
The good news is that there’s not just one strategy to help a massage therapist massage efficiently and without being in pain. And at the end of the day I became confident that I could help any massage therapist find the strategies that would work for her/himself.
Speaking of other body mechanics strategies, here’s another one: combining body parts.
What do I mean when I say combine body parts?
Combining Body Parts
I’m talking about taking two body parts—fingers, thumbs, knuckles, fists, forearms—and putting them next to each other or on top of each other to brace and support each other.
When I do this I create a very stable “tool” that doesn’t rely on one finger or thumb or joint.
In this video you can see how I combine body parts for working in the lamina groove.
Once you start experimenting with combining body parts, you are going to start to figure out what kinds of combinations work best for you and you’ll probably come up with a few of your own.
Here’s another strategy for saving your hands: become ambidextrous.
Become Ambidextrous
Becoming ambidextrous is not as hard as you think. It simply requires practice.
The trick is don’t try it all at once. In other words, sneak your non-dominant finger, knuckle or hand into a massage in short bursts. As you get more comfortable with your non-dominant hand you can work in longer periods of time.
Here’s one of my favorite body mechanics strategies: break static posture.
Break Static Posture
What is static posture?
It’s a fixed body position.
Think hairstylists, dentists, mechanics, data entry workers, and us, massage therapists.
The problem occurs when you’re in a fixed position for extended periods of time while you’re physically exerting yourself.
Why is that bad?
Because protracted static posture increases loads or forces on muscles and tendons in specific areas. When this happens fatigue occurs in these areas because blood flow is impeded. When blood flow is impeded there’s less replenishing of nutrients and elimination of metabolic waste. In other words, tissue recovery is not good.
It’s a perfect set up for back pain.
Now think about your way of doing massage. Seeing some static posture moments?
Time to make some adjustments.
Here’s a common static posture in massage.
Hunching with head down.
So how I can I interrupt this static posture massage cycle without rewriting how I do massage?
One way is to find times during the massage when you can change your back position. Here’s one way:
Massage with one hand so that you can straighten up.
Or take a knee on the table when standing and working on feet.
In this video you can see how I interrupt static posture when working the subocciptals.
Massage Body Mechanics Course
Massage body mechanics is more than just physics. What’s the point of applying the best theoretical body mechanics principles if those principles don’t keep you out of pain or worse, they put you in pain?
In my book, body mechanics and massaging without being in pain are inextricable—and both must be considered when figuring out the best body mechanics for you.
If you want to figure out the best body mechanics for you, I have a body mechanics online, home study CE course called How to Deliver Deep Pressure Without Hurting Yourself (3 CEUs).
It’s NCBTMB-approved and you can check it out here.
Want my latest information on staying out of pain when doing massage and building a massage practice? Sign up for my free, email group and I’ll send you my latest information.
Here are my favorite massage deep tissue techniques for pain relief and relaxation massage—that are effortless to do and don’t hurt my body.
The “don’t hurt my body” part is vitally important because if you’re killing your body doing deep tissue massage you’re either going to stop doing deep tissue or you’re going to continue to kill your body and resent your clients who want deep tissue work.
So, here are three deep tissue techniques that I do all day without being in pain.
By the way, after I show you the techniques, I’m going to explain the strategy behind each one. Once you understand the strategy you can develop your own pain-free, deep tissue techniques.
Here’s what we’re going to cover:
(1) Upper-Trapezius Non-Squeeze Release
(2) Rotatores and Multifidi Ischemic Compression Release
(3) Seated IT Band Glide/Press Release
1. Upper-Trapezius Non-Squeeze Release
In neuromuscular massage therapy (NMT) training I learned a great technique for releasing the deeper tissue of the upper traps.
The client is prone. With one hand you grasp the top edge of the trapezius so that your four fingers are wrapped around the superior, anterior edge and your thumb is on the posterior side of the upper-trap.
In this hand positioning you’re going to grip the upper trap and then “unfurl” the trap edge by moving your fingers towards you and your thumb away from you.
Once you get the technique down you can exert very focused pressure in the deeper tissues of the upper trap.
The goals of the NMT trap release are to deactivate hard to get to trigger points and to change ischemic conditions in those areas.
Though I don’t subscribe to NMT theory any longer, from a pain relief and relaxation massage perspective, I like the NMT trap release because it’s pain relieving and relaxing to clients.
But there’s a problem with the NMT deep tissue trap release: It beat the dog poop out of my hands.
This caused another problem. I couldn’t cut it out of my massage routine because a chunk of my clients were used to the NMT upper-trap release and loved it. So I needed to come up with a version that didn’t kill my hands. And that’s what I did.
Squeezing and rolling with one hand was what caused hand pain when doing the NMT Upper-Trap Release. So, instead of using one hand, I decided to use two. And instead of squeezing, I pressed with two hands.
By using two hands I could still roll and “squeeze” (now press) the tissue with focused pressure which was what made this NMT technique so effective in the first place, but without straining my hands.
In addition, for clients with very thick upper-traps, I added a massage tool which allowed me to press with enough force to reach the deeper tissues of the upper-trap.
Here’s what that looks like:
Play with getting really specific with your pressure. It’s amazing how focused your pressure can get when pressing between two hands.
Now, I want to show you a deep tissue technique for back muscles, specifically for rotatores and multifidi. It’s my favorite deep tissue technique.
2. Rotatores and Multifidi Ischemic Compression Release.
The multifidi and rotatores are in the lamina groove. Early on in my career, I shied away from anything close to the spinous processes. But neuromuscular therapy taught me that these muscles can be influenced and clients REALLY like getting them worked.
The Deep Back Muscles
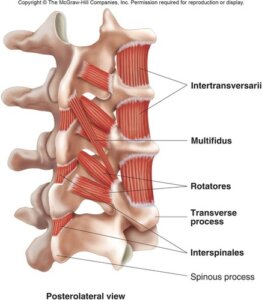
Here are the multifidus and rotatores:
They multifidus stabilizes joints within the spine. The rotatores lie underneath the multifidus and are involved in postural control.
The great thing about the deep tissue technique that I’m about to show you is that you can do this technique through clothes (like when doing demo massages). Being able to deep tissue massage during a chair massage event is a great way to market your skills and has helped me net clients.
4 Steps for Deep Tissue Rotatores and Multifidi
Here’s how to get comfortable working these deep muscles.
Step #1: Find the spinous processes.
Once you find the spinous processes, you’ve won the battle.
By the way, don’t be scared of the spinous processes. They are your friends (reference points).
Step #2: Go just lateral of the spinous processes (maybe 1/2 inch).
For extra assurance, keep in contact with the spinous processes. You can use fingers from your pressing hand or non-pressing hand to maintain contact.
Step#3: Press down into the lamina groove with a thumb/finger or body parts combination.
Here’s what that looks like:
(In the video I use the term power tools. Now I call power tools “body part combinations”.)
You may have noticed that in the video that my table is low and that I’m leaning generate deep pressure.
Why?
Because when you lean you can transfer your body weight into the area you want to work. In other words, you can use your body weight to generate pressure.
Leaning makes delivering static pressure in the lamina groove effortless.
To learn how to lean to generate pressure, go here.
As you’re learning to calibrate your pressure in the lamina groove, you may first want to use a pain scale system.
Here’s the pain scale system I use: I tell the client to think of a pain scale from 1 to 10 where 1 is not much pain and 10 is a lot. When you press on an area, you want your pressure to feel like it’s registering in a 3 to 4 range (in acute pain areas) or a 4 to 5 (in non-acute pain areas).
Here’s my pain-scale-system tutorial video if you want to take a deeper dive: Pain Scale Video.
When I have a client who responds well to deep pressure in the lamina groove, I use a massage tool to save my hands.
The massage tool also allows me to deliver deeper and more focused pressure.
The disadvantage of using a massage tool is that you will lose some sensitivity, but that can be remedied if you use a guide finger.
Go here if you want to learn how to use a massage tool in the lamina groove.
Step #4: Be thorough and relaxing with each press.
When I say thorough, I mean really explore the tight and/or painful areas with ischemic compression. Sometimes you may find the “that’s it!” spot, which when pressed with the appropriate amount of pressure may provide instant pain relief.
When I say make it relaxing, I’m talking about the speed you move from point A to point B.
Don’t rush it.
Zen it.
The focused, deep pressure can be very relaxing to many. Jump from point to point quickly and you’re undoing the relaxation benefit.
Here’s a trick for moving at a relaxing pace: Stay relaxed yourself because if you’re relaxed when doing deep tissue work, then you’re probably moving at a pace which is relaxing to your client.
Though ischemic compression in the lamina groove is my favorite deep tissue technique, this next one is a close second.
3. Seated IT Band Glide/Press Release
For most of my massage career I hated working IT bands because they were so hard to get to without having the client turn on her/his side. Then I’d have to deal with the sheet and the IT band was now on an angle and if I was using my forearm it was looking more like I was trying to block a linebacker than do a massage…and the list went on.
Give me an IT band deep tissue release that is easy to do, doesn’t hurt my body and is effective.
Here it is—the Seated IT Band Glide/Press Release.
Wait, Mark, how can you generate enough pressure in the IT band when you’re sitting?
You lean.
Just like when you were standing and leaning, you can lean when you’re sitting, but when you’re sitting, you’re leaning from the torso.
And, yes, you will be able to generate all the pressure you need to and then some.
For a broad glide, you can use your fists or knuckles or a fist-palm.
For more focused pressure you can use a knuckle, thumb or a massage tool.
Or you can use body part combinations like a knuckle thumb.
The great thing about seated deep tissue IT band work is not only is it easy on your body, but the body part combinations and tools that you can use to get the job done are practically endless.
Here’s how I do the Seated IT Band Deep Tissue Release:
Remember that in the beginning of this article I had said that the three deep tissue techniques that I was about to show you had strategies behind them and that you could use these strategies to develop your own deep tissue techniques that wouldn’t hurt your body?
Well, I want to explain those strategies to you so that you can walk away from here armed with the building blocks to help you create deep tissue techniques just for you.
Strategies for Pain-Free Deep Tissue Massage
Here are the strategies behind my deep tissue techniques that save my body:
Squeeze less. Press more.
Lean to generate pressure.
Use multiple body parts (and use tools) to deliver focused pressure.
Let’s take these three strategies and start experimenting.
TFL Deep Tissue Release
The TFL is a tough muscle to access. It’s small and requires very focused pressure, which begs the question: How do I massage the TFL with deep pressure without killing my hands?
In the video below I take the 3 strategies—squeeze less, lean and use multiple body parts/tools—to create a deep tissue technique that doesn’t hurt my body.
Are you starting to see how these 3 strategies can be applied universally to all body areas that you are massaging?
Here’s another example of deep tissue work in the tibialis posterior where I use the 3 strategies (more press, lean and use multiple body parts/tools).
By the way, this massage example is not part of what I would do during a relaxation massage. It would be what I would do if someone came in with a tibialis posterior issue.
Massage Deep Tissue Techniques In a Nutshell
So, I showed you three of my favorite deep tissue techniques—(1) upper-trap non-squeeze release, (2) rotatores and multifidi ischemic compression release, and (3) seated IT band glide/press release.
To get to the deep tissue of a muscle, you need to be able to exert a certain amount of pressure. Sometimes that pressure needs to be precise.
Once you can exert the appropriate amount of pressure you can hold that pressure, glide with that pressure or do other movements with that pressure, like cross-fiber work.
To be able to hold that pressure consistently your body can’t be straining. In fact, your body needs to be relaxed which means you need to be using strategies that make deep tissue work easy.
Leaning, less squeezing and more pressing, and using multiple body parts/tools to deliver pressure are strategies that will take the strain out of your body when doing deep tissue work.
If you work with these 3 strategies you will not only save your body when doing deep tissue work, you’ll start to develop your own techniques that are unique to you and your style of massage.
Online Deep Tissue CE Class
If you want more help, I have a online, home study, CE course that will give you the platform to create your own deep tissue techniques and get competent with deep tissue work without hurting yourself.
It’s NCBTMB-approved and you can check it out here.
And if you have a question about my deep tissue techniques or anything else, email me anytime— mark@makethemostofmassage.com. 🙂
Here are seven “injury prevention for massage therapy” strategies that keep me out of pain and allow me to increase my massage max.
Stop doing techniques that hurt you.
Find replacements for techniques that hurt you.
Use as many body parts as possible.
Use your body weight to apply pressure.
Interrupt static postures.
Use a massage tool.
Become ambidextrous.
You may have laughed at the first strategy—stop doing the techniques that hurt you—but here’s the reality, it’s easier said than done.
1. Stop doing techniques that hurt you.
You learn a great scapula release technique at a CE class and your clients love it. Problem is, it hurts your hands. What do you do? Well, if you’re like me you keep doing it until it becomes a problem. I know I’m not the only one that does this.
Once I was training Susan, a massage therapist who was working for us.
She complained about that her right shoulder was really bothering her as the number of massages in a day increased.
So, we went into the massage lab to investigate. As she was working on me (tough experiment for me, haha) she said, Now…it hurts now.
Okay, what are you doing right now?, I asked.
When I got off the table she showed me what she was doing. Her right hand was under my back and she was doing a supine subscapularis release technique.
That’s it, she said, that’s exactly when my shoulder hurts.
I then asked her, Have you tried a different release technique?
She looked at me puzzled, and then said, I never thought about trying something different.
I showed her a side posture subscapularis release technique and it didn’t cause pain in her shoulder.
There was a flash of embarrassment on Susan’s face when she realized that she never thought about NOT doing the move that was hurting her shoulder.
I told her that we’ve all been there. In fact, you still might be there.
You might be thinking: This killer move is what my client wants, it’s my signature move, it’s the best move out there and/or I’ve done this move forever (in varying degrees of pain) so it’s my body that’s the problem, not the move.
Okay, let’s get rid of this “if I’m in pain doing massage, it’s okay” out of our heads right now because there’s a cumulative effect with this mindset. And it can set you up for more pain and potentially an injury.
No technique is worth an injury (or pain). If certain techniques bother your body, stop those techniques and…
2. Find replacements for techniques that hurt your body.
Here comes that voice again: “Nothing can replace my patented supine rhomboid move.”
I’m here to tell that voice, Yes, that move can be replaced.
And it can be replaced by a move that doesn’t hurt your body.
You just need to start experimenting.
For example, are you into squeezing traps?
If so, how do your hands and forearms feel after a 6 hour day of squeezing.
Mine didn’t feel so good. That’s why I started to experiment with different ways to release traps. In this video I use a massage tool to press instead of squeeze with my hands.
Now that you’ve agreed to stop doing the techniques that hurt your body and are starting to think about replacement techniques that don’t hurt your body, it’s time to…
3. Use as many body parts as possible.
When I say body parts I’m talking about fingers, thumbs, knuckles, fists, palms, forearms and elbows.
Why use as many body parts as possible?
So that you don’t burn out one body part.
Think about it—if you can alternate between fingers, thumbs, knuckles and elbows (in large muscles areas) for detail work, you can spread out the workload over multiple joints and body parts.
Spreading out the workload amongst body parts may look like this for detail work: 20% thumb, 20% fingers, 20% knuckles, 20% elbow, and 20% massage tool (we’ll talk about massage tools in a minute).
Hmm…100% using thumbs to do detail work versus 20% using thumbs…I’m going to say my thumbs will be a lot happier carrying only 20% of the workload for detail work.
We covered some injury prevention strategies for detail work and general massage, but what about for deep pressure massage?
4. Use your body weight to generate pressure.
When you use your body weight to generate pressure you take the strain out of your upper body. In fact, applying pressure pretty much becomes effortless. But in order use your body to the point that you can transfer your body weight onto the client, you’ll need to lower your table.
Twenty-five years ago I was taught that to set my table height, my distal knuckles should touch the top of the table when my arms were at my sides. Look on the Internet and you’ll find a range of table height advice, like: The height of your table should be your height divided by two.
Though well intended, there are some serious flaws with standardizing a table height setting that result in a loss of leaning leverage for medium and deep pressure. With no leverage, backs, hands, arms and necks get trashed because you need to overuse your upper-body when doing deep pressure.
But a lower than “normal” table is the set up to allow you to transfer all of your body weight (lean) onto the client.
If you don’t believe me try leaning onto your client at your normal table height. Then lower your table to the lowest setting, better yet, take off the extender legs so that the table is even lower than the lowest setting. Now lean.
Do you see how you can now transfer all of your body weight onto your client if you wanted to?
It will take you some experimentation to figure out which lower table height setting works best for you when doing deep pressure. My suggestion is this: Whichever setting you’re thinking about lowering your table to, go one if not two settings lower than that.
To learn more about working on a low table so that you can lean effectively, go here.
Leveraging your body weight to deliver pressure is going to take the strain out of your upper-body, but we have something else to consider that can lead to fatigue and cause us pain and potentially contribute to injury—static posture. Here’s what we’re going to do:
5. Interrupt static posture.
First, what is static posture?
Static pressure is being in a position for a long time without moving. It often looks like this during a massage:
Static posture is bad because protracted static posture increases loads or forces on muscles and tendons in specific areas. When this happens fatigue occurs in these areas because blood flow is impeded. When blood flow is impeded there’s less replenishing of nutrients and elimination of metabolic waste. In other words, tissue recovery is not good.
Here’s an example of how you can disrupt static posture during a massage.
Look at the picture above. I’m hunching with my head down, a common static posture position.
So how I can I interrupt this static posture massage cycle without rewriting how I do massage?
One way is to find times during the massage when you can change your back position. Here are some examples:
1. Take a knee on the table when standing and working on feet.
2. Sit and lean whenever possible.
3. Massage with one hand so that you can straighten up.
This article will give you a more in-depth understanding of how to break static posture during a massage: Don’t Do Static Posture Massage.
Breaking static posture will become the norm once you start experiencing the huge benefits of not being in the same position all the time.
Speaking of big rewards, I now want to show you how massage tools can save your hands.
6. Use massage tools.
I’m not talking about any massage tool. I’m specifically talking about massage tools that have a handle and a stem.
Why?
Because a handle makes the tool easy to hold, and a stem does a fantastic job of simulating a thumb.
Here what tools with handles look like:
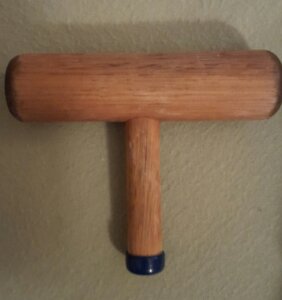
Here’s a T-bar:
And here’s a long stem T-bar:
(Thank you Matt Johnson for designing and making my wooden tools!)
Massage tools with handles come in a lot of different flavors, but I really want to emphasize the importance of the handle.
The Importance of a Handle
The handle allows you to easily hold the massage tool BUT I’m not talking about holding a handle in the traditional sense–wrapping your hand around the handle and gripping.
I’m talking about using the handle to support your body weight. Think of parallel bars or push-up stands where you’re simply supporting your body weight on an apparatus.
Holding a Massage Tool
With a massage tool you are directing some of your body weight onto the handle of the tool.
If the massage tool is pinned between your hand and the tissue you’re working on, you can loosen your grip.
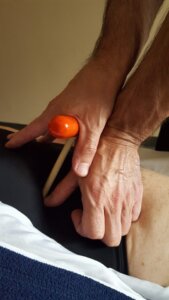
And if you add a guide finger/thumb next to the end of the stem of the massage tool, you can actually relax your “holding” hand.
Here’s what that looks like:
See how relaxed my hands are?
My guide fingers is helping to stabilize the tool. I’m also sensing how much pressure I am applying with my guide finger.
This all looks great, right? But when you actually go and try to hold a T-bar or L-bar without gripping you’re going to say–Mark, you’re a freakin’ liar–because it’s not going to work.
Why isn’t it going to work?
Because your table won’t be low enough. And that means you’re not going to be able to lean onto the massage tool handle with enough pressure to keep the tool upright without gripping.
Leaning into a massage tool, like leaning into the client with your hands, is not rocket science. It just takes practice.
The last injury prevention recommendation I have is to…
7. Become ambidextrous.
Raise your hand if you’re severely one-sided!
I was. It felt unnatural and inefficient to use my non-dominant side.
Why?
Because it WAS unnatural and inefficient to use my non-dominant side.
But with a little practice I got a little better and soon the idea of becoming competent with my non-dominant side didn’t seem that farfetched.
This isn’t exactly what I did, but I think it will get you to where you want to be. For the next 50 massages, every time you use a dominant-side body part for detailed work (e.g. right thumb), use a non-dominant-side body part (left thumb), too.
Make it easy when you first start by only placing a non-dominant-side body part down for 1 or 2 seconds. Gradually add more time.
As you add time, explore with the non-dominant-side body part.
Why not? We have the perfect work situation to explore.
Seriously.
For one, we can eye the client for reactions.
Get a squirmy reaction, then stop and try again in a different place or on a different client.
We also know what it feels like to get a massage. We know when pressing on a spot too long starts to feel uncomfortable.
And that on-the-table sense is always running as we’re doing the massage. To build that sense up, get more massages. I’m always amazed how much I learn when I’m actually the one getting the massage.
Injury Prevention for Massage Therapy in a Nutshell
If you’re feeling like injury prevention is a little daunting, step away from my specific recommendations for a minute and think in broader terms.
To prevent repetitive stress injuries you don’t want to keep racking up the massage hours with a particular body part, like your thumbs.
So what do you do?
You can become ambidextrous, use many body parts (and combination body parts) and massage tools.
To prevent injuries that are caused from overstraining, use your body weight to generate pressure, stop doing the techniques that hurt you and find replacement techniques.
To avoid injuries due to muscle fatigue from being in one position too long, find other positions to do your work.
It took me a while to get this about massage injuries: Avoiding injuries (and pain) when doing massage is an active process. It’s not an off and on thing. In fact, it always needs to be on. When it is, it becomes part of your massage style and what makes you unique and keeps you injury free.
Have a pain/injury issue?
Take my pain quiz and get an instant video solution.