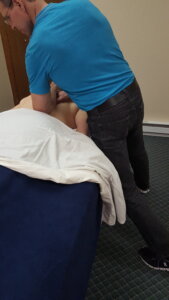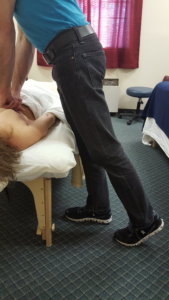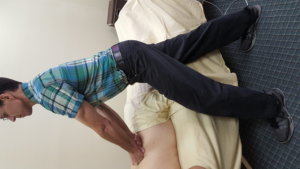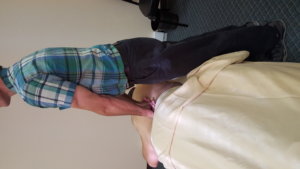
Category: Massage Pain-Free

  • Massage Therapy Hand Pain – NOPE

    Massage Therapy Hand Pain – NOPE

    How do you eliminate hand pain when doing massage?

    1. Incorporate your non-dominant hand. 
    2. Add in bracing/combination techniques.
    3. Use hand-held tools.

    I bet you thought I was going to say use your elbows/forearms as substitutes for your hands.

    Elbows can be good substitutes for hands, but if you start to rely on your elbow too much you could develop overuse problems, like cubital tunnel syndrome. 

    In addition, an elbow is great for a back, but how about if you’re doing detail work, like in the neck? For most of us massage therapists, using an elbow to do detail work in cervical erectors is not going to work.

    Enter your non-dominant-hand, bracing and combination techniques and massage tools.

    1. Massage Therapist Hand Pain – Be Ambidextrous 

    About 10 years ago, my right thumb started to bother me.

    When I think back it makes perfect sense that it would. I used it a lot—especially when doing deep, detail work. For a long time, I simply accepted thumb pain as the price to pay for doing massage.

    But as the pain increased I realized that if I didn’t change something soon I was going to be in trouble.

    One day during a massage my right thumb was really aching and I had to give it a break. So I stuck my left thumb in the cervical erectors.

    It was awkward BUT my left thumb didn’t ache. (Hey, I could get used to this!)

    Then I experimented with my left thumb so often that it started to hurt, too.

    Eventually, I found that if I followed a thumb workload formula of 60/40 (60% dominant thumb/40% NON-dominant thumb) my thumbs felt great.

    2. Massages Therapist Hand Pain – Combine and Brace

    Splitting the workload to 60/40 between my thumbs was a big improvement for reducing pain in my right thumb. However, it didn’t solve my problem of achy and stiff fingers.

    There was one move in particular that really made my hand ache. The move involved squeezing and rolling the upper trap edge between my thumb and fingers.

    One day I was doing that move and my hand ached. Without thinking I reached over with my other hand to help with the squeezing.

    Hmm…it sure was a lot easier squeezing with two hands.

    And that is when I really started to experiment with combining and bracing.

    What happens if I put a thumb over top a thumb and pressed down with both thumbs?

    Well, I’ll be damned if that didn’t make the work for my dominant thumb easier.

    There are no right or wrong bracing techniques. It depends on the individual and is influenced by anatomy (e.g., big knuckles versus small knuckles) and preexisting conditions.

    My favorite hand-saving, bracing combinations are

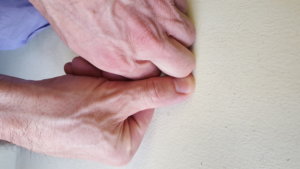
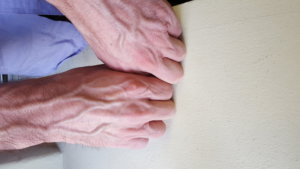
    Braced thumbs:Braced Thumbs pic
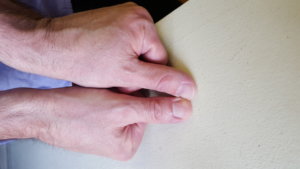
    Third knuckle and thumb:Braced Thumb and Third Knuckle pic
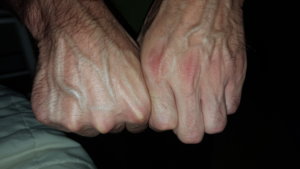
    Braced knuckle and fist:Braced Knuckle with Fist pic

    Check out this video for more in-depth bracing and combination techniques: 

    Here’s my favorite eliminating hand pain solution—massage tools.

    3. Massage Therapist Hand Pain – Massage Tools

    Becoming ambidextrous and bracing my fingers, thumbs, knuckles and fists together made my hands feel better. But adding in hand-held tools allowed me to increase my massage volume big-time without injuring my hands.

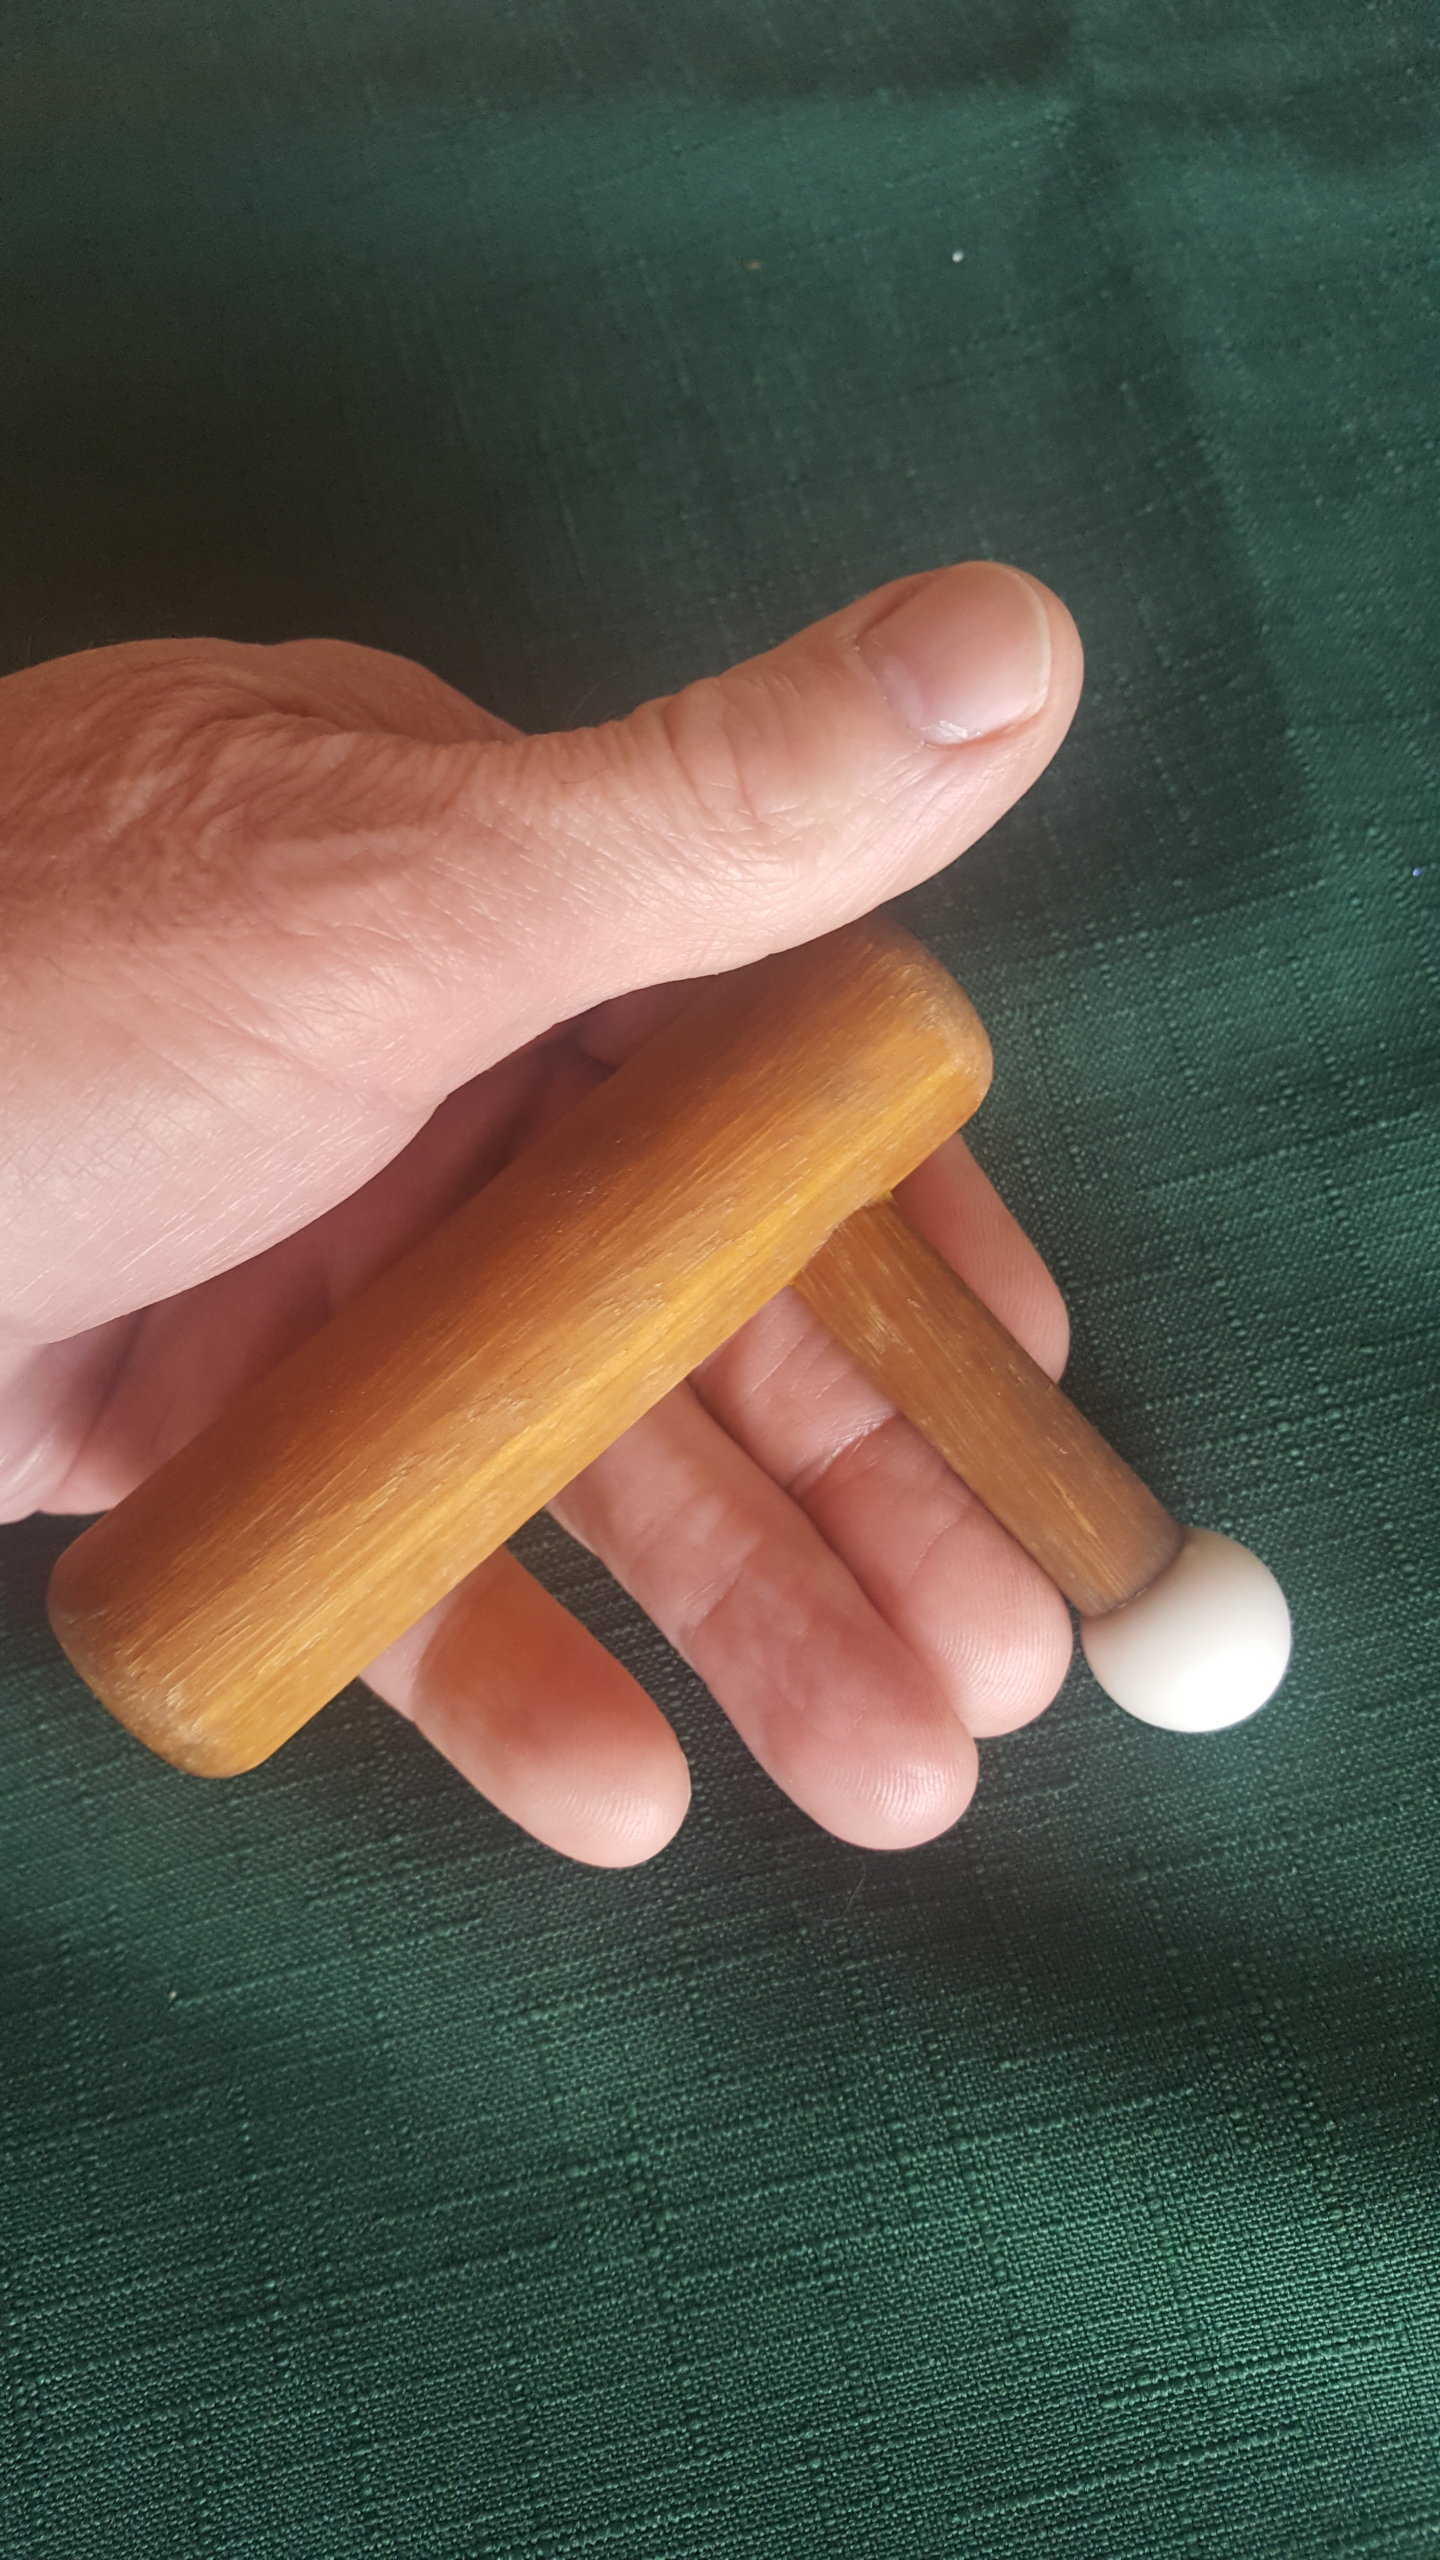
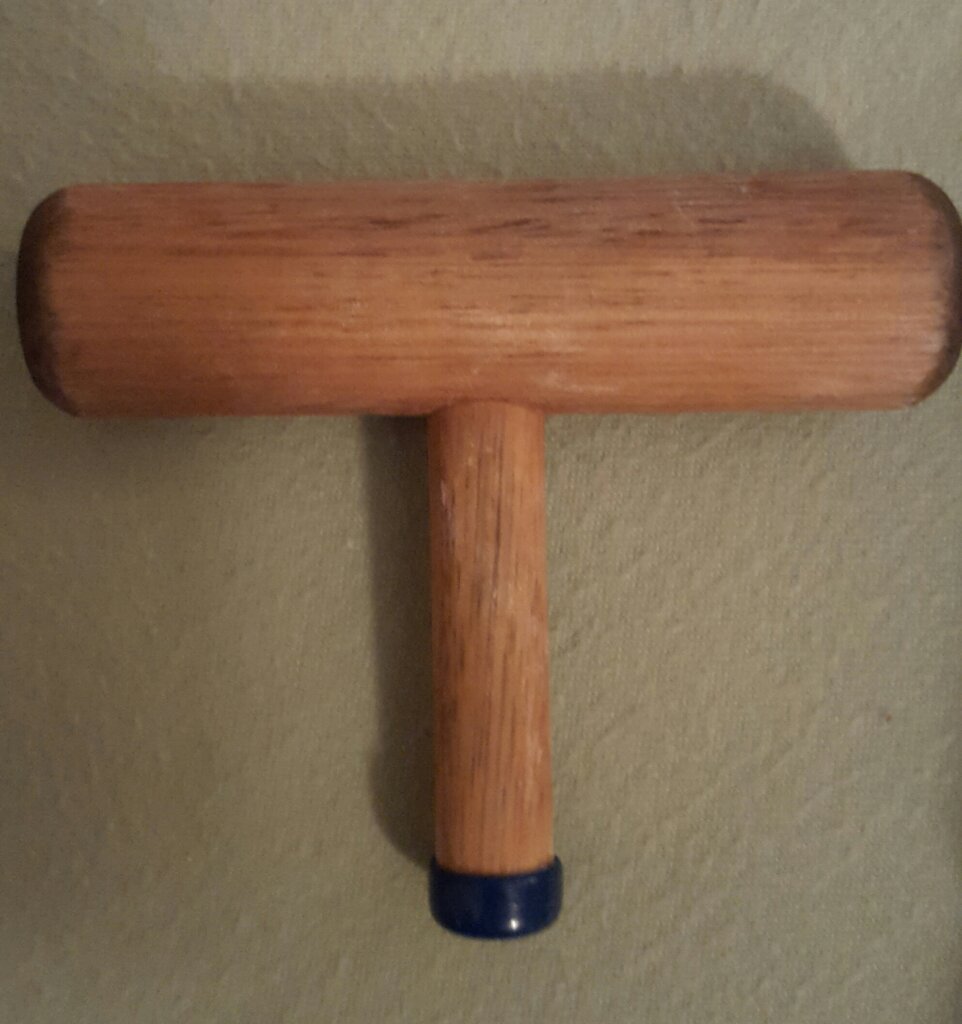
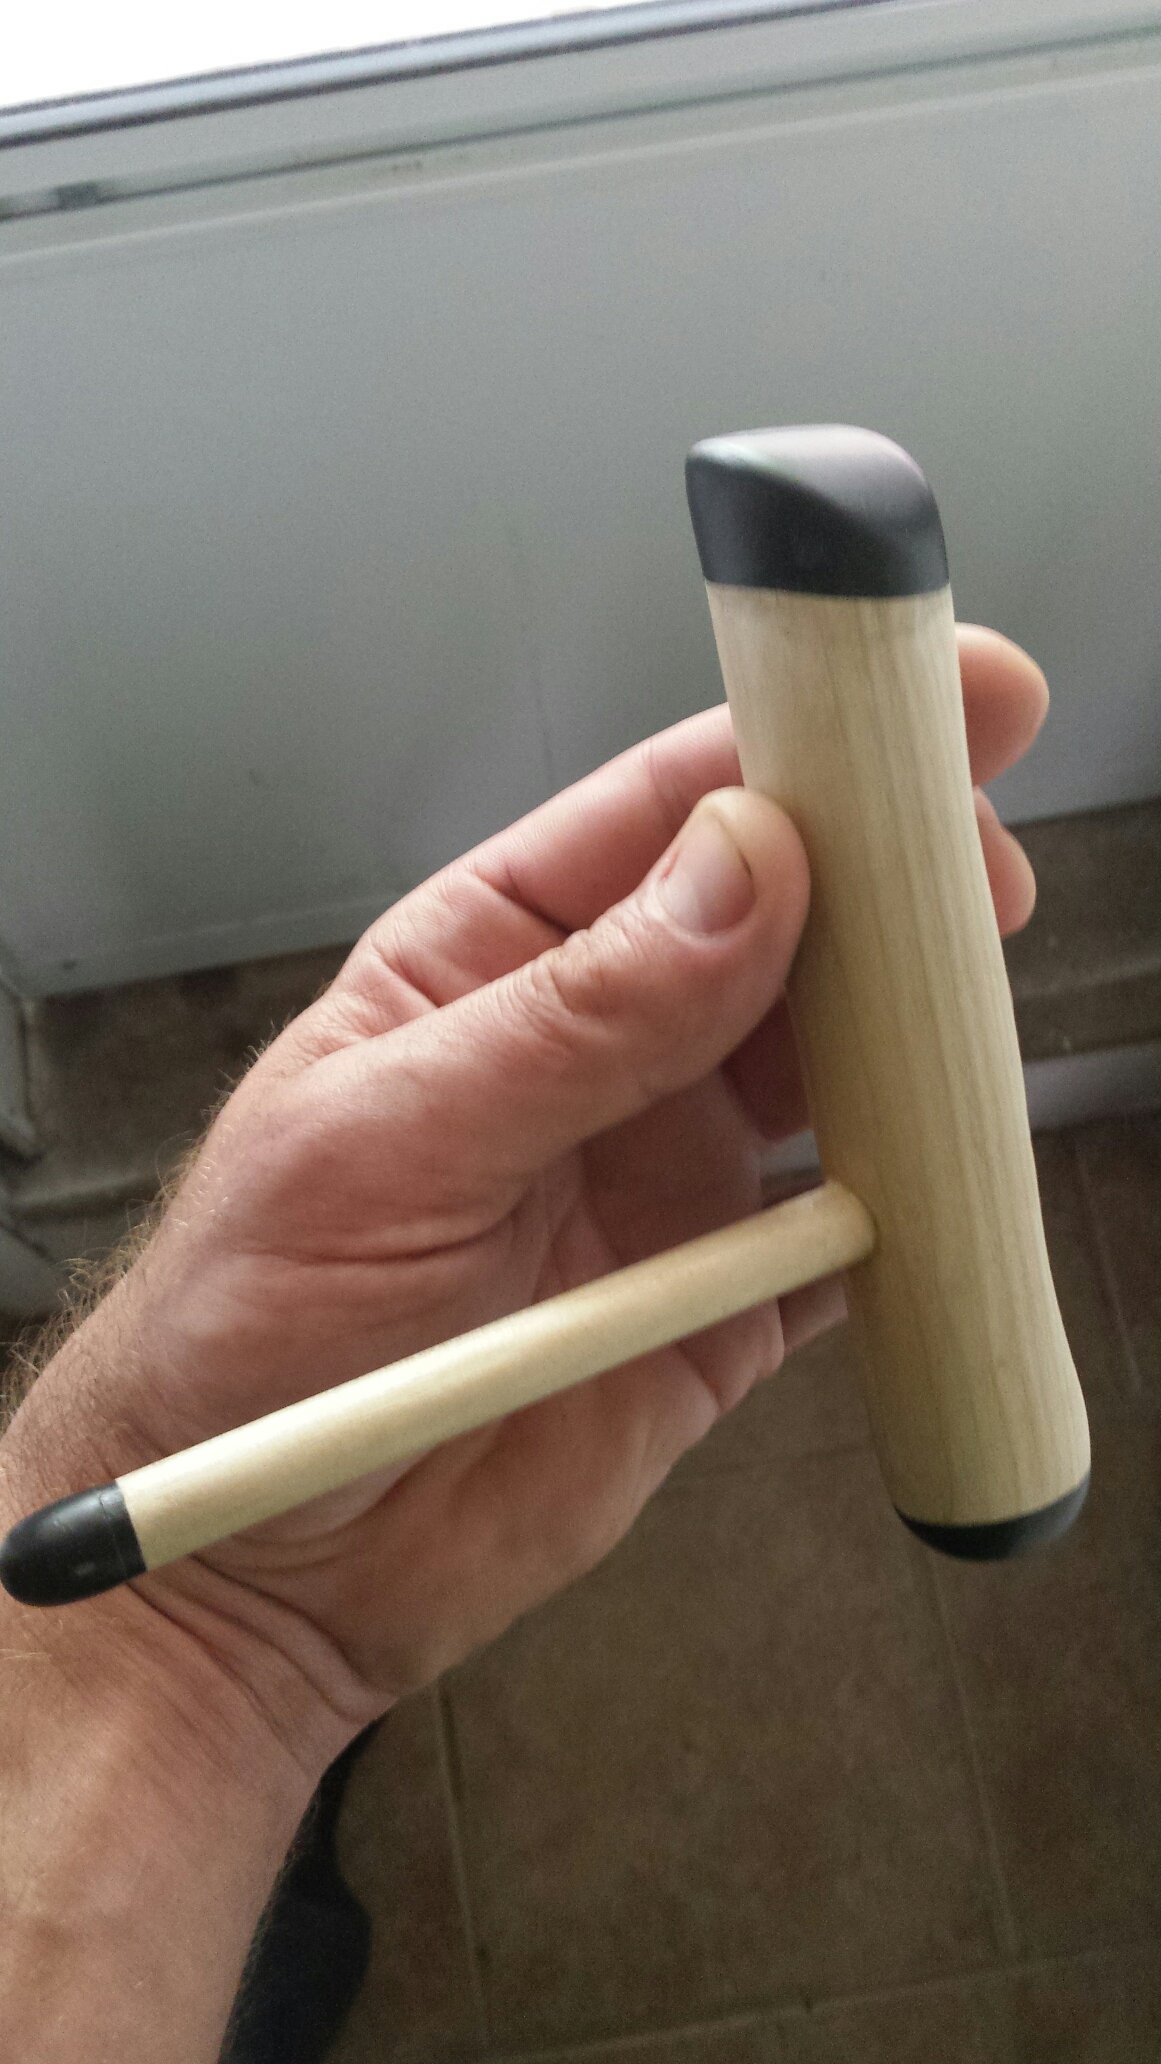
    Here are 2 basic types of wooden hand-held tools that I use:T-bar and L-Bar pic
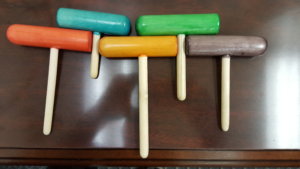
    These tools were designed by my massage colleague and friend, Matt Johnson.

    Let’s take a closer  look.

    This is a T-bar.
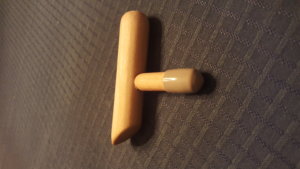
    And this is an L-bar.
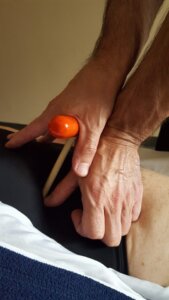
    A little intimidating looking, right?

    But if you start with baby-steps you’ll get used to them, and then you’ll never want to do another massage without them!

    Here’s what you need to do to get competent with massage tools.

    Adjustment #1: Relax Your Hand

    This is how we were taught to grip a T-bar in NMT class.
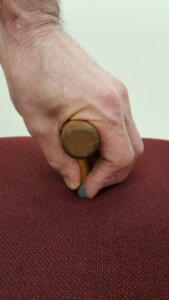
    Take note of my fingers gripping the stem and tip to control the T-bar.

    This hold allowed you to have fine-tuned control of the T-bar when working a tight/tender spot, but it also encouraged you to grip the T-bar tightly, even when applying light pressure.

    Hmm, I wondered, what would happen if I just loosened my grip some?

    Actually, nothing happened. The T-bar didn’t slip out of my hand, and I was still able to control the tip with a lighter grip.

    This begged the question: How loose can I hold the T-bar without it actually falling out of my hand? I started experimenting and found that my hands were very happy when I simply steadied the T-bar with the minimal amount of pressure required to keep the T-bar from dropping  or slipping from my hand.

    This is a loose-hand hold: 
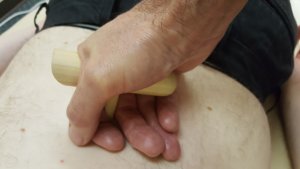
    My fingers are relaxed and I’m using just enough of a grip so that T-bar doesn’t slip out of my hand.

    At the end of a month or so, I got pretty good with light and medium pressure, but when I ratcheted up to deep, I had to tighten the grip to keep the tool steady.

    I wish I could say that I figured out the pain-free method of holding a T-bar for deep pressure within a month or so, but I can’t.

    In fact, I went in a different direction altogether. I started experimenting with other massage tools for deep and precise pressure. And it wasn’t until 15 years later that I figured out how to use the T-bar for deep pressure without hurting my hands.

    At that time, shoulder and neck conditions forced me to radically change my massage body mechanics. One of the big changes that I made was to set my table lower than I normally had it. And when I did, the T-bar missing puzzle piece fell into place.

    Adjustment #2: Pin the T-bar

    With a lower table, my work was below me. This meant that I could take full advantage of leaning my body weight into the client to generate pressure.

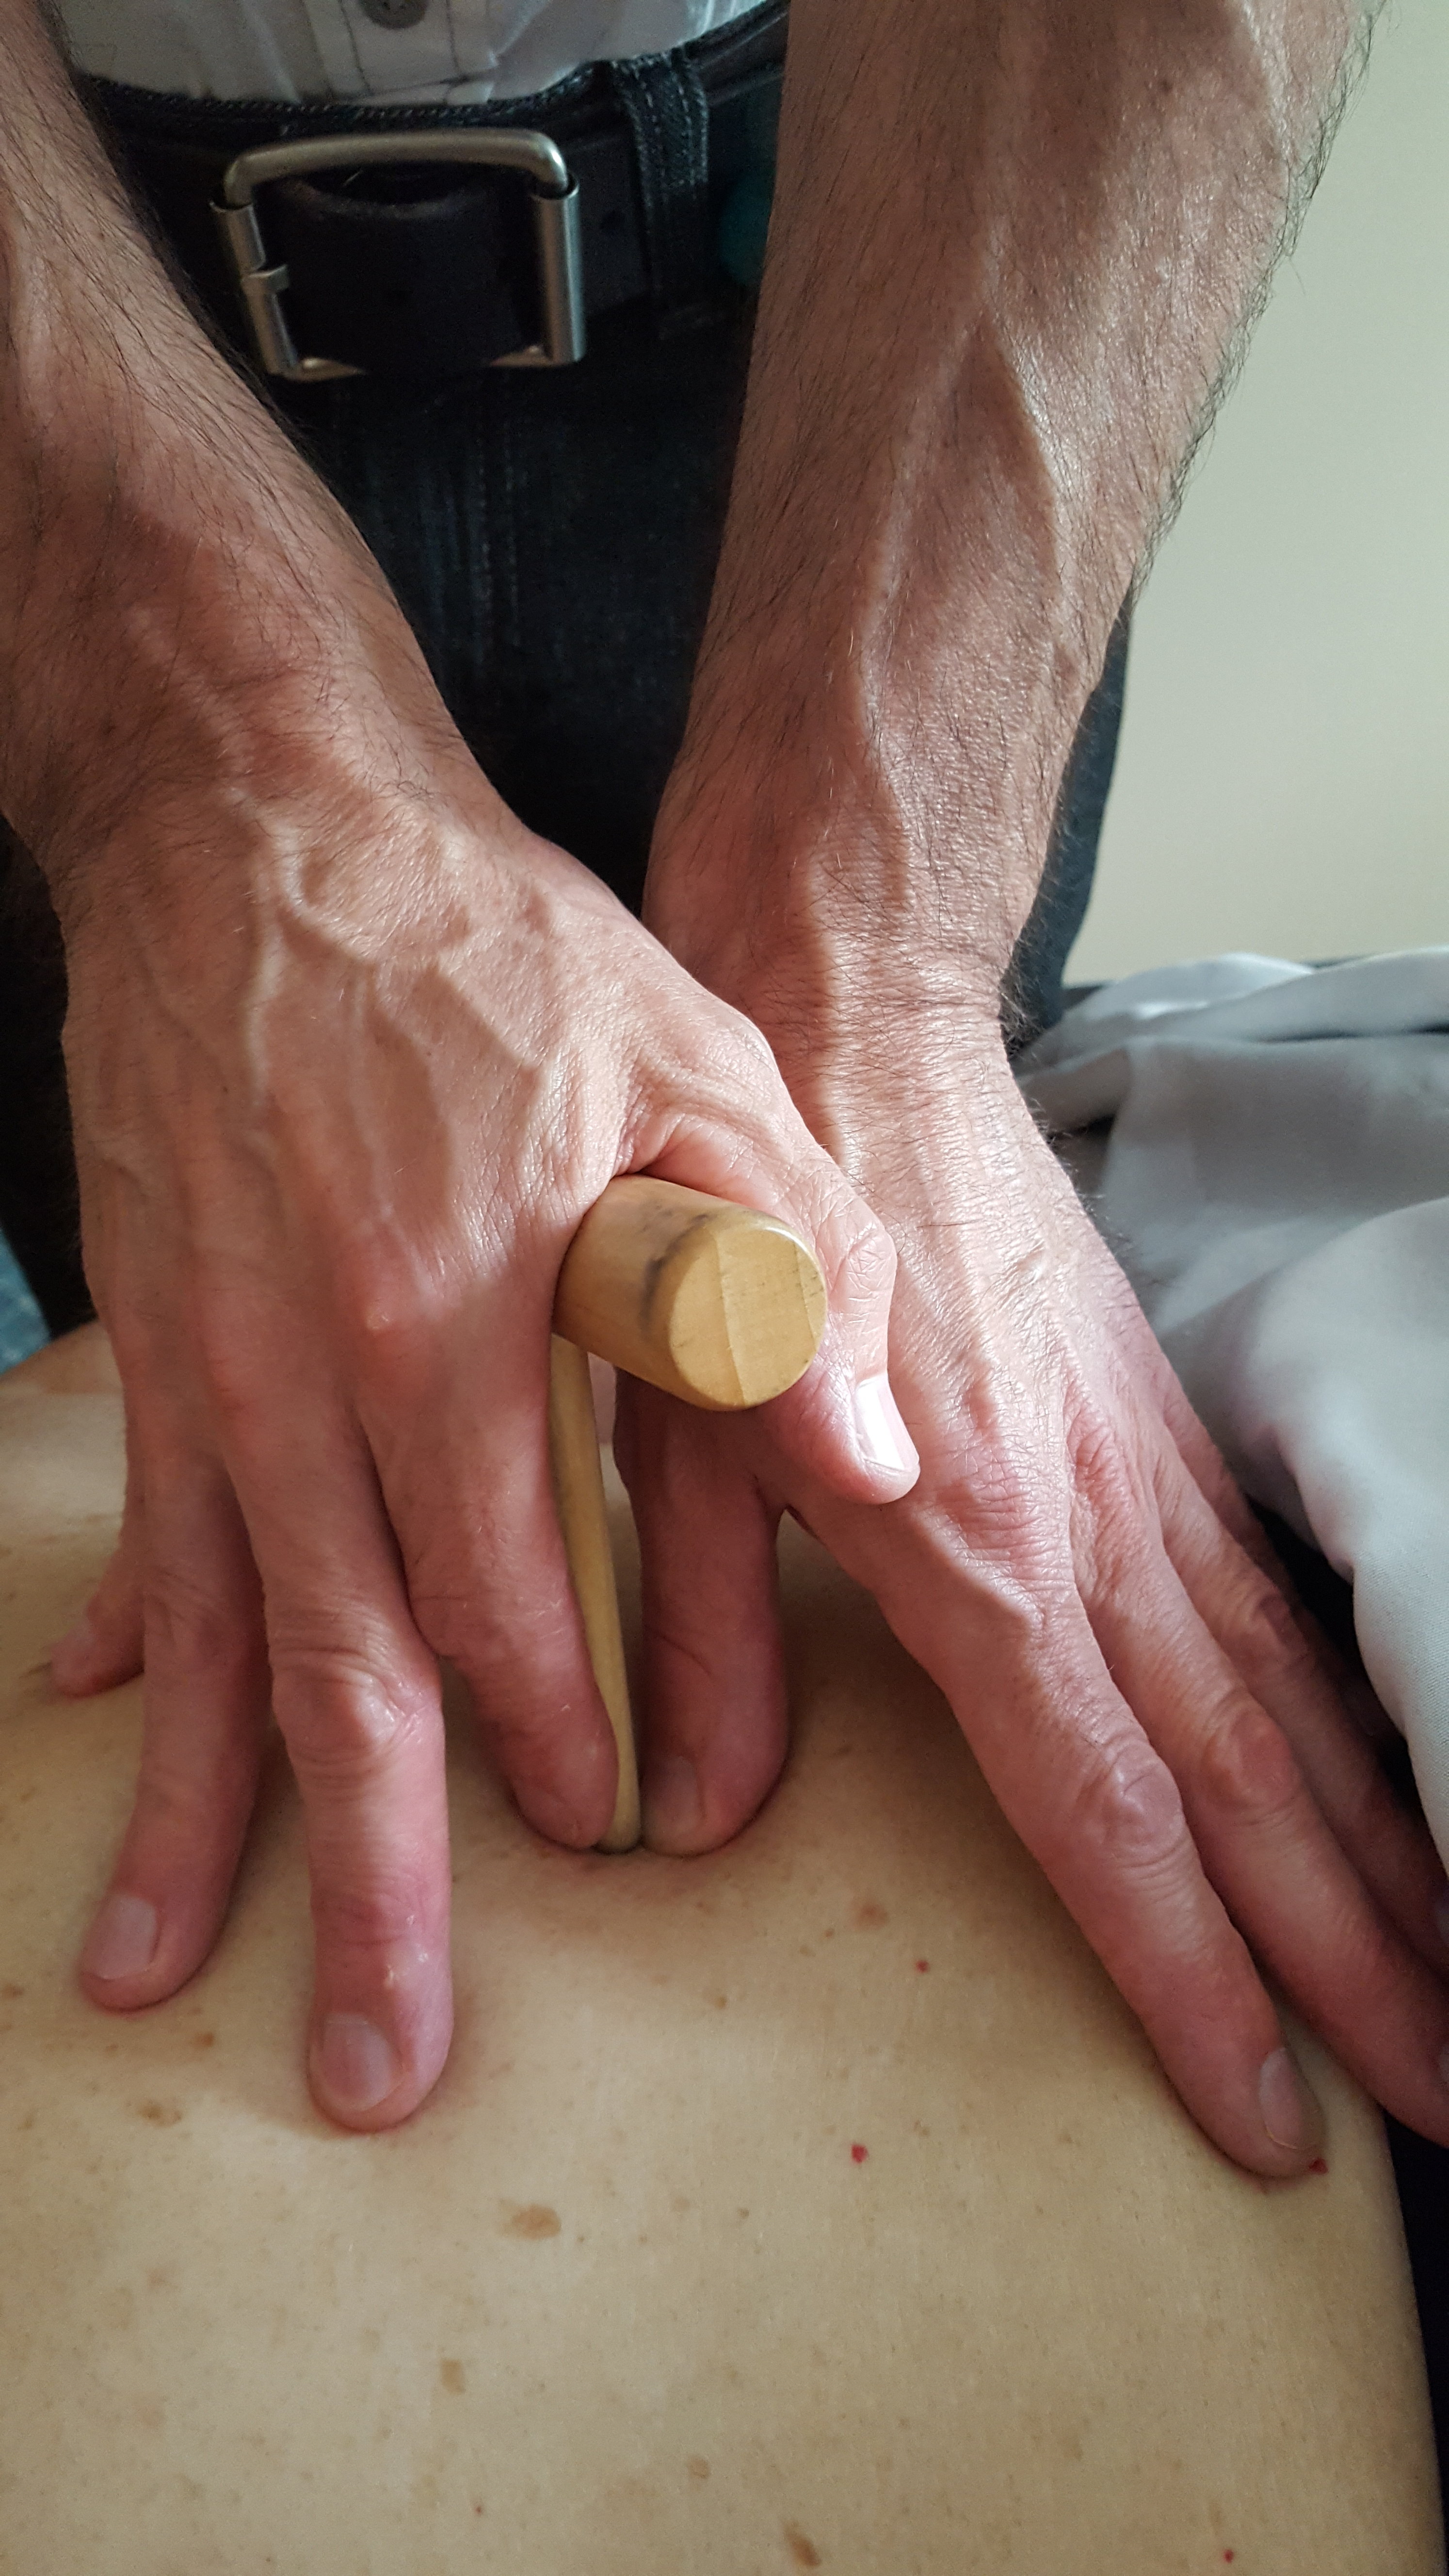
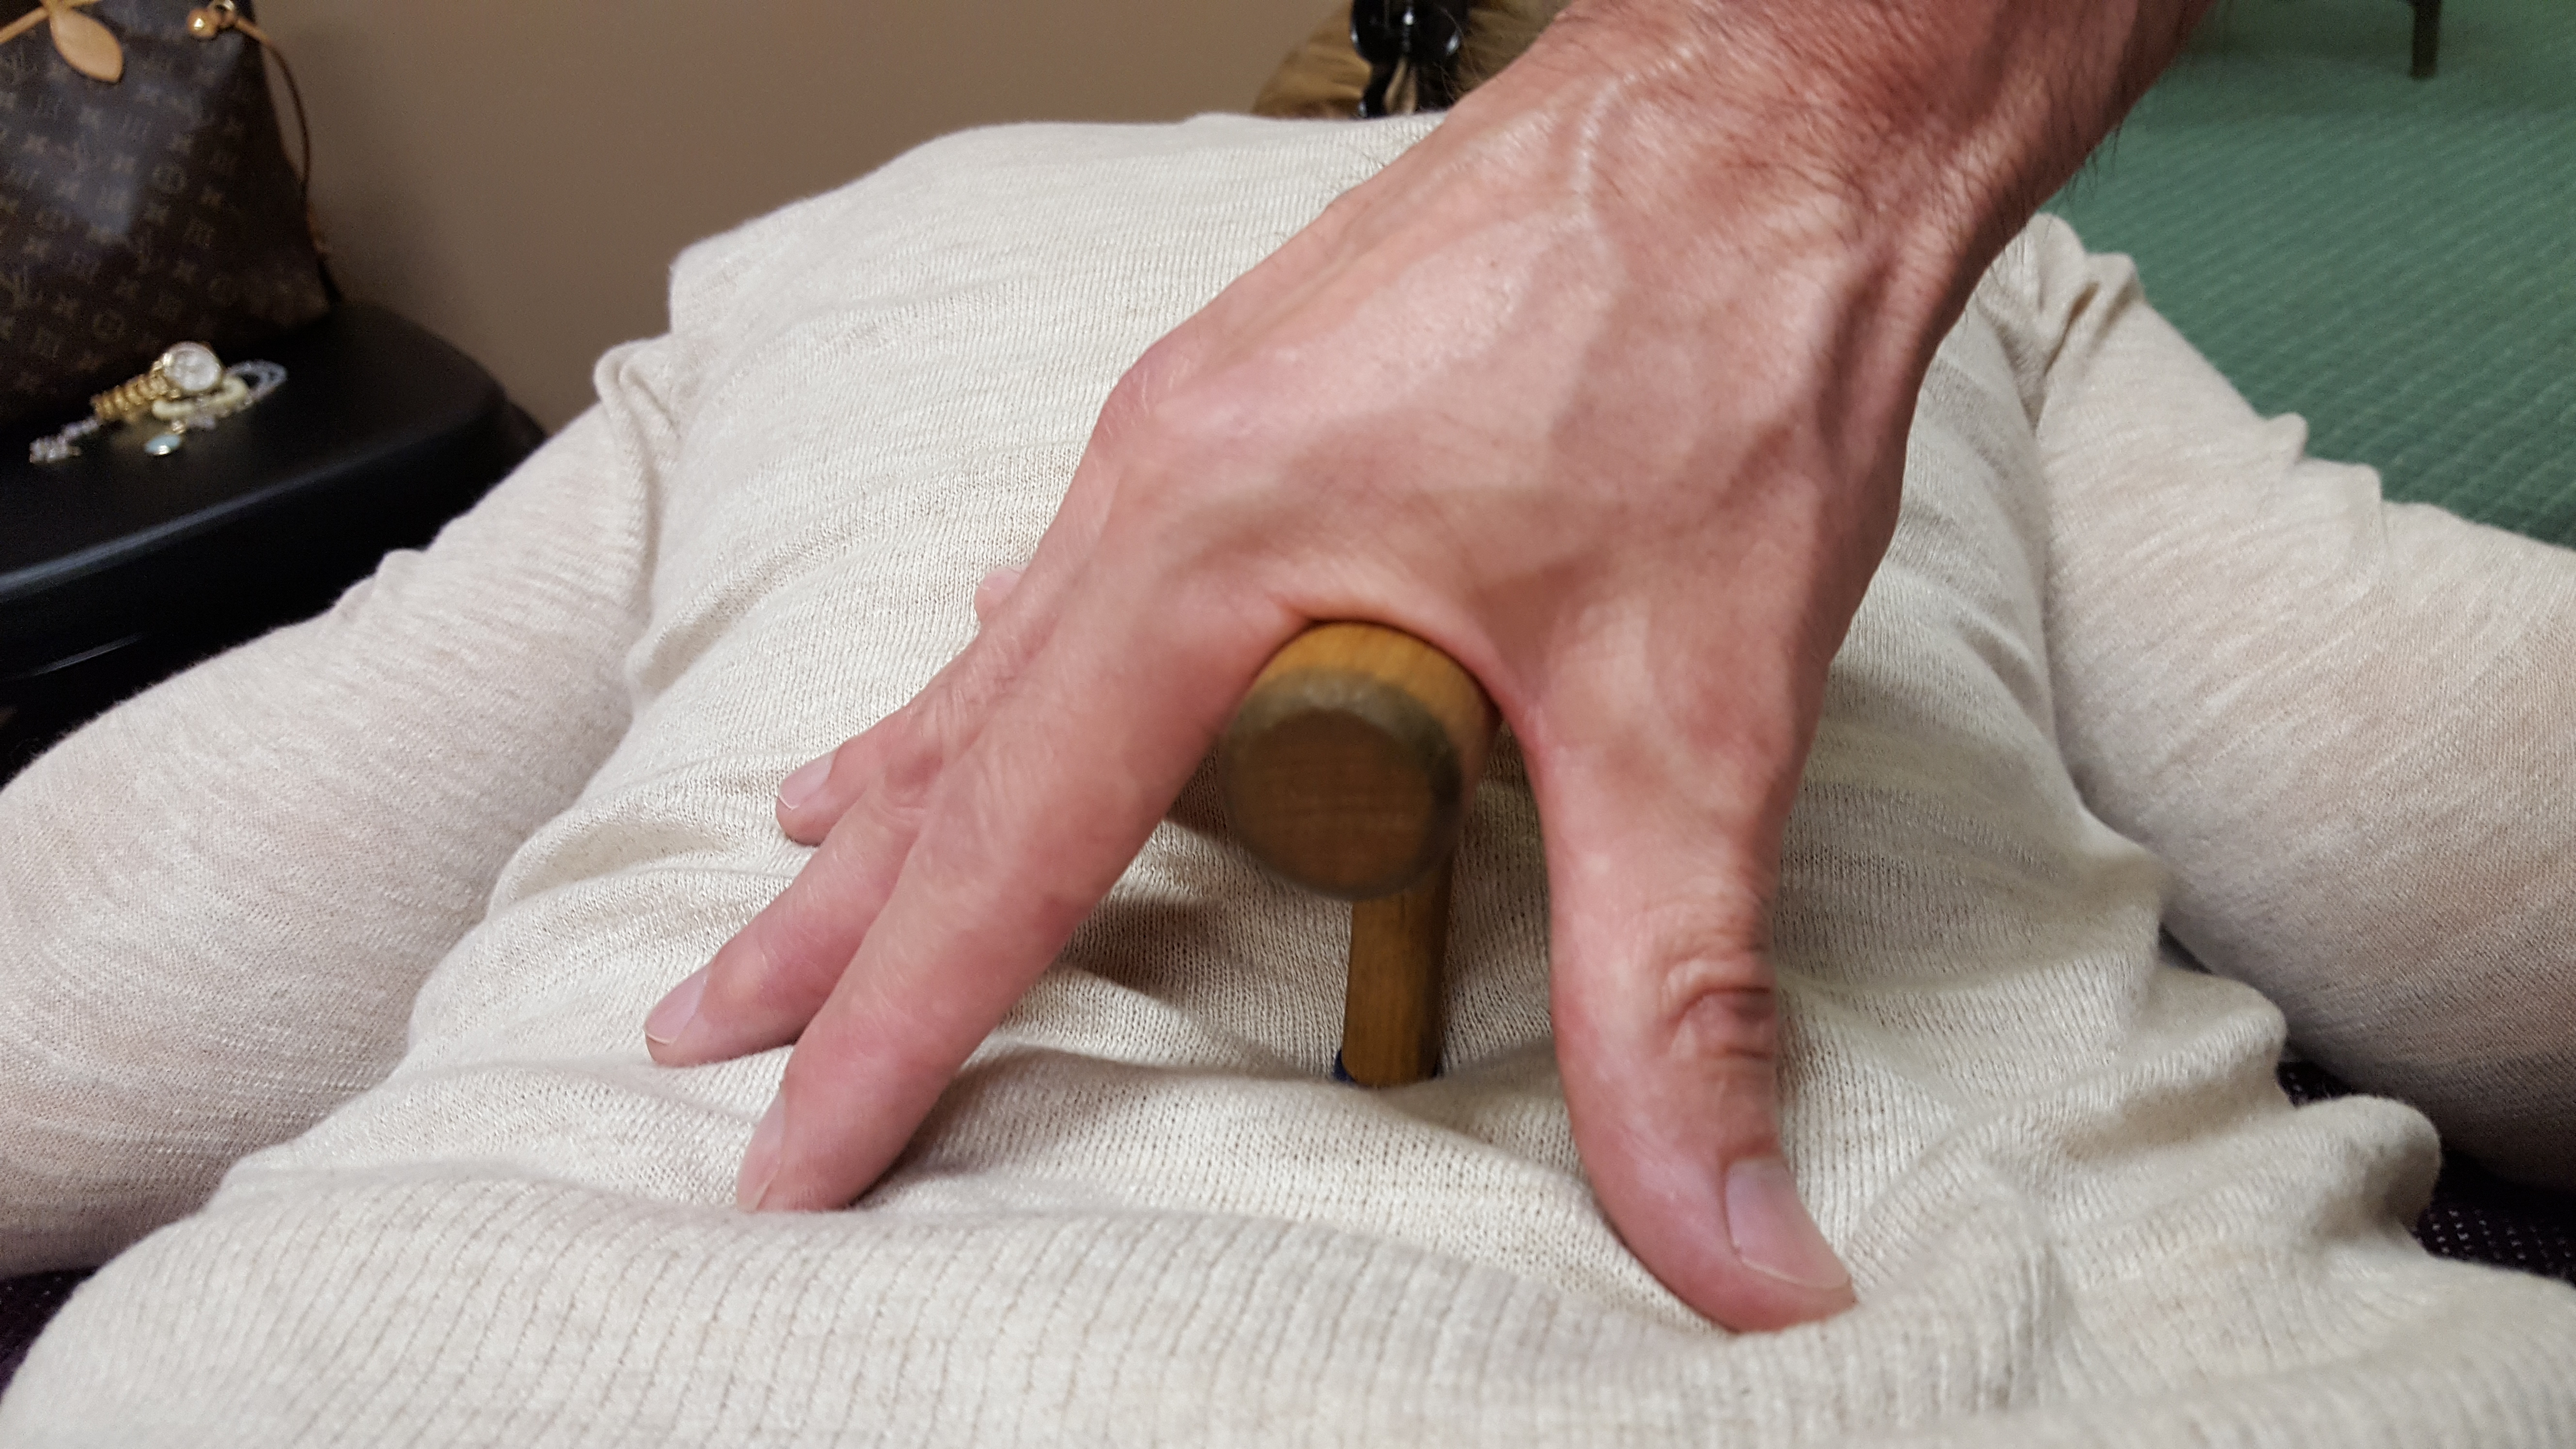
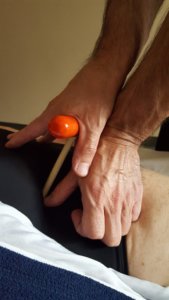
    When I leaned in with a T-bar to do deep pressure, I could pin the T-bar between my hand and the client’s body. There was no need to grip hard to hold the T-bar in place. In fact, I really didn’t have to grip at all. This is an open-hand hold.
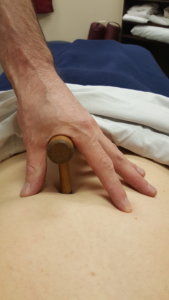
    Open hand hold.

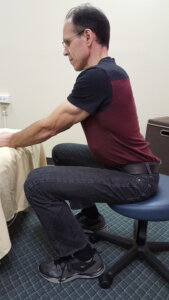
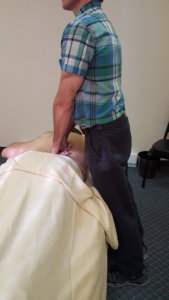
    To execute this hold the table has to be low enough so that you can lean in to generate pressure and pin the T-bar. Here’s what it looks like when the camera steps back.

    The pin technique made it easy to hold the T-bar, but there were times when a one-handed pin wasn’t possible and/or my pinning hand needed a break. This leads us to the third adjustment.

    Adjustment #3: Use A Guide Hand Next to the T-bar

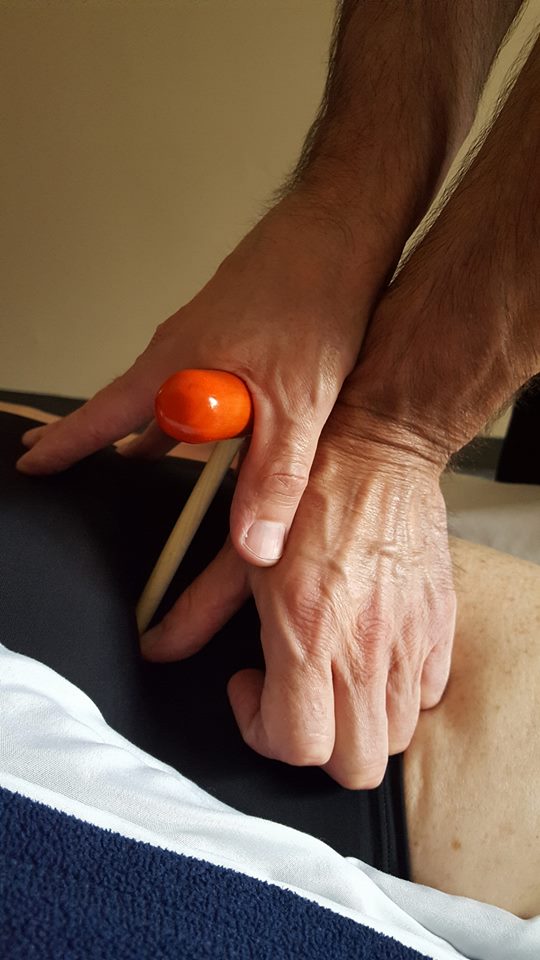
    Using a guide hand next to a T-bar is my preferred way to hold a T-bar.

    For one, I’m contacting the client with more surface area than I would with the T-bar alone. This gives the massage more of a relaxation feel.

    Two, it’s really easy to stabilize the T-bar with a guide hand, maintain sensitivity and regulate pressure.

    Three, I can shift the emphasis of pressure from tool to guide hand (hand not holding the T-bar) without having to pull my hands off the client.

    In this picture my guide hand is a relaxed fist. 
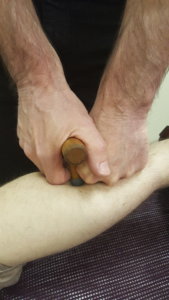
    The relaxed-fist, guide hand that’s next to the T-bar serves as a stabilizer. For broader pressure, I would direct more of my body weight into my fist. For precise pressure, I’d lean more into the T-bar. This hold is great for calves and forearms.

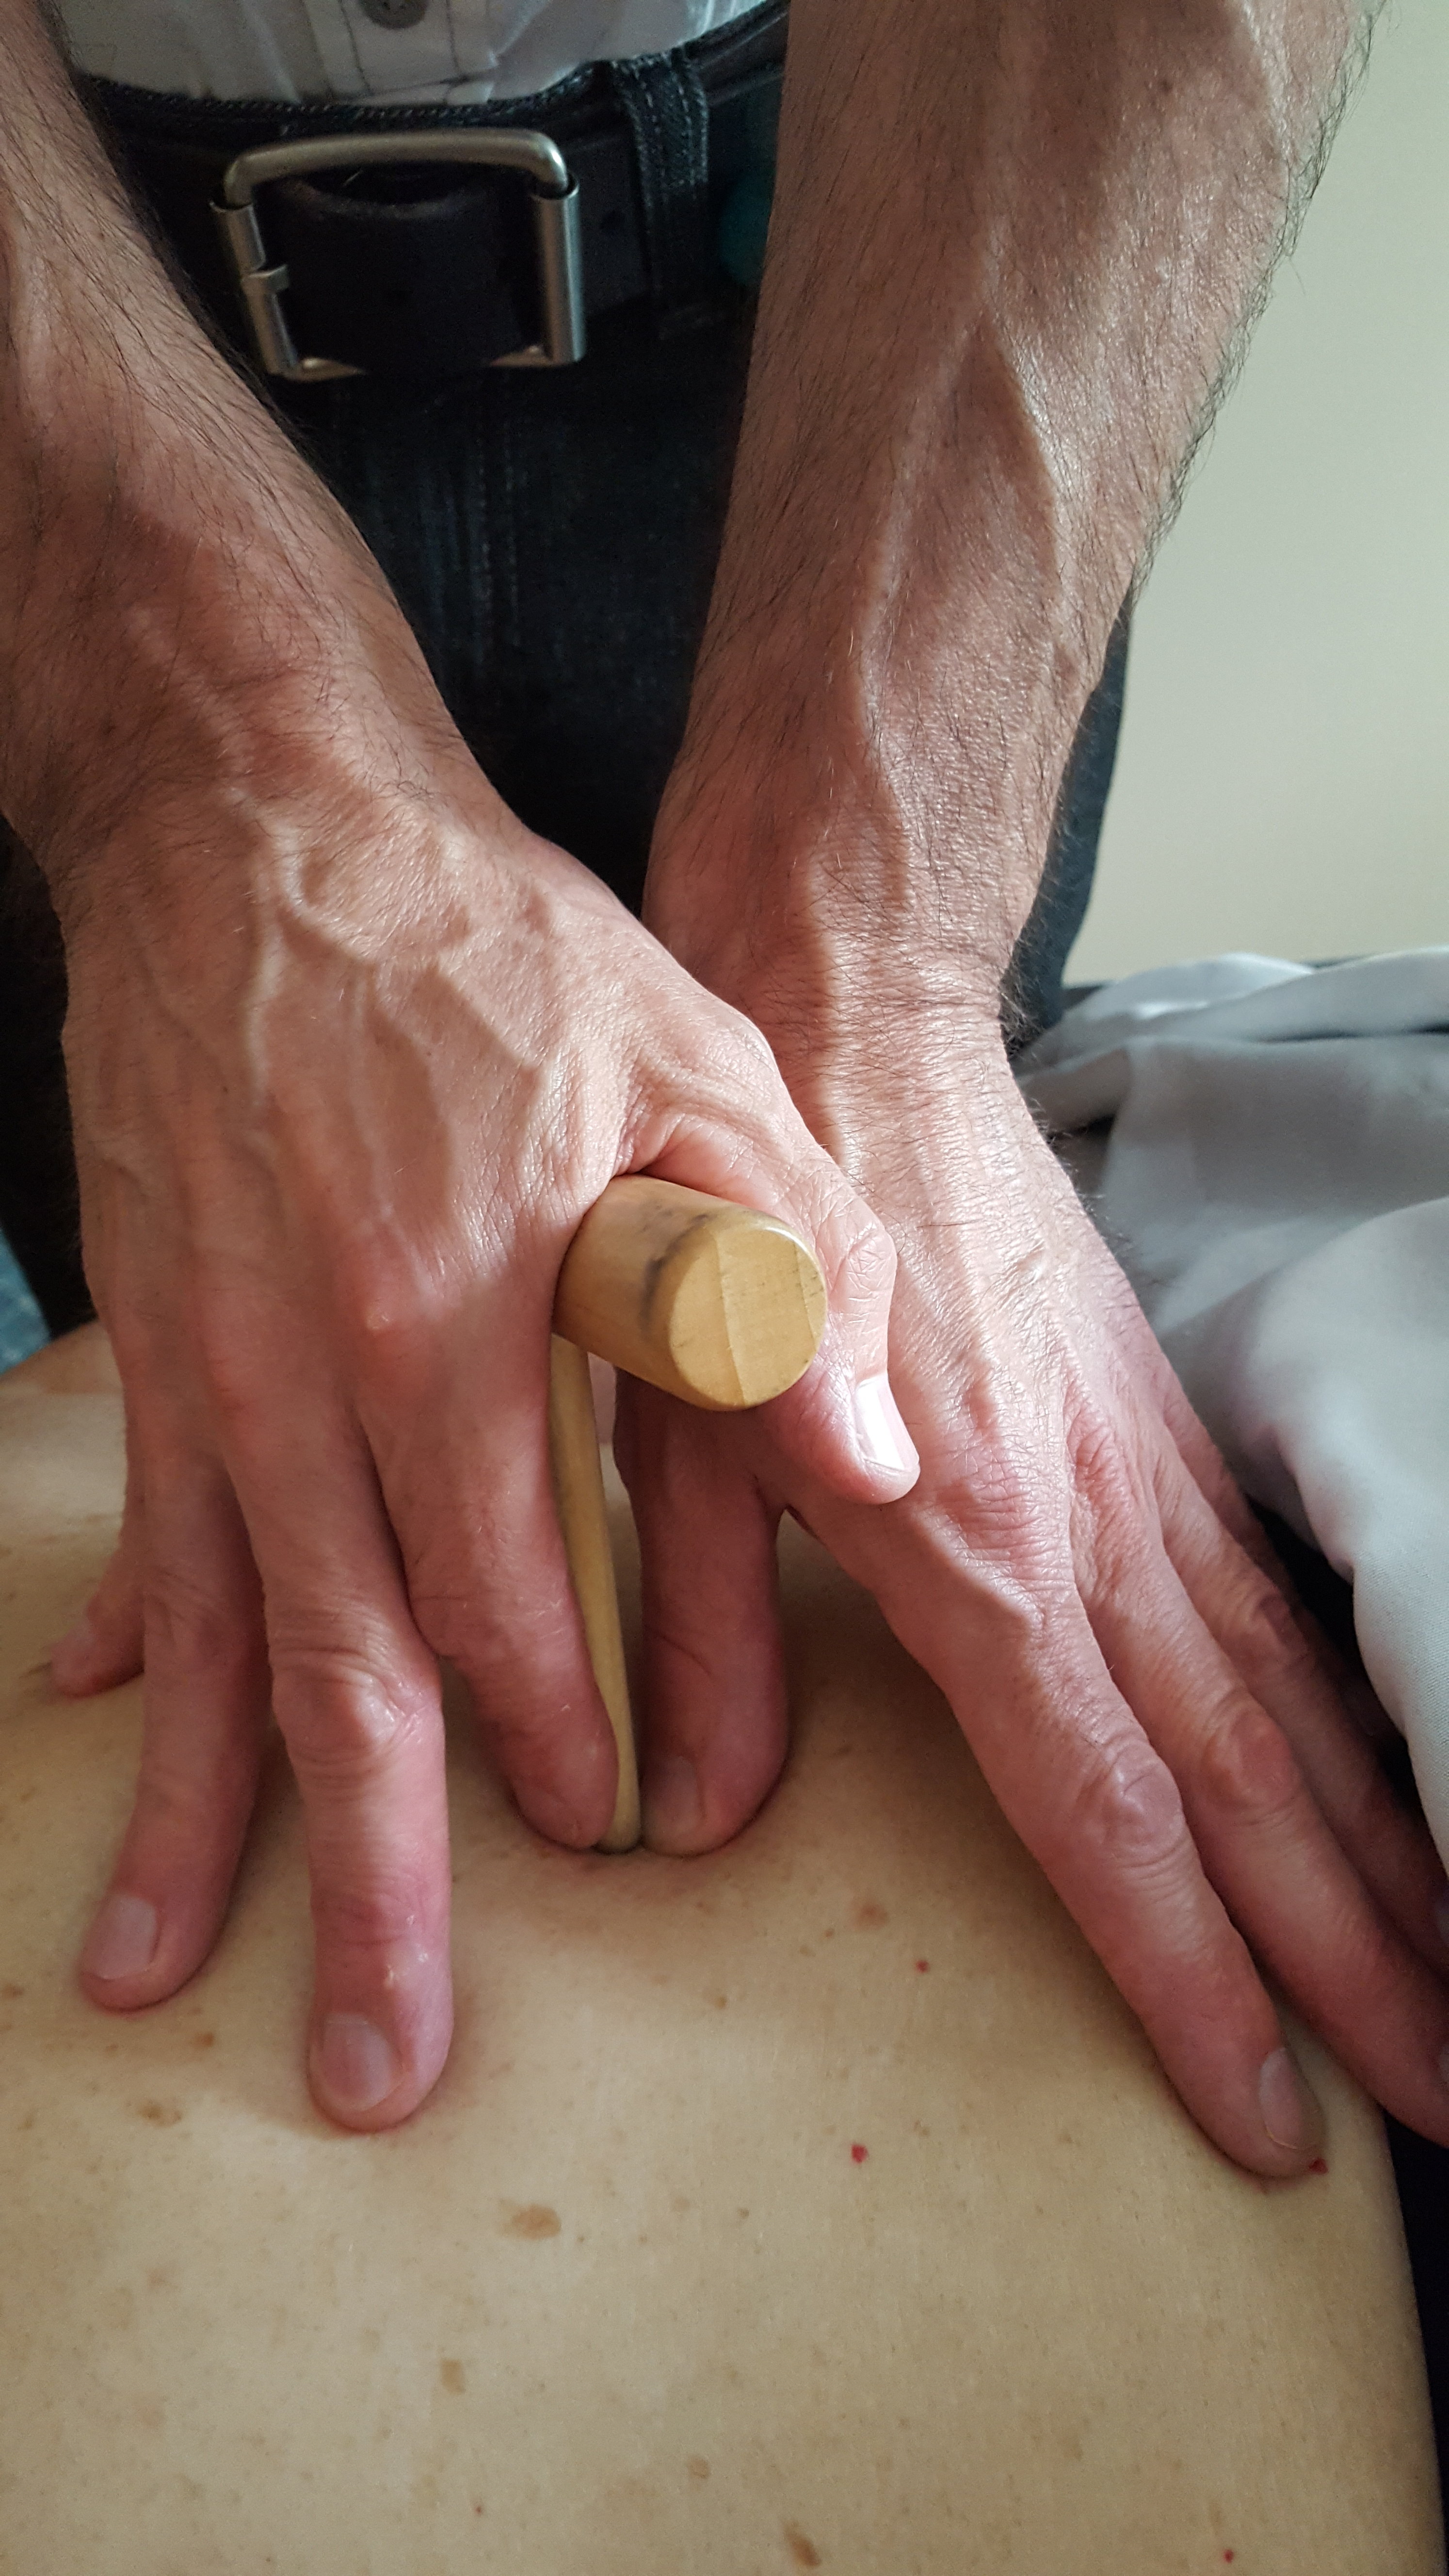
    This next example is a double-handed hold.
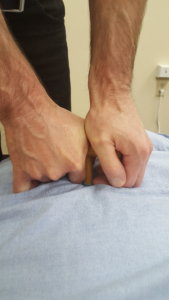
    Two hands on the handle hold.

    Note that both hands are contacting the handle. Having two hands on the handle allows me to lean in with my body weight. I use this hold when I need to deliver more pressure to influence deep muscles.

    The double-handed hold is good for when you’re working thick areas, like back, hamstrings and quads.

    Also, can you see that my hands are relaxed? That’s really important because you’ll instinctively want to tighten your grip to steady the T-bar as you lean in to deliver deeper pressure.

    But that’ll be completely unnecessary. Look at all the points of contact my fingers and knuckles make with my client’s back. That T-bar is not going anywhere!

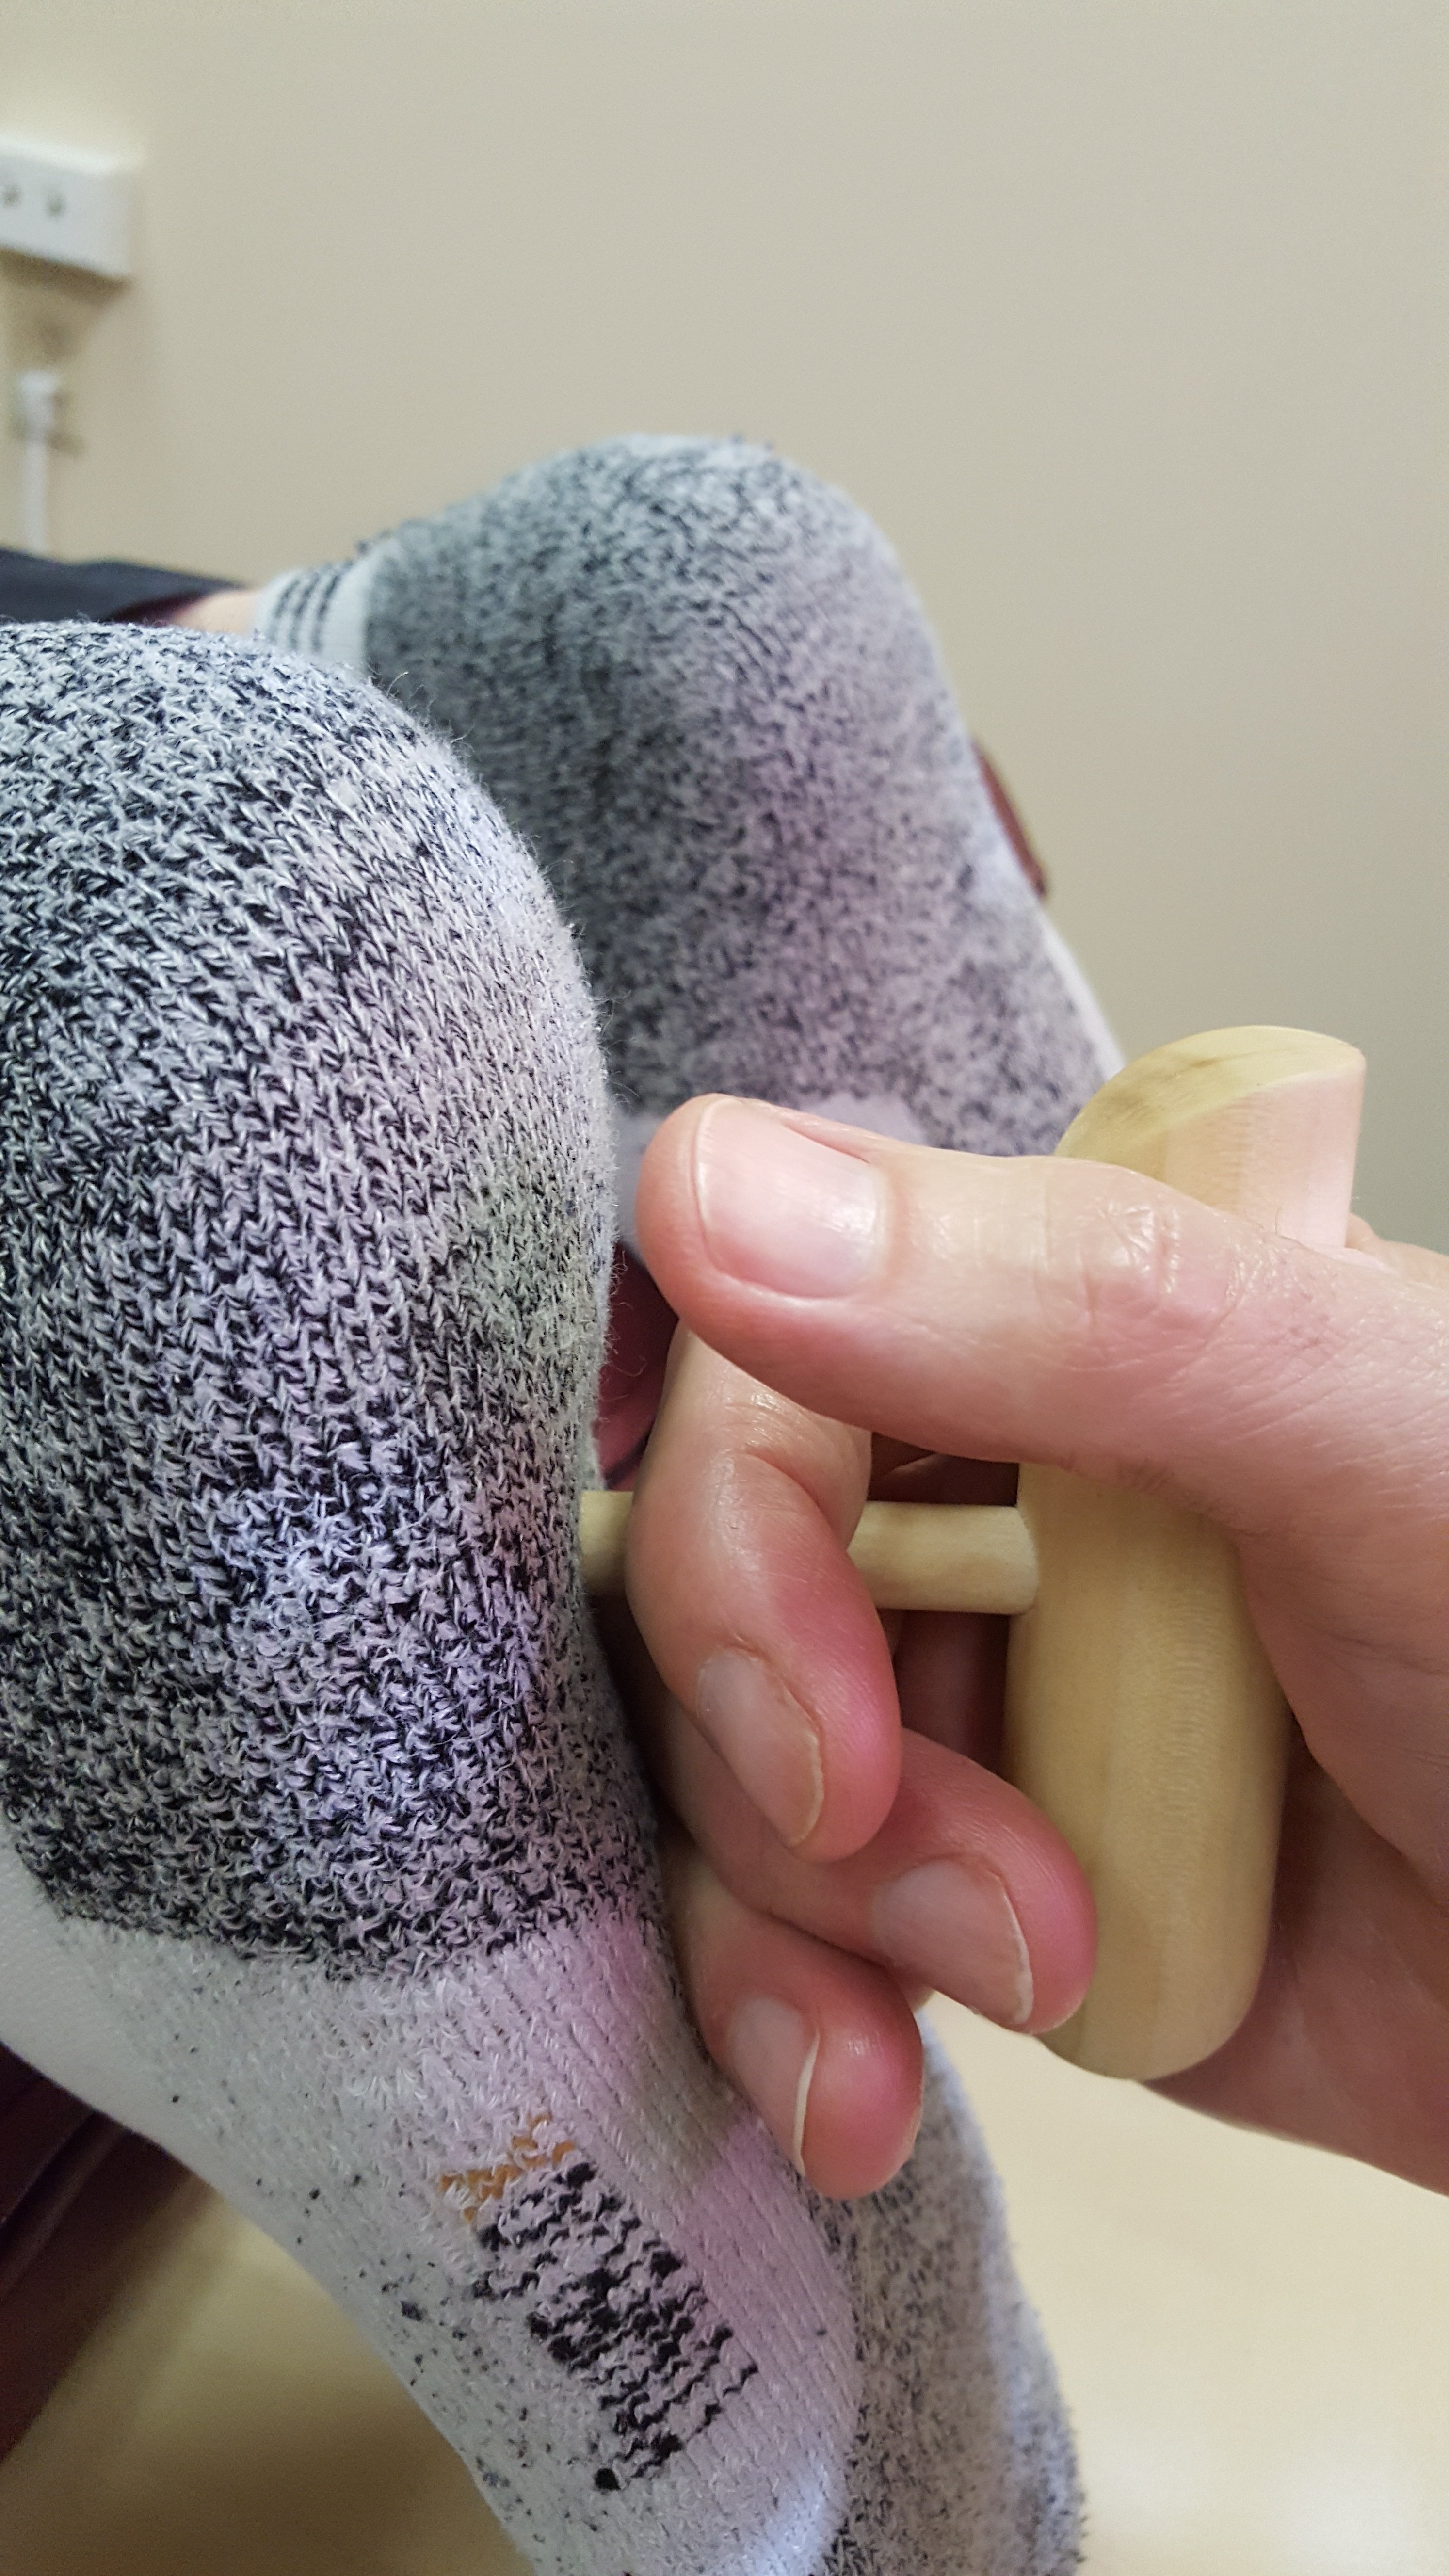
    This last hold is a wrap-around technique that works well feet.
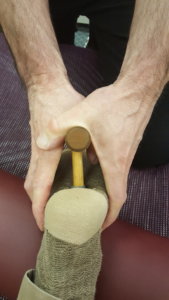
    The great thing about the wrap-around hold is that it’s easy to control your pressure. You simply lean in. 

    The guide-hand and two-handed holds worked great for me, but I had a tendency to get really comfortable with one or two holds and I then I’d feel the overuse pain again. This tendency led to me to adjustment #4.

    Adjustment 4: Vary Your Holds

    There are countless ways to hold a T-bar. Here’s how I recommend you experiment. First, pin the T-bar between your hand and the client’s body. Then place your other hand next to the T-bar and allow that hand do whatever it wants to in order to support the T-bar.

    Just remember to keep your hands relaxed and you’ll be amazed at how many different holds you’ll come up with.

    Easier than You Think

    There’s a potential irony in massage that we all desperately try to avoid. It goes like this: We put ourselves in pain to get someone else out of pain.

    Thumb pain is not a byproduct of doing massage.

    Kick thumb pain to the curb by using a T-bar when doing deep and precise work. But first you have to learn how to hold the T-bar without gripping it.

    Here are the keys for holding a T-bar:

    1. Hold the T-bar with a relaxed hand.
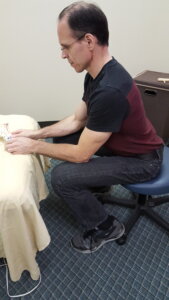
    2. Pin the T-bar between your hand and the muscle by leaning in. You may have to lower your table. You can lean when you’re sitting, too.
    3. Use a guide hand, thumb, finger next to the T-bar for stability, sensitivity and as a pressure gauge.
    4. Use two-handed holds to spread the workload.
    5. Vary your holds so that you don’t overuse a body part.

    Once you get these basic things down, you’ll never have to worry about developing chronic thumb pain again.

    This video will help you, too:

    Eliminate Hand Pain Recap

    The great thing about massage is that you can get paid for on-the-job training.

    With a paying customer you can experiment with your non-dominant hand.

    Once you do that add in a bracing combination, like thumb on thumb.

    With hand-held massage tools take it a little slower.

    First,  practice on friends, colleagues and family.

    Once you get positive feedback with your tool work test out a massage tool  on a client. 

    Slowly increase the time you use a massage tool with that client on subsequent sessions.

    Online, Save-Your-Body CEU Course

    Need more help saving your hands?

    I have an online course that can help you eliminate hand pain (and shoulder, neck and back pain, too).

    A while back I almost quit massage because of pain and injuries.

    Then I spent a year revamping my massage to see if I could massage pain-free. That’s where incorporating the lower half of my body into the massage came in along with a bunch of other strategies that ultimately saved my massage career.

    I pulled all that first-hand experience together and made a live CEU class which I taught for about 5 years. During those 5 years I listened to the massage therapists taking the course and worked out the learning kinks. 

    Check out the kink-free, massage-pain-free course here

    Online, Massage Tools CEU Class

    Massage tools help saved my hands and upper-body.

    Most massage therapists shy away from using massage tools because, less face it, it’s hard to be sensitive with a piece of plastic or a hunk of wood–that is unless you have work-arounds.

    I use massage tools in every massage from focused pressure work to total relaxation. I can do this because the work-arounds work and are easy to implement.

    So, if you’re ready to take the plunge and delve into massage tools, I have an online, home-study course that will make your learning life easier.

    Here it is: How to Use Massage Tools (Fearlessly and Effectively).
  • How to Do Deep Tissue Pressure Massage (Without Hurting Yourself)

    How to Do Deep Tissue Pressure Massage (Without Hurting Yourself)

    How do you do deep tissue pressure massage—without hurting yourself? Lean to generate force. In this article, I’m going to show you how to deliver deep-tissue pressure on a low table.

    Step #1: Lean to generate force.

    Let’s get into the nuts and bolts of leaning. When teaching I refer to leaning as “fall” and “catch” massage. You let your body “fall” and the client (and/or table) “catches” your body.

    Your body weight provides the pressure. And with good body mechanics there’s minimal strain to your neck and shoulders.

    I should mention that we’re talking about controlled falling. No black and blue clients.

    Here’s what I mean by controlled falling.

    You’re going to…

    Initiate the fall with your feet.

    By simply shifting your weight from your heels to the balls of your feet you begin the fall.

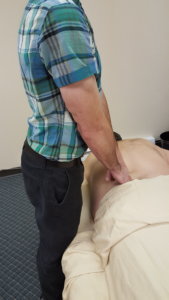
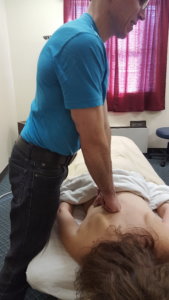
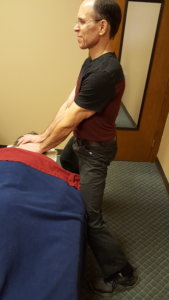
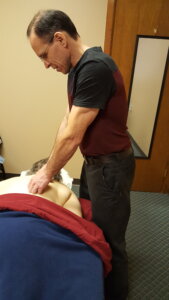
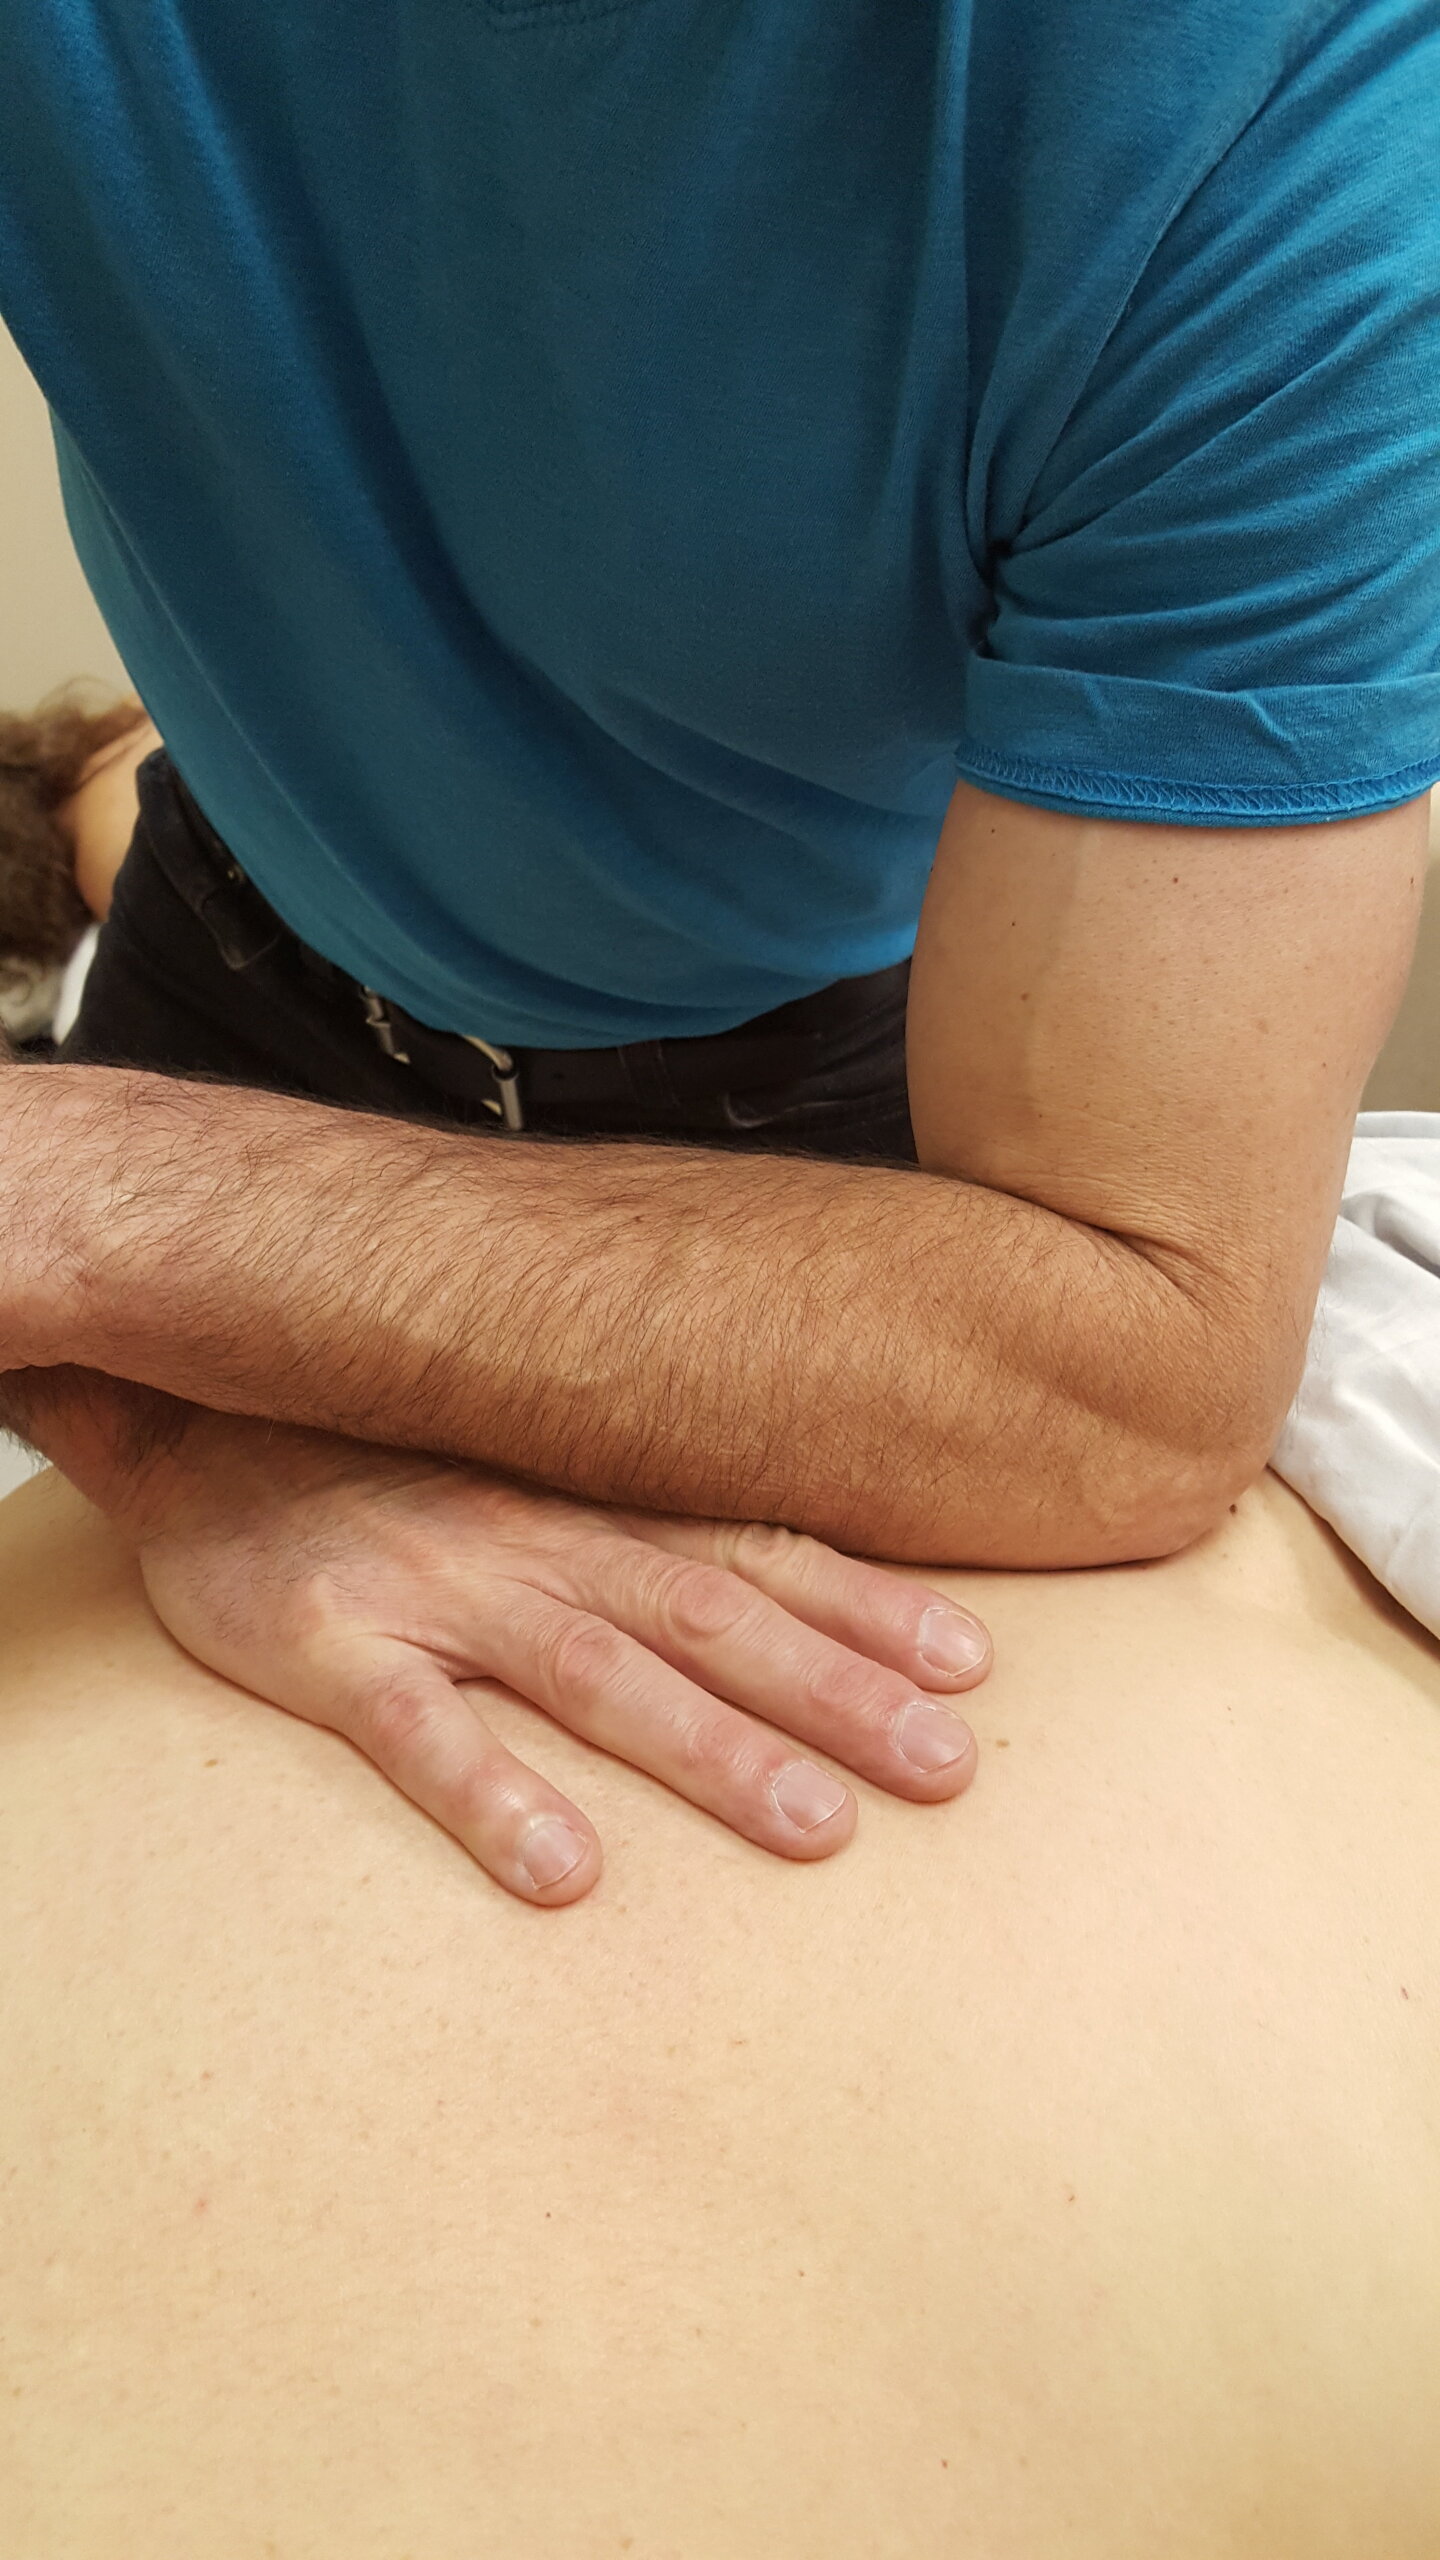
    In this pic I’m positioned to fall with my fists. My weight is towards my heels.

    Here I’ve fallen by shifting my weight to the balls of my feet.

    .

    Catch your weight on the table and/or client.

    The catching part is practically imperceptible because the body parts you’re massaging with (palms, fists, forearms, thumbs, or knuckles), should be in contact with the person.

    You’re simply transferring your body weight forward by shifting your weight from your heels to the balls of your feet.

    By the way, look at my shoulders, elbows and wrists in the picture above. Notice how those 3 joints are stacked one over the other. Stacking joints puts less adverse stress in the joints than not having them stacked. It’s a strategy that’s important to execute throughout the entirety of a deep pressure massage.

    Okay, to do light to medium pressure, direct some of your body weight into the table as well as the client.

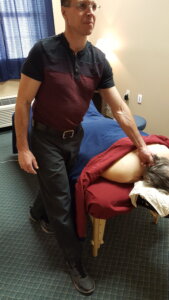
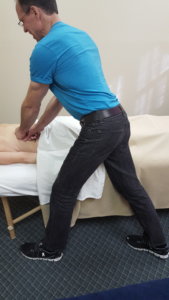
    See my leg leaning against the table in this pic? I’m primarily leaning into the table and exerting light pressure through my forearm. (80% into the table; 20% into the client).

    For deep pressure direct all of your body weight into the client.

    If you “fell” too deep, shift some of your weight back off the balls of your feet.

    If you’re having trouble figuring out how much falling (transferring your body weight onto the client and/or table) you should do, keep this in mind: If you are leaning and someone suddenly moves the massage table, you should fall.

    Remember that you if you want to put less pressure into the client, lean more into the table than the client.

    Okay, here’s the next thing that’s going to save your body when doing deep pressure:

    Step #2: Do short strokes.

    It’s time to rethink what a makes a stroke relaxing especially when working at a really deep pressure. My opinion in the past was that a relaxing stoke is done at a slow pace and covers a long distance. But over time I realized that it’s difficult, if not impossible, to maintain consistent deep pressure during a long stroke and maintain alignment between your shoulders, elbows and wrists.

    On the other hand, if you segment a long stroke, do short strokes instead of long ones, you can maintain consistent deep pressure while staying in good alignment.

    I tested this idea out on clients and fellow MTs and no one complained. In fact, they loved it.

    The reason why a short stroke allows you to maintain consistent deep pressure is because you’ll never be out of position to lean into the client.

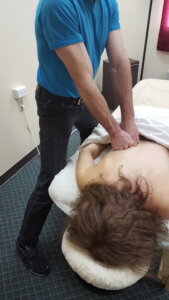
    Here’s how I’d segment a long back stroke. Divide the back stroke up into 3 parts—upper, mid and lower. Stand at the side of the table and lean into the area in front of you.

    You can position your body so that you are facing the direction of the stroke.

    Or you can position yourself so that you aren’t facing the direction of the stroke.

    Glide just in the segment area.

    Okay, so you did a short stroke, so now how do you get in position to do the next short stroke while remaining in alignment.

    Step #3: Move your feet.

    Moving your feet is important because that puts you in position to do your next stroke.

    Here’s how moving your feet looks: You’re at the end of your short stroke and ready to start your next short stroke. Keep your hands/forearm on the client as you move your feet to get in position to do your next short stroke. This may seem choppy, but it’s not. By having your hands/forearm on the client as you re-position yourself, you’ll maintain contact and consistent pressure. Also, you will keep the same relaxing stroke speed during the next short stroke.

    Here’s a video of what moving your feet to get in position for the next short stroke looks like:

    Now there is one more key thing you need to know to be able to do deep pressure without hurting yourself.

    Step #4: Use the table for support.

    When you lean onto your client with all your body weight to deliver deep pressures there should be no strain in your upper-body because your body weight is doing the work.

    However, not all my body parts may be happy.

    Your back could start talking to you because you’re working on a low table, especially when the client requires less pressure (light to medium).

    Less pressure means that you can’t lean all your body weight onto the client so your back and legs have to do more work.

    There’s a solution to potential more strain in your back. It’s lean into the table.

    How?

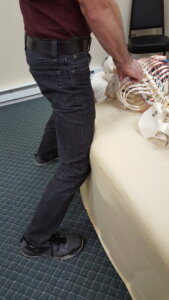
    Look at the picture below. Do you see how my one leg is pressing into the table?

    The leg against the table provides extra support.

    That means less work for my back to do and, ultimately, it allows me to change positions so that I won’t be in the  massage-hunchback position all the time.

    Leaning into the massage table has become a central feature to my body mechanics, so much so that if you randomly pulled the massage table away from me when I was standing during a massage, I would fall on my face 90% of the time.

    Here’s what you need to know to experiment with leaning into the massage table.

    (1) You can lean into the massage table for support with all sides of your legs (front, back, side, inside).

    It doesn’t take much leaning to provide enough support to be able to get you out of massage hunchback.

    Here I’m leaning into the table using the inside of my left leg.

    In this next picture I’m leaning into the table with the side of my leg.

    Here’s classic leaning into the front of a leg.

    And here’s what you’ve been waiting for: Leaning into the back of a leg(s).

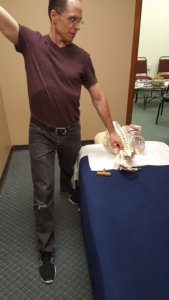
    This back of legs leaning position is also a what I call a get vertical position.

    Anytime you can lean into the table to support your body weight so that you can straighten your torso is a vertical position.

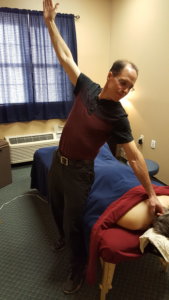
    Here’s another example of getting vertical:

    Getting vertical during a massage helps with breaking up static postures, the postures a massage therapist tends to get stuck in during a massage, like hunchback posture.

    I’ll go into that in more detail below. Here’s the next tip you need to know about leaning into the table:

    (2) Think plank when leaning into the table for deeper pressure.

    Deeper pressure is going to require more weight onto the client rather than onto the table.

    So you’re contact leg that’s leaning into the table is going to help stabilize your “planking”.

    Don’t worry about getting more vertical when leaning and doing deep pressure.

    Here’s what leaning into the table delivering deep pressure looks like:

    That’s about a 90% lean into the client and 10% lean into the table. The table is helping to stabilize me and the client’s body is supporting most of my weight.

    Last leaning into the table tip:

    (3) Straighten up and change back positions with light to medium pressure and/or when using one hand to massage.

    For light to medium pressure my stances widen because I don’t want to transfer all of my body weight onto the client.

    The combination of not needing to exert a lot of pressure and having the support of the table is the perfect opportunity for me to unbend my back.

    Here’s a one-hand massage example where I’m applying light to medium ischemic compression while taking the opportunity to unbend.

    You can also give your legs and back a break by sitting and leaning.

    If you want to also give your upper-back and traps a rest, rest your forearms on your quads and lean:

    Now that you got the get the basics of leaning, moving and using the table for support, here’s something else that will help you deliver deep pressure effortlessly.

    Lean with a Massage Tool

    Ever think about using massage tools when doing deep pressure?

    If not, you should.

    A massage tool can save your hands and elbows, especially if you’re doing deep and focused pressure.

    But you can’t be gripping the massage tool like a screwdriver if you want to make deep pressure massage easy on your body. Instead you need to relax your hand(s) and lean.

    Lean with a massage tool?

    Yep. Just like when you’re using body parts (hands, forearms and fists) to deliver deep pressure, leaning is how you make using a massage tool for deep pressure effortless.

    Here are the basics for using a massage tool to deep-pressure focused massage work (aka, saving your thumbs):

    (1) Lean into the massage tool to generate pressure.

    (2) Use a guide finger to maintain sensitivity.

    (3) Use a non-holding hand to stabilize the massage tool.

    Take a look at this video. I want you how having two hands on the massage tool makes for some easy going:

    Not as scary looking as you thought it might be, right?

    My advice for perfecting your deep pressure massage would be to get the leaning down first so that you know how to leverage your body weight. Then it will be easy for you to lean into the massage tool and get comfortable with massage tools.

    Massage Mindsets and Physics

    Working deep without being in pain comes down to mindsets and physics. We often get locked into beliefs, like “I have to do long back strokes with every relaxation massage”. But that belief can be harmful to your body especially when doing deep-tissue pressure massage.

    A better approach to long strokes when doing deep-tissue pressure is short strokes. For example, divide a back stroke up into upper, middle and lower, and only work one segment at a time. By doing so you can effectively lean into the client using your body weight to generate the force. Make sure to stack your arm joints (shoulder, elbow and wrists). Move your feet when you want to start the next short stroke and pivot when you’re out of position to effectively lean. Lean into the table to support your back, adjust your pressure and/or straighten up to get out of hunch-back posture.

    Deep-Tissue Pressure Online CEU Course

    I have an online, home study How to Deliver Pressure Without Hurting Yourself class.

    There are lots of videos and if you have any questions while you’re taking the course, you can always ask me (mark@makethemostofmassage.com).

    Check it our here: How to Deliver Deep Pressure Without Hurting Yourself.

  • How to Use Your 11th & 12th Fingers

    How to Use Your 11th & 12th Fingers


    How do you save your thumbs as a massage therapist?

    Add more thumbs to you hand by incorporating massage tools.

    But not just any massage tool.

    I’m specifically talking about massage tools that have a handle and a stem.

    Why?

    Because a handle makes the tool easy to hold, and a stem does a fantastic job of simulating a thumb.

    Here what tools with handles look like:

    That’s a round tip L-bar.

    Here’s a T-bar:

    And here’s a long stem L-bar:

    (Thank you Matt Johnson for designing and making these T-bars and L-bars tools!)

    The T-bar stem is in the middle of the handle and the L-bar stem is offset.

    Having the stem in the middle of the handle or as an offset provides different options to access muscles and muscle attachments that are tough to reach.

    More about stems later. Let’s jump back to handles.

    The Importance of a Handle

    At the beginning of the post I had said that a handle makes it easy to hold a massage tool. Now I need to do some explaining because I’m not talking about holding a handle in the traditional sense–wrapping your hand around the handle and gripping.

    I’m talking about using the handle to support your body weight. Think of parallel bars or push-up stands where you’re simply supporting your body weight on an apparatus. 

    Holding a Massage Tool

    With a massage tool you are directing some of your body weight onto the handle of the tool.

    If the massage tool is pinned between your hand and the tissue you’re working on, you can loosen your grip.

    And if you add a guide finger/thumb next to the end of the stem of the massage tool, you can actually relax your “holding” hand.

    Here’s what that looks like:

    See how relaxed my hands are?

    My guide fingers is helping to stabilize the tool. I’m also sensing how much pressure I am applying with my guide finger.

    This all looks great, right? But when you actually go and try to hold a T-bar or L-bar without gripping you’re going to say–Mark, you’re a freakin’ liar–because it’s not going to work.

    Why isn’t it going to work?

    Because your table won’t be low enough. And that means you’re not going to be able to lean onto the massage tool handle with enough pressure to keep the tool upright without gripping.

    This will help you figure out your table height.

    Okay, I’ve hammered away about the handle thing enough.

    Now, let’s bounce back L-bar and T-bar stems.

    T-bar and L-bar Stems

    Stems come in varying lengths and diameters.

    They can simulate wide thumbs or small fingers.

    The stems and end tips are what makes these tools extra fingers because if you use these tool you won’t have to use your own fingers to do precise detail work.

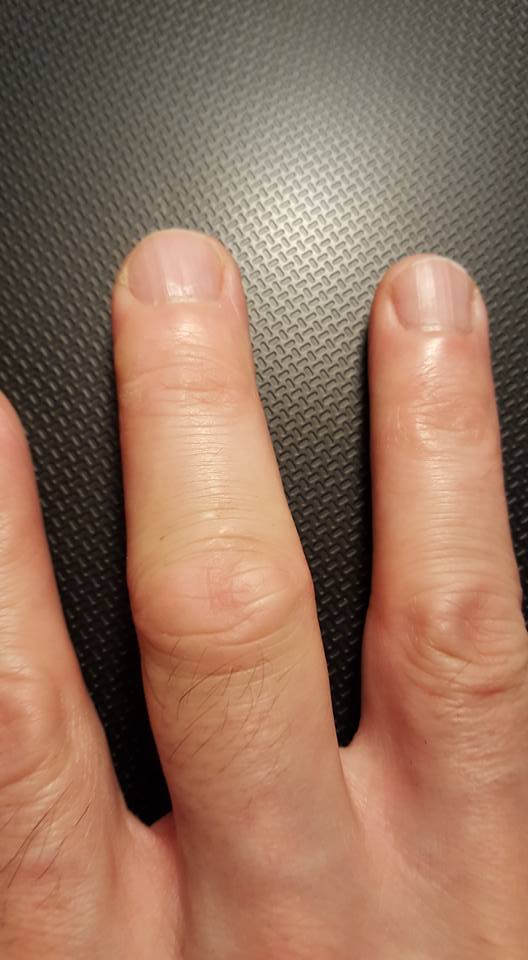
    One afternoon I really jammed my middle finger.

    But I worked the next morning because I used a very long T-bar for detail work and it allowed me to keep my injured finger straight. 

    Short stems work great in areas where it’s easy to access muscles, like feet…

    …or multifidus and rotatores.

    6 Finger Pic

    I have tons of massage tools with stems lengths that range from shorter than my thumb to longer than my 3rd finger.

    Mark Liskey

    But understand, I am a massage tool addict.

    You don’t need a thousand massage tools.

    Just using one will be a game changer.

    If you not sure which one, email me.

    By the way, Matt Johnson will make you anything you want and it won’t cost you an arm and a leg. Let me know and I’ll put you in touch with Matt.

    How to Save Your Thumbs as a Massage Therapist Quick Sketch

    (1) Select a massage tool with a handle and a stem.

    (2) Lean into the massage tool so that you can pin it between your hand and the tissue you’re working on.

    (3) Relax your hand.

    (4) Add a guide finger/thumb to help stabilize the tool and regulate pressure.

    (5) Experiment with stems of different lengths and diameters.

    Once you start using tools for detail work, you’ll never go back to burning out your thumbs and fingers:-)

    Oh, and I have an email group. It’s free. Just sign up below.


  • How to Work Around an Injury

    How to Work Around an Injury

    I’m going to scare you. Ready? Massage injury (or any injury that prevents you from doing massage).

    If you can’t work, you don’t get paid, right?

    The good news is that unless you really hurt yourself, like a broken arm, you can work through most injuries without worsening the injury or developing a compensatory injury.

    How?

    By finding a different way to get the job done.

    I know this is a really broad statement. So, let’s make it useful by applying it to specific examples.

    Massage Injury: Finger/Thumb 

    Here’s how you can get the job done without causing pain to an injured finger or thumb.

    1. Use the non-injured finger/thumb instead of the injured finger/thumb.

    But what if I injured my go-to thumb, Mark?

    Well, then, it’s time to learn how to press with your non-dominant thumb.

    It’s not crazy hard.

    And I have a way to expedite things: Combine two hands when pressing so that one hand acts as a guide, sensor and stabilizer.

    For example, say I’m left-handed and injured my left thumb.

    To use my non-dominant (right) thumb, I combine my hands when I press.

    Here’s how it might look:

    The fist of the dominant hand (left) is not only a stabilizer, it’s also assisting in applying pressure, making it easier for my right thumb to adapt to doing the work.

    The left thumb (hurt thumb) is just hanging out:-)

    2. Use a massage tool.

    A while back I jammed my middle finger.

    Sucked for me because I’m a middle-knuckle kind of massager.

    But it didn’t take me long to discover that a long T-bar was a perfect substitute for a knuckle.

    And I didn’t miss a day’s work with my jammed finger.

    What about finding a different way around a shoulder injury?

    Massage Injury: Shoulder 

    You can…

    1. Use the non-injured arm for the bulk of the work.

    If you injured your right shoulder and do a lot of deep work with your right forearm, use your left forearm.

    2. Experiment with table and stool height.

    I have left shoulder instability. When I lowered my table and used my fists and knuckles to deliver deep pressure instead of using my forearms, my shoulder pain went away.

    But my shoulder condition may not be the same as yours.

    So, experiment with different table and stool heights and find the mechanical advantage for delivering pressure with your particular shoulder condition.

    3. Sit or stand.

    Does your shoulder feel better when you sit and lean?

    Or does it feel better when you stand and lean?

    Relax your back.

    4. Stop doing moves that hurt you.

    Over-extension bothered my shoulder, especially at the end of a long stroke when I was applying firm pressure.

    So, why do long strokes?

    Good question.

    I shortened my strokes and no more over-extension. I do short stroke massage  all the time now.

    More than Meets the Eye

    Finding a different way to get the job done goes beyond just getting through an injury.

    It’s actually a way to extend your career and keep your body happy.

    The reasoning is the more ways you have to get the job done, the less likely you are to burn out one body part.

    For instance, I use massage tools more often now because of my jammed middle finger. And my fingers thank me for that.

    Now I do short stroke massage and fist massage because of my shoulder instability. Fist massage has led me to becoming more vertical during a massage. And my shoulders and back thank me for that.

    Healing While on the Job

    So, if you have a massage injury or condition that’s not incapacitating, here’s how you can work around it:

    1. Give the bulk of the workload to the uninjured side.
    2. Use massage tools.
    3. Experiment with table and stool height.
    4. Sit or stand.
    5. Stop doing moves that hurt you.

    If you need more help, check out: Table Height is Everything.

    Lastly, I have NCBTMB-approved, online courses that will help you figure out everything you need to do to massage pain-free. You can check them out here: Mark’s Pain-Free Massage classes.