Category: Massage Pain-Free

  • Take the Strain Out of Occiput Work

    Take the Strain Out of Occiput Work

    Over the years occiput work beat up my fingers and thumbs. At one point, my hands ached so bad that I thought about taking occiput work out of my massage.

    But instead I experimented for about a year and discovered that when I changed one bad habit and found other ways to get the job done, my hands felt better. Here’s what I did.

    The Supine Habit

    In massage school I learned how to do occiput work when the client was supine. The idea was this: the weight of the client’s head on your fingertips would be the force that “generated” the pressure. Do it this way and there would be less strain on your hands.

    But my hands told a different story. They ached from years of supine occiput work. When I started to pay attention to my hands, I realized that supine occiput work wasn’t just about supporting the weight of the client’s head with my fingers. More times than not it also involved pressing up into the client’s skull in order to generate enough pressure.

    It was time to try prone.

    Go Prone

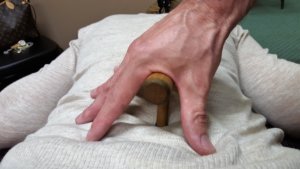
    I was first introduced to prone detail work while training to be a neuromuscular massage therapist. We used a T-bar in the lamina groove.

    I liked prone work because I could generate the pressure I needed by simply leaning into the client with my body weight. Using the T-bar in the lamina groove inspired me to experiment with my thumbs and knuckles in the lamina groove.

    1. Thumbs and Knuckles

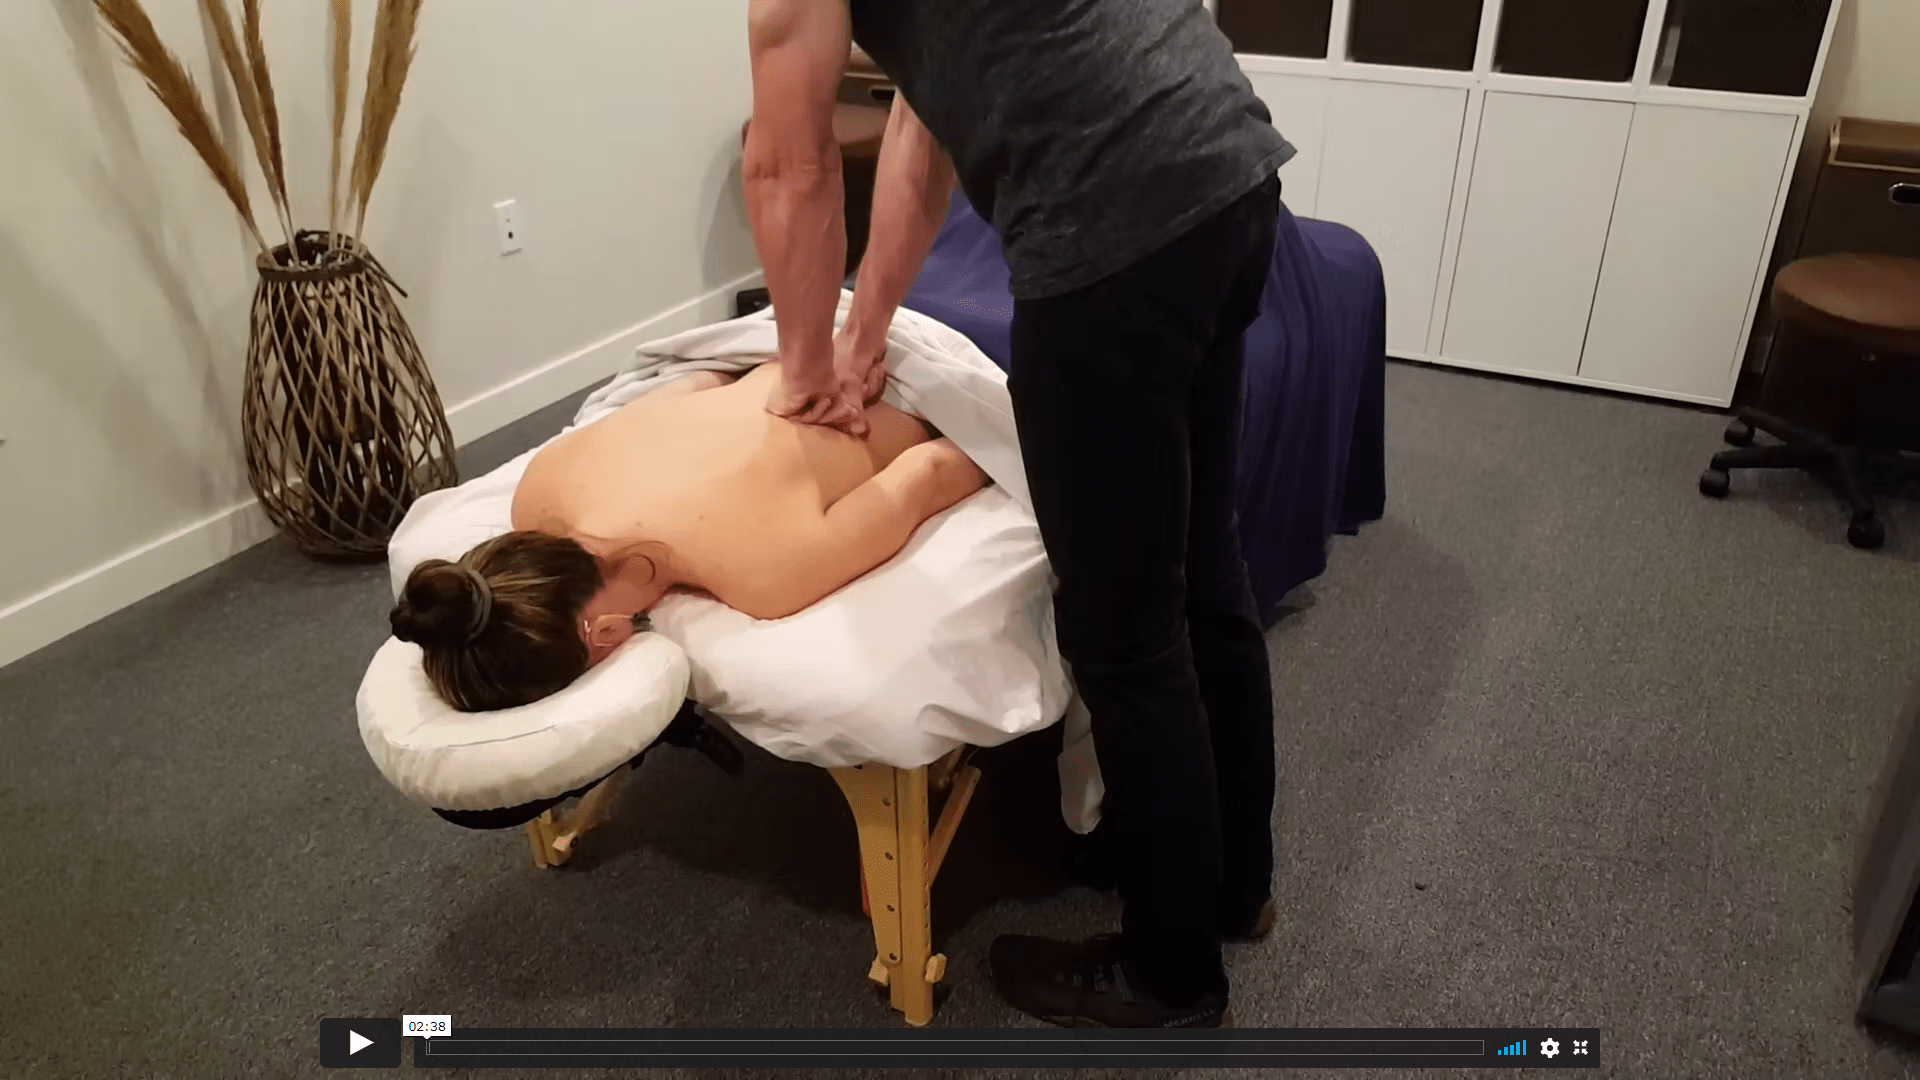
    A middle knuckle is a wonderful thing. It’s especially helpful for prone occiput work. Why? Because you can generate all the pressure you’ll ever need (and then some) by leaning in with your knuckle.

    Another great prone occiput technique is double thumbs braced together. I use double thumbs for light to medium pressure and I use my middle knuckle when I have to apply deeper pressure.

    The key to these techniques is to use the massage table to help support your body weight.

    In this video, 2 Prone Occipital Massage Techniques, I show you how to work the occiput using double thumbs and a middle knuckle.

    1. T-bar or L-bar

    6 Finger Pic

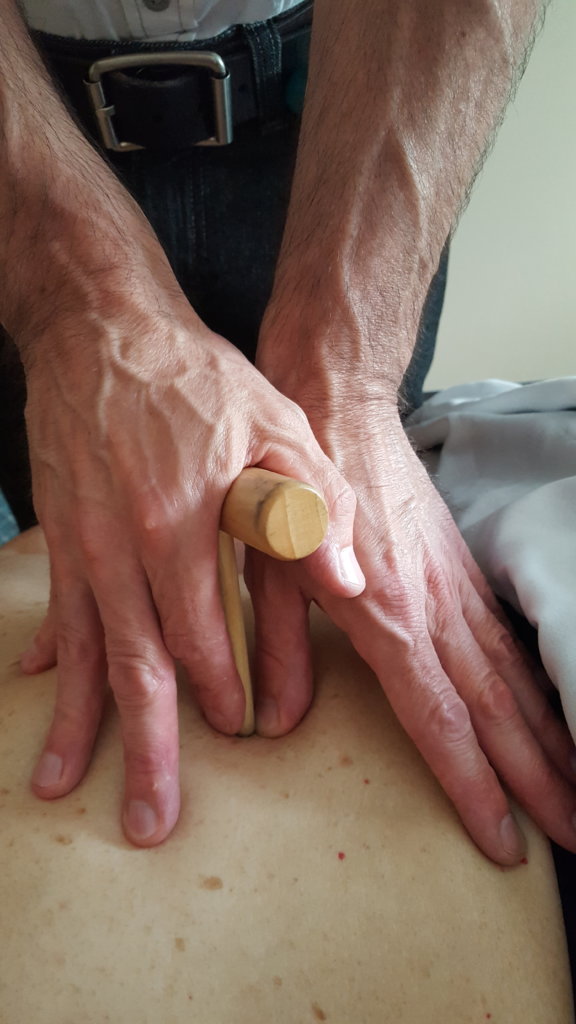
    A great way to give your fingers a break is to you use a T-bar or a L-bar. In the occiput, you can use a T-bar or L-bar even more precisely than you could use your thumb.

    In addition, you don’t need to exert a lot pressure because the tips of these massage tools are small and the pressure is focused. And when you position your hand so that it rests against the client’s upper trap, it couldn’t be easier on your hands.

    In this video, T-bar for Occiput and Back Muscles, I show you some easy-to-pick-up T-bar techniques for the lamina groove and occiput.

    1. Fourth and Fifth Fingers

    Take a look at your hands. Which fingers do you use most during a massage?

    My finger usage rating, from most used to least used, goes like this: 1. Thumb, 2. 2nd finger, 3. Middle finger, 4. Fourth finger, 5. Pinky.

    Another way to gauge finger usage during a massage is to ask yourself: if I only had time to cut three fingernails on each hand before I did a massage, which ones would they be? My guess is that your fourth finger and pinky would not make the cut. (Pardon the pun.)

    If you really love supine occiput work and don’t want to remove it entirely from your massage repertiore, try using your middle, fourth and 5th (pinky) fingers when doing supine occiput work.

    It will feel weird at first, but after a couple of times, you’ll fingers will adapt. Once they do, you can give your go-to fingers a break when doing supine occiput work.

    Where There’s a Will There’s a Way

    You can do some great occiput work without killing your hands. Here are my three favorite techniques:

    1. Prone occiput work with a knuckle or double-barred thumbs.
    2. Prone occiput work with a T-bar or L-bar.
    3. Occasional supine occiput work with non-dominant fingers (for me my 3rd, 4th and 5th fingers).

    I am 100% convinced that by breaking bad habits and thinking creatively you can do a great massage and stay out of pain.

    Save-Your-Body, Online, CEU Course

    A while back I almost quit massage because of pain and injuries.

    Then I spent a year revamping my massage to see if I could massage pain-free. That’s where incorporating the lower half of my body into the massage came in along with a bunch of other strategies that ultimately saved my massage career.

    I pulled all that first-hand experience together and made a live CEU class which I taught for about 5 years. During those 5 years I listened to the massage therapists taking the course and worked out the learning kinks.

    Now I have an online version of the live body mechanics class that is kink-free and will help you massage pain-free.

    Check it out here.


  • How to Fearlessly use a Contoured Edge Massage Tool

    A massage tool with a contoured edge may look like there’s going to be some blood on your sheets after the massage is over, but I have a way to make it less scary: Put a guide finger/thumb (from the hand that’s not holding the massage tool) next to the contoured edge.

    I’m going to show you how I do that in a minute, but, first, let’s look at two examples of tools with contoured edges.

    This is a wooden tool.

    This is a plastic tool with a contoured edge.

    Yeah, they’re a little scaring looking.

    Time to make them less scary.

    Ready?

    Take your thumb or finger from the hand that’s not holding the massage tool and put it next to the contoured edge of the massage tool.

    That guide finger/thumb is a sensor.

    And it’s wired to your brain.

    So, you’re going to be able to maintain sensitivity when using the contoured edge.

    Now, slide your guide finger/thumb over part of the edge on the massage tool.

    You can use that finger/thumb to help you press and get very precise pressure.

    Wait, Mark, why do all that?

    Why not just press using the tip of the T-bar?

    1. Spread out the pressure.

    You can, but if an area is too sensitive for pinpoint pressure (tip of the T-bar), the contoured edge of the T-bar might just do the trick.

    Why?

    The contoured edge is not as pinpoint as the tip of the T-bar and it’s more likely to contact surrounding tissue outside the pain area.

    That could reduce pain through distraction.

    In other words, it’s harder for the client to feel (focus on) the pain when other tissue around the pain area is being stimulated.

    There are more things you can do with the contoured edge.

    2. Cross-Fiber Friction

    The contoured edge is great for cross-fiber friction while being kind to your thumbs.

    It’s easy.

    Ready?

    Find your spot.

    Press down with the contoured edge and your guide finger.

    Have at it going back and forth across the affected fibers.

    The contoured edge can also be a great tool for palpation.

    3. Palpation

    To find tight/tender areas I place the contoured edge down on the area I want to examine.

    Next comes my guide finger/thumb.

    I press down on the contoured edge.

    I go back and forth east and west and/or north and south creating contrast as I press.

    When I find an area of tightness I can home in on it by pressing the guide finger onto the contoured edge where the pressure is needed.

    Fearlessly Using a Contoured Edge Massage Tool

    Using a contoured edge is not so scary anymore, right?

    Keep that guide finger/thumb next to the contoured edge to sense and palpate.

    And use that finger to help apply more precise pressure on the contoured edge when you need to get more exact.

    Here’s a quick video to help you out:

    More about using massage tools here.

    Massage tools for sale soon at Pain-Free Massage Therapist.

    Also, if you want to get crackin’ on getting competent with massage tools, I have an online, home study course: How  to Use Massage Tools and Fearlessly and Effectively.


  • Massage T-bar: Get Sensitive with Pressure

    How do you get good at applying the right pressure with a massage T-bar?

    Don’t press and hold the T-bar when you’re first working on an area. (I’ll explain why later).

    Instead…

    1. Find the area you want to work with your finger, knuckle or thumb.

    2. Then press down with the T-bar to the depth of what was needed to find that area with your finger/thumb.

    3. Next ease up on your pressure slightly.

    4. Last step: Increase the pressure until it feels like the same pressure you would use to work the area with your finger or thumb (probably similar to your palpation depth).

    This seems pretty straightforward, right?

    But it’s slightly more complicated than that.

    Here’s what I mean.

    Grip Versus Hold

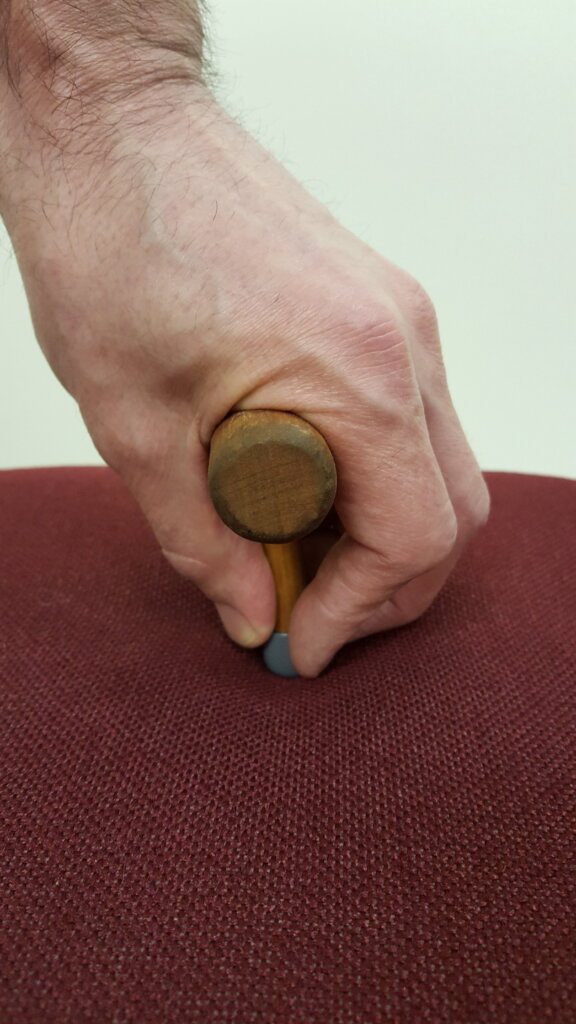
    If you grip the T-bar like this…

    …or if you grip any massage tool too tight or for too long the tool is going to hurt your hands.

    Been there, done that.

    Okay, but isn’t gripping going to give me fine-tune control of the T-bar, Mark?

    Yes, but there’s another way to have great control over the T-bar without gripping.

    It starts with a relaxed hold.

    Relaxing your holding hand does two things.

    1. The more your T-bar-tool-holding hand is relaxed, the more it needs help from the other hand to keep the T-bar upright.
    2. Two hands supporting the T-bar together make it easier to hold the the T-bar without gripping.

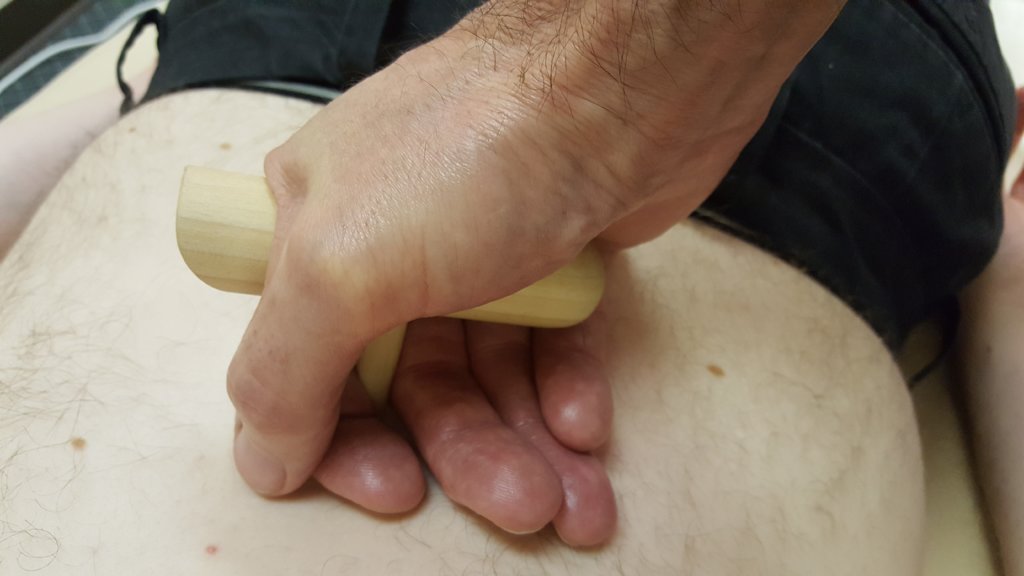
    Supporting the Massage T-bar with Two Hands

    Here’s a picture of a relaxed hand hold with support from the non-holding hand.

    If I look way comfortable here, it’s because I am.

    See all the points of contact (fingers on back) that are supporting the T-bar?

    That’s a really stable configuration.

    The T-bar is not going anywhere and my hands can chill.

    But where’s the control if I crank up the pressure?

    Those fingers are going to have to tighten around the T-bar, right?

    Not if I pin the T-bar between my hand and the tissue I’m working on.

    Pinning the T-bar

    How do I pin the T-bar?

    I lean into it.

    So, instead of pressing the T-bar using my shoulder and arm, I “balance” some of my body weight on the T-bar.


    My body weight is doing the work.

    How much I lean determines how much pressure I’m exerting.

    Here’s what it looks like sitting:

    I know, balancing on top of a little, wooden T-bar doesn’t seem so fine-tuned.

    But it is once you get comfortable pinning the T-bar.

    This should help you out with pinning and leaning:


    Alright, let’s let’s go over this pressure trick one more time.

    The Massage T-bar Pressure Trick

    Don’t immediately press and hold an area with a T-bar.

    Why?

    Because you want to mimic your thumb with the T-bar.

    To do that you need to establish different “feels”.

    You need the palpating the trigger point feel (the deeper pressure).

    And you need the lighter pressure feel.

    Now you have the two end points to work in between.

    Here are the finding-the-right-pressure steps:

    1. Find the area you want to work with your finger, knuckle or thumb.

    2. Then press down with the T-bar to the depth of what was needed to find that area with your finger/thumb.

    3. Lighten your pressure a little.

    4. Slowly increase the pressure (by leaning) until it feels spot on with the pressure you’d be pressing with your finger or thumb to work that area.

    How to Use Massage Tools Online, Home-Study CEU Course

    This online, home-study course will give you everything you need to know to get competent with a massage tool: How to Use Massage Tools  Fearlessly and Effectively (2.5 CEU).

    Once you’re feeling comfortable with using a massage tool you can increase your massage max and have a massage brand that stands out from the crowd.

  • Minimal Effort Massage: More Massages, Less Pain

    Minimal Effort Massage: More Massages, Less Pain

    Remember when you first started massage and thought your earning potential was 40 hours x $60, $70 or $80? But then one day you hit your massage max and experienced pain (the built-in disincentive to making extra money through massage). Sad day, huh? Well, there’s a way to bump up your massage max without being in pain. It’s called minimal effort massage.

    Minimal effort massage? What am I supposed to fall asleep on my client now?

    Well, not actually asleep, more like pre-dozing.

    I’m sorta not kidding.

    When you’re working efficiently and using minimal effort to get the best results, you’re going to feel very relaxed, like you’re ready to fall asleep on your client.

    To get to the point of “almost falling asleep on your client” you need to do two things: (1) lean and (2) position yourself to lean.

    Minimal Effort Massage Step #1: Lean

    Why lean? When done right, leaning is less taxing on your body to generate force than pressing with your upper-body.

    Personally, I discovered the mechanical advantage of leaning as I worked through neck and shoulder injuries. Later I came across research which supported my experience. In this post, I’m going to cover leaning on a low table using fists.

    How to Lean

    To be able to lean effectively (transfer all of your body weight onto the client if you have to) if you’re massaging with your fists,  you’ll may need to lower your table.

    For more about setting your table height, check out Table Height Is Everything.

    Here’s a quick look at leaning in pics.

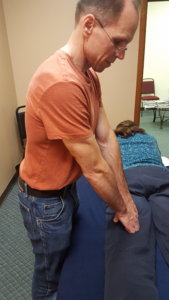
    This is a lean gone bad.

    My back is rounded and I’m using my upper-body to generate pressure because my table is not low enough.

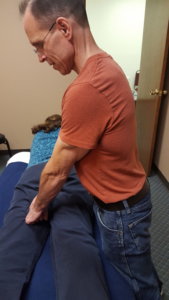
    This is a good lean.

    My shoulder, elbow and wrist joints are stacked. And my table is low enough so that I can effortlessly transfer my body weight.

    Here’s what it looks like in action:

    Pretty easy so far, huh? Here comes the challenging part.

    Minimal Effort Massage Step #2: Positioning Yourself to Lean

    To maintain your leaning advantage throughout the massage you’ll need to put yourself in positions where leaning is easy to do.

    In other words, you’ll have to move.

    If you’re normally taking 250 steps (out of my butt #) around the table during the course of a massage, you might need to take 500 steps to be in the best positions to lean.

    If you don’t move to get into position, you’ll be over-extending and recruiting your upper-body to get the job done.

    The way to know it’s time to move your feet is when you feel that your leaning pressure is becoming less effective and/or you start to feel bodily discomfort.

    Lateral and Medial Positioning

    Positioning applies to working the lateral and medial aspects of muscles and muscle groups, too.

    For example, in the picture below I’m working hammies. In this position it’s easy for me to lean and work the biceps femoris.

    But to reach the semimembranosus, semitendinosis and adductors I have to extend my arms and my pressure is going more “out” and less “down”.

    Now, look what happens when I walk to the other side of the table and lean.

    I can easily lean all of my body weight into those muscles.

    Time for a siesta.

    Source: Schuger

    About Shortcuts

    One more thing, you’re going to want to take shortcuts. That’s human nature.

    When you get tired your feet will stop moving. Don’t let ‘em.

    It will take some energy to walk around the table, but once you do you’ll be in a position to deliver pressure effortlessly.

    You’re also going to want to keep the table height the same all the time because it’s a pain to change a manual table.

    My advice: For a month, adjust your table height whenever you need to without question.

    The Quick Version of Minimal Effort Massage

    Okay, let’s go over the basics one more time. To master minimal effort massage with fist (1) adjust your table so that you are able to transfer all of your body weight onto your client if you need to, (2) lean and (3) get in the best positions to lean.

    Online Class and Book

    By the way, I have an online class, that will help you to massage efficiently, effectively and with minimal strain to your body: Delivering Pressure Without Hurting Yourself.

    And here’s the book: The Pain-Free Massage Therapist.